Digital Photography Basics
Digital photography basics offers discussions on your digital camera features and using that technology to foster better photographic results.
Basic Photography topics like Shutter Speed, Apertures, Depth of Field, Hyperfocal distance, Circles of Confusion, ISO settings, and color in images and other important photography principals, are cover under the section Photography Basics, as these important principals apply to film and digital alike.

The primary difference between film and the digital camera, is that the film
was replaced by the digital image sensor, and a computer processor that manages
the data of the images. Having said that, there is some digital technology that
you will want to learn that helps you strive for the best possible results.
Some people wonder as they are about to take up photography if going digital or film is the right choice for them. I favor working in digital as most people do now days because of freedom and flexibility it offers in divers lightning situations, color correction control, and instant feed back on your results, these advantages make working with digital it much easier then the medium of film. Beyond that, some of the real magic of digital medium comes to life when you begin to process and edit your own images, where here you will find much more flexibility with digital than you would working with film processing and printing mediums. I point out some of these differences on the link Digital vs. Film Photography.

Canon 5D Mark II CMOS Image Sensor.
Digital Photography Basics
Reflections off of CMOS.
One of the better places to start learning about digital photography basics is the image sensor, since this replaces film as the light sensitive medium for the digital camera.
The CMOS image sensor is the most common image sensor type being used currently in dSLR cameras. On the link What is CMOS, we'll talk a little about how the image sensor captures light, and how this light is transferred into an electronic charge and then assigns a numerical value for brightness as data for the camera's computer. This is useful for your understanding of many topics like editing color in RGB values, White Balanced adjustment, and what Pixels really are.

There are some basic features that exist on most all digital cameras (consumer
and prosumer alike), these are looked at in brief on Digital Camera
Settings. If you are just being introduced to Digital Photography,
then this page will be worth the visit regarding these topics:
|
Optical Zoom vs. Digital Zoom |
Red Eye |
Exposure Modes |
|
Image Stabilization |
Auto Focus (AF) |
Continuous Focus |
|
Single / Continuous Shooting Mode |
Face Detection |
Timer Delay Button |
|
Auto Exposure Lock (AE-L) |
Diopter |
Electronic Flash |
|
Full Frame vs. APS Image Sensor |
|
|
Our link Image File Formats, offers basic information about the Pixel Dimension size of images, some of the limitations or advantages of different file sizes. File size can also be effected by Color Bit Depth which is endemic to file format that you choose to shoot with, which for most cameras this is the Jpeg file or the Camera's RAW file formats.
As just mentioned Jpg File and RAW file Format are the two most common file types offered on dRLS cameras. Both of these image file types have quite different work-flows to capturing quality images from and involving image processing. The information on these pages should help you sort out which file type is going to work best for you.
Color Bit Depth is associated with the total number of colors that different file types can have, and is how a computer uses it's binary language to describe unique colors. A common Jpeg image file of the kind being used on the web can represent a potential of 16 million different colors, while a RAW file might be able to represent on the order of 4.3 trillion.
While we don't really need 4.3 trillion colors to describe an image, this does have amazing power for us while editing within the RAW file format as an option. We'll describe Color Bit Depth and how this allows for about 3 stops more of exposure latitude of available definition during the editing process for the RAW file format.
Printing Digital Pictures is important topic that I will present as a separate section topic of it's own, as there is so much to say about this process.
Memory Cards for Digital Cameras store the digital image data files of the pictures you take. For most dSLR cameras there are two generalized card types that are being used, the Compact Flash and the smaller SD Cards, with the latter of the two becoming the more popular choice lately by manufacturers do to it's smaller physical size demands.
This link should answer most all of your questions on that topic, like names for memory sizes Megabyte, Gigabyte, and Terabyte. There are Speed Requirements that need to be met for your camera regarding the writing of the image data files, and you may have personal Reading Speed file requirement for uploading to your computer, these can be different stated values for the cards, and when you want to purchase a card these effect the price of the card greatly.
Color Spaces are options you have managing color in your camera. Your camera uses a process for regenerating colors using the RGB system, which basically uses the three primary colors (Red, Green and Blue) to represent the colors in your scene. Your camera gives you two color spaces to work with, aRGB and sRGB for capturing color images. sRGB is a smaller gamut of colors that can be found in the much larger aRGB color space.
For most people, working with color and managing them will be much easier starting out working within the sRGB color space. I will talk about both aRGB and sRGB in this link. I will also talk a bit about the color setting on you Monitor and Printer color settings

White Balance
is simply balancing the color of your image sensor to the existing light that
illuminates your photographic scene.
White Balance can be as simple as setting your camera on the AWB (Auto White Balance), selecting one of the White Balance Settings (or Presets) on your camera, or fine tuning your white balance using the Custom White Balance option. The latter of these options it the most precise achieving correct color balance, and colors in your pictures can benefit from this by looking lively.
To understand white balance well, I also talk about, Color Temperature, File Format limitation, When Not to WB, Gray Card, White Card, Acrylic Filter, and WB Correction During Processing.
|
Styling set to Monotone B&W |
|
|
|
Portrait Picture Style |
|
|
|
Picture Styles are used |
|
Digital Photography Basics. |
Color Picture Styles are a selection of settings on your camera that allows you to adjust specific color enhancement or quality styling characteristic that you may frequenly prefer to edit into certain types of shots. These stylings are intended for Jpeg images, and are design to save you some time when editing images of a specific type that you like to shoot often. Landscape, Portraits, B&W, Neutral, Faithful are just a few of the named image categories. The camera comes with some preset values for color saturation, image sharpening, contrast, color, filter effect with some stylings, but any of the settings can be change to your liking.
LCD stands for Liquid Crystal Display.
There are two of these usually on each digital dSLR camera, one is on top next to the shutter button and the other is on the back of the camera functioning as the video play back of the image you shot.
Both offer quick access to valuable menu selections. On the link : LCD, We'll talk about the resolution of the display, brightness option and a caution with this, and the vary useful Live Video Option that is available on a few cameras
. The Histogram Graph is the truth regarding your exposure brightness levels for the image you shot. This can do more to help you get exposure issues under control then perhaps looking at the LCD playback of your image, because the LCD screen can deceive you. This is a highly useful tool and you can learn many aspects of exposure and image quality by learning to interpret this graph.
I'll discuss the histograms appearance, exposure at the ends of the graph, where 1 stop adjustments fall on the histogram, and histogram examples.
Example of Exif Data
This information here is automatically stored every time you take a picture. During editing, you can add other kinds of Metadata to suit you needs.
- Exposure : 1/80 s at f/11
- Exposure Bias Value : -0.33
- Exposure Mode : AV
- ISO Speed : 125
- Focal Length : 24mm
- Lens : EF24-105mm f/4L IS USM
- Date Time : 10/03/09, 10:12:52 AM
- Flash : none
- Orientation : normal
EXIF data is the descriptive technical Picture Data that is recorded in your camera with every shot, and it is a class of descriptive data that is called Metadata, which is capable of being stored with your images and even traveling with your image file as you show your images on the internet, or send your images to a client.
Where Metadata is words you can apply to your image file such as, topic, location, subject matter and Key search words, EXIF data is your cameras exposure settings, and which lens you used, it's lens magnification setting, exposure settings, and if the flash was used, and if it even fired.
You don't set EXIF data, the camera does when ever you take a picture. This is like have a helpful assistant traveling around with you taking notes, vary cool.
Exposure Compensation allows you to override the light meters suggestion quickly and efficiently to arrive at the exposure you want for the shot. So valuable is this feature that once you get familiar with how frequently the light meter suggestion is off, you will be using this for most every shot. If you would like learn to predict how the light meter will react to lighting situations, you will want to look at the section heading Photography Exposure.
Auto Exposure Bracketing is a feature that allows you to take three or more shots in sequence while apply different exposures to each shot. Years ago I though this function to be a bit silly, but then development of HDR (High Dynamic Range) merging applications that could take these three picture and blend then into one shot became an option, now it is one of the more creative exposure options for digital photography that allows you to shoot pictures who's existing light range exceeds that of the image sensor.
|
|

The items listed on this page are some of the most important topics to have a good grasp on regarding your digital photography basics for achieving the highest quality results and knowing your way around the digital medium.
If you are familiar with the all the topics on Photography Basics and you are familiar with your Digital Camera Settings and basics of in this section of Digital Photography Basics, then I would say knowledge-wise you are no longer a beginner with digital photography and you have likely already taken some vary fine images.
The next section Photography Exposure is about getting control of exposure so that you are capturing the light quality you want in the image. Many people relay heavily on editing adjustments to repair what was not captured in the original image, and though the latitude for editing in digital photography is amazing, you can only adjust what you have captured in the original image.
Introduction to Photography Basics
Photography Basics is easy to learn. This photography tutorial section will help the photography enthusiast up from the grass roots bottom, and helps them understand valuable photography principles relative to all of photography, digital and film photography alike.
The Digital Photography Basics section that follows this one, is all about digital features of that camera technology.
The evolution of photography has always been steeped in math, physics, and chemistry, but for the general consumer, the technology of taking pictures has been simplified. So much so, that we usually only think in abbreviated forms of these disciplines today.
Throughout this tutorial you might see a light dusting of those sciences where it helps to clarify important concepts that every semi-serious photographer should know about.
The numbers next to the page links are just a suggestion of an order you could progress through this photography basics tutorial.

You may be like me in that, photography just heightens the moment of new experiences
that we have as we explore the world around us. It often adds to the adventure,
and opens opportunity to share those experiences with others later on, and that
is like having the opportunity to live them all over again.
We are often drawn to a photographic moment by seeing the beautiful interplay of light. So naturally part of the challenge to photography is learning to control the way light is captured in your photos.
There are three general controls that we use to physically control the amount of light during each exposure. They are Shutter Speeds, Apertures and ISO setting. More than just exposure controls, these photography basics are tool for your photographic expression and a means to managing the technical quality aspect of photographic results.
For a proper exposure, these three settings (Shutter,
Aperture, and ISO), are like a triad of balance, they all need to be set in
balance with each other, and adapted to the requirements of the existing light.
Photography Basics
Exposure is a balance of three camera controls
|
|
|
|

The first things we need to do is get a good handle on our exposure controls.
Aperture: There is a lot to comment on this simple Iris like feature that resides in your lenses. What is Aperture(1) will introduce you to what this is and how it works as a light exposure control, we also talk about Aperture Numbers, we introduce the 1 Stop of Light concept, and how you can Memorize the Aperture Numbers.

The Creative expression of the Aperture is called Depth of Field or DOF, and it results from a physical property of light traveling through different sizes of the lens aperture openings you have selected. This can help you have focus at only one distance from you, or it can allow you to carry focus through a range of distance, from a point near you, and continue through to a farther distance point into your scene. Understanding Depth of Field(2) begins this discussion, but there is more say on this topic to come. First it is important to introduce you to a phenomenon called Circles of Confusion and the Plane of focus.
As you begin to use DOF you will notice that the closer you focus on a subject the shallower the effect of DOF becomes. So I share close focusing techniques using DOF, and how to use the DOF Preview Button on this link, Depth of Field Examples(3).
A Funny thing about DOF is, that the more you apply to your image by narrowing the aperture beyond a specific point, you get more DOF but your resolution of details begins to be diminish, a problem known as Aperture Diffraction. So there are times with you don't want to not take DOF as far as you are able to. I introduce this and Airy Disk on the link Pinhole Aperture(11) because this effect is just what is happening with the pinhole camera and why it will never resolve sharp details.
Shutter Speed and Aperture(4) is how we manage to balance the exposure between these two exposure controls. We talk again about the 1 stop of light principal as it applies to shutter speeds, and introduce the Shutter Speed Numbers and how you can memorize them easily. We also introduce Equivalent Exposures or Reciprocity and where this begins to break down as a principle when using film, an effect known as Reciprocity Failure. Digital does not experience Reciprocity failure.
The concept of a Shutter Speed if vary simple to understand, Fast Shutter Speed(5) is capable of stoping motion or limiting motion to the greatest effect of the action within your image. I take you through several different speeds of stoping action with a Shutter Speed Guide so that you get the feel of where you need to be in order to capture the action the way you want it to look in your image. We'll also talk about some important techniques like the Hand Held Rule, and some pointers on Panning with the Action. There is guidance on Image Stabilization and I show you how you can calculate the Distance of travel of Objects in Motion, sometimes this can help in pre-planning of a shot.
Slow Shutter Speed(6) is used for primarily showing motion in your pictures, something that we as physical beings, don't get to see without the use of this amazing ability to see a span of time in one image. Slow shutter speeds also give us the opportunity to capture beautiful qualities of light that exist in dimly lit low light situations, and so slow shutter speeds deserves a page all to itself. I will also introduce Basic Dalight Exposure or BDE, this is a way of relating to long shutter speed exposures and is based on principle of the Sunny 16 Rule. We have an Exposure Guide here also and we talk about photographing Water Falls, Fireworks, and Star Trails
Camera ISO(7) is the exposure adjustment that calibrates the light meter of your camera for the film you are using, or in digital cameras, it allows you to increase or retard the sensitivity of the image sensor to light so that you can shoot in varied light brightness situations.

The choice you make over which Exposure Control Method(8) you choose to use can have large effect over the success of having consistent exposure results. We'll try to discourage you from using the Fully Automatic mode, and show you that using the Aperture priority selection or the Shutter priority selection are the main work horses of exposure readings and control for electronic cameras today. I we'll also suggest when the Manual exposure mode is best. There is more to this of course then just the exposure mode you are using. Light meters by nature will give exposure readings that may often disappoint the new student to photography. The section on Photography Exposure will answer most ever question you have for understanding exposure and how to master it.
How the color in images is actually captured in photography is important for understanding many principles in photography from Adjusting Color Correction in the digital camera before shooting a picture, or to understanding the display on your color monitors, to many editing principals you will encounter. Color Images(9) will also relate to your understanding of how the digital image sensor works and records color. We'll talk briefly about nature of the (B&W) image, Color in Film and Color in Digital.
Hyperfocal Distance(10) is apart of DOF but it applies to using DOF in a vary specific way of carrying sharp focus from infinity, up to some point nearer to you that you wish to remain relatively sharp. Often photographers will choose focus at infinity for showing distant features, in doing this they run the risk of loosing valuable foreground details they may want fairly sharp in the photo. This can be mistake when it comes time to enlarging a picture that you want to see on your wall because of an out of focus foreground will look much worse enlarged. We'll show you how you can limit some of this effect. I also provide and Hyperfocal Distce Formula so you can calculate and make some tables for your lenses. I also provide a few down loadable Hyperfocus Distance Tables you are free to use.Most of this section pertains to the fundamentals of photography basics in film and digital alike. There are a few more topics, but we'll cover them under the Digital Photography Basics and Photography Exposure sections.
Benefits of Digital vs Film Photography
Digital vs film photography is a common enough debated question amongst film vs digital enthusiast. However the direction the market has gone is certainly not subject to much question, and in this direction of preference there are many supporting benefits favoring the digital work flow solution in vary meaningful ways.
Digital vs. Film Faithful Reproduction
Though the image below has a kind of romantic era appeal, the days of trying to lean over a cramped space, shuffling slides in and out of holders, and spot checking with a Lupe, is really not as great as it looks. In Digital vs Film Photography we'll try to hit of some of the bigger issues and some of the arguments that some film shooters still hold with. Don't get me wrong, I use to shoot film, still photography, large format photography and motion picture. But when it comes to shooting 135mm format, regarding Digital vs Film Photography, I choose Digital hands down.
|
|
|
|
Digital vs Film photography Argument
:
Film represents color and tones more faithfully!
I really don't know if this really has any relevance in the debate of digital vs film photography. Both film and digital technologies do not record color images directly, they record b&w luminance values only under the influence of color filters. I discuss this in Photography Basics. Each film manufacture uses a different patented process for color generation with their product, so each film has different color biases, contrast, saturation, resolution, tint, you name it, and people select these film products based on individual preference they like to see in their images.
The digital image lets you select any of these biased interpretations of the final image through editing, a real plus for digital vs film.
I can see a concern from a publishers of perspective regarding nature photography, that the photographer might be enhancing the images and therefore falsifying the colors respective to each other, it is just so easy to add more color anywhere you want it. But publisher get around this by requesting the RAW file. So if anything, Digital is an advantage with regard to color augmentation, because you can choose how you want to flavor the appearance of your digital image capture.
Digital vs Film photography Argument
:
Film reproduces Luminance tones as continuous linear progression!
Yes, that is pretty much true.
And when you compare this image in contrast to the 8 bit digital Jpeg image file having only 256 different luminance values per RGB channel from the brightest areas of your image to the darkest, then under certain conditions you may notice a step transition of from one brightness level to the next. There are differences in the extreme highlights of digital vs film photography where if you are not careful with exposure, then the highest highlight can seem to look like a block of white.
However, your digital camera captures all images in the RAW file format first, and it is either a 12 bit or a 14 bit image, and if you choose to save your image as a 14 bit RAW file, then you have 16,384 different luminance tones per color channel, and this can yield a potential 4.398 Trillion colors and tones, so it is kind of hard to reason this as anything but continuous from a practical stand point of digital vs film photography.
I talk about Bit Depth in the link Color Bit Depth and it shows you how a number of luminance values can be generated into digital data values. We will also talk a little about why this is useful from an editing stand point.
Digital vs Film Photography - Faithful
Digital vs. Film Time and cost have real meaning
Top Bottom
Advancements in the SLR camera was vastly improved with developments of Auto Focus, Image stabilization, and fast multiple image capture rates allowing photographers to capture images we could only dream of in earlier days.
Digital photography has added to these benefits. We have technical and qualitative feedback of the images we just shot displaying on the LCD screen. We are allowed to make adjustments, fine tuning our results to match the shooting situation. Compare this to shooting film and then having to wait a day, or two, or even a week before seeing your results as we had to do Kodachrome days.
You learn faster with digital vs film photography with instant feed back that digital technology provides, you can see what has gone wrong in the thought process regarding the exposure assessment.
This helps you tremendously if your skills of exposure accuracy has not matured just yet. Bar none, this is the single biggest challenge for most people trying to learn photography, because one can not rely solely on the averaging light meter reading, there are vary real limitations to it's conceptual design. In almost every shooting environment, you will need to make some measure of exposure correction adjustments for optimum results.
Digital vs Film photography Argument
:
Well you just need to learn to use your light meter!
Agreed!, but even professionals use to used Polariod T52 instant films to help base exposure interpretation on and examine the highlights and shadows for detail, when shooting important subjects before committing to Tra
Agreed!, but even professionals use to use Polariod T52 instant films to help base exposure interpretation on, to help examine the highlights and shadows detail of an image when shooting important subjects before they commit the image to Transparency Films, because re-shoots are not often practical and it helps to loose clients.
So no shame here, It's a tool, use it.
I will show you how to overcome the short comings of the averaging exposure readings in the section Photo Light Meter.

Beyond just the image of the Video playback on the LCD screen, there is the more important Histogram Graph that can show you the placement of brightness levels across your image in 256 different illuminance values. This will help you determine if you are loosing important details, and if your dynamic range is being completely captured by the image sensor. This is like having a lab densitometer at hand, and it is much more telling of your critical image exposure than the picture on the LCD screen.
With shooting film, there are also other cost, negative and slide sheet holders, slide dupes, scanner, Binders, cotton gloves, slide mounts, light tables, Slide projection trays, perhaps filing cabinets or book shelves to hold these image libraries that take up real space. The film image ages, meaning it would not be as good color quality in twenty to thirty five years, it fades and there can be color shifts.
Film also scratches easily, and is sensitive to dust, moisture and atmosphere. I have Archival negative holder pages still in the original purchased package, and they are turning brown on me.
Digital vs Film Photography- Cost
Digital vs. Film longevity of the product
Top Bottom
Located in the foreground of the above image that relates to image storage, you see a portable hard drive that could hold quite a few times the image storage in that same photo. And the cost of the drive is less by far then the holders, and trays you see in the picture.
One of the hypes about digital images was that it would last forever on CD's and DvD's because the data was burned into the disk by lasers. We now know that nothing is forever, that there is a degradation that occurs even to this memory storage medium, but the life is much longer than the film would be itself. And these can be copied as many times as you like and it will still be the same image. The storage is much cheaper also and takes up only the room of one or two notebooks of DvD's.
Although the storage life on Kodachrome is quite good, I have some images that are nearly 40 years old and they look great.
I have seen suggestions that the life span of a DVD might be 30 - 100 years. Obviously these are not being touch, shuffled, and handled.
Back up more than you need and store the ones you are not touching in a cool dry place.
Storage for digital images gets less expensive all the time.
External hard drives are the likely choice now days because the prices are so reasonable for massive amounts of gigabytes. Although it would not hurt to print some DVD's for long term safe storage for your most valuable images. A hard drive can still go bad, so for people who need instant and constant access to all their images might have back up drives for the back up drives set up in an array that will back up on a schedule and even test each other to the accuracy of the copied data.
Digital vs Film Photography- Longevity
Digital vs. Film Image Processing requirements
Top Bottom
|
An example of a typical Darkroom lab |
|
|
|
|

The other giant advantage in digital vs film photography is in image processing of your images. It is much easier to attain a computer and monitor these days then you can install a home darkroom for enlarging your photographs, and a large wet sink area for the film developing process, the plumbing, electrical, temperature regulators and all the other equipment. So you are way ahead of the image processing requirements of photography on that level alone.
Though it is true that one will need access to a computer and monitor to perform image process, it is vary possible that you may already have a computer, or laptop for other uses within your family, so one could easily consider this not a photography expense at all, due to it's multi tasking function in our daily lives.
I shoot digital, but I don't print often. I out source that. I edit my own work as most digital photographers do, because this is an area where your shots really begin to shine and to show their unique personality
Owning and maintaining a professional printer printing system can be fairly expensive, and if you are not making a living off of your photography, then I would say find a printing house within your budget for your larger print work.
With digital photography you can, edit when you have time, shoot when you want to, and incur no additional cost while doing so, while with film shooting you have film purchases, development cost, time delays, perhaps travel expenses, enlargements, or home lab cost with chemical purchases, photographic printing paper, and darkroom equipment.
Contributions made by advancements in digital image processing has vary much opened the door for creativity and quality controls as they never have been before. Software developers have been making the image processing applications easier and more intuitive to use, and the flexibility and options for image control is so much more numerous then it ever has been with film.
Going Digital frees you up from on going cost of film photography charges that is always relevant to working in with that medium, and over the life of your camera they can really add up.
Digital vs Film Photography - Processing
Digital vs. Film Cost Comparison
Top Bottom
There were plenty of trips where I could not afford the number of rolls of film that I would have liked to take along, but then there is also the challenge to manage that number of rolls of film amongst your travel bags or packs. If you are having to traveling light, 100-200 rolls of film does not condense easily, and if you are flying there are always risk of exposure to x-rays which does fogs the film, especially with international flight connections.
1978 Ball park price for Kodachrome 36 exposures is around $5.15, and you have to process that at just about the same cost. 100 rolls of film then cost $1030.00, one time use in 1978.
Today you can get a 8 Gb memory card for $12 dollars, it can hold 72 images of 21mp images. That is two rolls of Kodachrome, and Kodachrome would have cost $20.60 for the same number of images. Your memory card is reusable, your film is not.
Even though Memory cards are cheaper than film, I probably would not buy 50 of them to store the equivalent amount of pictures that I would get with 100 rolls of film. I would look at a portable image storage hard drive device, they are small, weigh just ounces, and a 100gb capacity will set you back about $500.00, and that will hold the equivalent of 3600 images, the same as 100 rolls of film. So Digital is still about 1/2 price of film at 1978 prices, and with digital you can use it over and over until it breaks.
With regards to large format film photography (ie: 4x5", 5x7" and 8x10"), film is less expensive.
Image sensors are expensive to make, so for now they are affordable by most people only in the smaller format sizes, for DSLR cameras these are commonly APS-C, APS-H and the full frame 35mm formats. But cost are coming down, and I maybe dreaming, but I hope the day will come when a large format image sensors will be much more practical experience. Though I have sold my darkroom, I still hold on to my 5x7 Deardorff camera for just such a day. Although my little computer would likely have a stroke if I loaded such a file into my little old computer.
In summing up the comparison of Digital vs Film Photography, our creative and financial potential sways far towards a digital process with benefits of:
Benefits of Digital over Digital vs Film Photography discussion
- Quicker feedback benefits learning curve
- You are better informed while taking the picture
- Better Results in printing details and resolution
- Longer potential life of the original image file
- Infinite creative options
- More cost effective, you can go out and shoot as many shots as you want and it does not cost you a penny more. For myself and millions of other digital photographers out there, Digital wins in Digital vs Film Photography.
What is CMOS
What is CMOS? Well it stands for Complementary-Symmetry Metal-Oxide-Semiconductor, and it is the image sensor that is most often selected by manufacturers for use in digital single lens reflex cameras for capturing the digital image. The CMOS image sensor shown in the picture below, is a full frame 35mm CMOS sensor used in the Canon 5D Mark II camera.
|
Location of the CMOS image sensor is behind the mirror |
|
|

CMOS is a fairly common image sensor type found in cell phones and many digital cameras, but there are other technologies for image sensor designs like the CCD (charge coupled device).
CCD chips have been vary commonly used in video cameras through the many years of their development. There are some differences between the two different image sensor types, where the CCD has benefited from superior image quality in years past, its power consumption on the other hand has been more taxing of battery power. The differences in image quality between the two technologies has been significantly reduced over the last decade, and the CMOS sensors, though more complicated to make, in the end are less costly to manufacture, so they are used most frequently. If you have had the opportunity to use both types of image sensors, you will be vary please by the enhance battery life of the CMOS sensor.
You can look at your camera manual and it should indicate what type of sensor is used in your camera.
What is CMOS
What is CMOS - How does the image sensor work?
Top Bottom
The development of the digital image sensor, has taken a somewhat similar path to solve the challenge of making a color image as film has had to take.
If you recall from reading the link on Photography Basics, color film images are three different layers of B & W emulsion, where each silver emulsion layer is designed to capture only the luminance under a single color filter, unique to that color of filter. One emulsion layer is sensitive only to brightness values under the red frequency, and likewise the other emulsion layers record only the light image under their respective filter, the green or blue filter.
CMOS Image Sensor
Image sensors replace film as the light sensitive medium for
capture our digital images. The different types of image sensors like CMOS and
CCD, uses the vary small photosites to record how much light hits these tiny
little micro sized light sensitive cells.
An important what is CMOS point
The photosites are electronic and can store an electrical charge. Each photosite records how many times they get hit by a photon of light.
When a photon hits the sensor it releases an electron, this results in an electrical charge that builds up as a stored energy unit for that specific photosite. The total electrical charge built up under an exposure at any given photosite, can represent the relative brightness of light recorded by that photosite. The image sensor is composed of millions photosites recording independently the electric charges that built up from photons during exposure.
|
Symbolic interpretation : |
|
|

The photosite stores the electrical energy a little like a well holds water, if the well fills up to capacity, that would be the maximum brightness value that the sensor could record.
The amount of electrical charge built up during an exposure in any given photosite is converted into a numerical value that can represent a brightness value for that photosite.
Just as mentioned above with the design of film, B & W layers in film record the luminance values of light under the influence of colored filters, colored filters are used over the photosites on image sensors, and the image sensor are only sensing luminance values or brightness, not color. The color filters that are placed over the photosite will be Red, Green or Blue, so that each photosite will read only the luminance within one of these wavelengths. If you are not sure what I am saying, let me refer you to the above link, Photography Basics page, and the section "The Nature of Color Images, where color is recorded using three different B&W emulsion layers under the presents of Red Green and Blue filters.
The Pixel
It is the data that comes from three neighboring different
colored photosites, which when combined together, makes up the color needed to
describe one unique unit of pixel color that we see with our eyes. The data
set, that comes from three neighboring photosites is what is known as a Pixel.
An important what is CMOS point
As just stated above, to be able to describe color anywhere on the image sensor there has to be neighboring photosites of red, green and blue. The same is true for your TV or color monitor, your color monitor has these same colors over it's diodes used for display. You can use a magnifying glass to see the colored diodes, or just look at the image below. Because of the close proximity of these colored diodes projecting their own illuminated values of the red, green, or blue colors, we see unique colors.
|
|
|
Randy Smith
Photography © 2011. |

This image is a closeup of my computer screen monitor. I photographed this image while it was displaying a picture of a blank white portion of a piece of paper. These are vary large diodes in comparison to the photosites on your camera's image sensor. I think my computer screen resolution is about 86 pixels/inch, however my camera's image sensor has about 3744 photosites/inch
There are several different possible patterns for how the colored photosites are arranged in color patterns on different brand images sensors, and by image sensor type.
The Bayer pattern is used on the CMOS sensor, and this is the type of image sensor that will be described on this page.
What is CMOS - Bayer Pattern is used on the CMOS sensor
Top Bottom
|
|
|
Randy Smith Photography © 2011. |

The CMOS image sensor uses the Bayer pattern as an arrangements of color filters that are placed over the photosites. This has photosites in a single row with green and blue filters over the top of the photosite, while on alternating rows there will be green and red filters placed over those photosites. Each colored filter limits light only to that frequency to pass through the filter and be recorded as luminance data.
You may have notice that the photosites with a green filter out number the neighboring red an blue ones. As it turns out our eyes are a bit more sensitive to the yellow/green frequencies, so this ratio helps us see the digital image more relative to how we see colors.
|
|
|
|

What is CMOS - Bayer Pattern
What is CMOS - The Pixel
Top Bottom
The word Pixel (a contraction meaning Picture Element), is
by definition the smallest picture element that can be displayed by a bitmap
image that you can edit. The luminance information gathered from three
different photosites, RG & B, is what makes up a pixel. So a pixel really
has no physical structure.
An important What is CMOS and CCD point
Sales people will sell you a camera and tell how many pixels or megapixels it has. If your camera has 10 megapixels, it really means that your camera has a little over 10 million photosites, and with those, the camera can arrive at a bit over 10 million pixels of unique color units of information for building images with.
If you are thinking these numbers don't add up, you are right. Directly three photosites can offer data for one pixel color. This amounts to only 1/3 of the data you get for building your image.
Math is used in algorithms to average and interpret what brightness and color values that might exist in the spaces in between the actual photosites on the image sensor. This is done to the advantage of generating a simulation of higher pixel density than you really do have.
Now if you are looking at those big filters and thinking, there is not much space between those, why build more pixel data for that small area?
The answer is in part because my graphic does not have a high degree of spacial accuracy and also that the filters are wider then the actual photosite themselves.
The part of the photosite that collects the light is called a diode, and that can be quite small, about 1/4 the width of the photosite itself. We are talking only a few Micron in width, perhaps from 3-8 microns, so basically there is some space that exist between these structures.
This practice may seem a little like cheating, but this does have big payoffs.
One of the main reasons for generating probable color data rather then just putting more photosites on the small size sensor is that the smaller each photosite is, the smaller share of photons each photosite can receive during your image capture, and this can equate with a lower amount of signal to represent those luminance values and colors in an accurate way.
All electronic equipment has low end limit of accuracy to operate within do to free existing electronic static energy that is basically everywhere, this is an issue of signal to background noise, and visually it presents itself as Noise on the TV or monitor. Low values of the ratio of signal to noise means you see less picture and a more exaggerate random punctuated false luminance in your darkest regions of your image, a kind of grainy image.
So getting back to point here, there is a limit at reducing the size of photosites, larger photosites are able to over come background noise easier and reproduce color and tone more faithfully.
So for now the limitation of space and other physical phenomena is over come by cleaver reasoning in math. Pixel groups are so close together, it is a simple matter that the color in the space between actual photosites is a blend between the actual data collected. This allows for higher pixel densities for file sizes based on pixel data. This doesn't improve resolution however, we are not recording more accurate details with these extra pixels, but we do get better, and more color data.
It is a little mind boggling how much data processing has to be done just after you take a picture.
So the number of photosites closely equals the amount of pixel data that is generated by an image sensor, that leads many people to describe pixels as the photosites themselves, you will come across this frequently, it's a mute point, but a useful one for understanding why display monitors are made in RGB components. If we had small units called pixels, each one would be able to create lots of unique colors, and that is just not what happens. We use RGB values from photosite to generate the idea of a color we think we see, but only variants of Red, Green and Blue is present.
What is CMOS - The Pixel
What is CMOS - The power to change colors
Top Bottom
By varying the luminance level of any of the red, green or blue data values in your image you can make any color in the RGB color space, which is what the descriptions "RGB color space" implies, all the colors that can be generated by varying the luminance of the RGB data.
An important what is CMOS and CCD Image Sensor point
This ability to change the luminance data from inside the camera of the photosites is powerful stuff. It means that color corrections can be applied electronically to the over all scene that we are shooting a picture of.
An algorithm can add or subtract any amount of luminance from each photosite sensitivity associated with it's specific color assignment, R G and or B. This is how color balance correction is achieve. The only thing you need to be aware of is, are you under light that requires any particular color bias correction, Like, is it daylight, cloudy, tungsten, fluorescent, or some other light source that might results in odd looking color over all the image. There is even a setting on your camera that attempts to automatically adjust for deviations from a neutral color balance. This function is called Auto White Balance, and we will talk about white balance on the page topic White Balance.
Digital Camera Settings
Digital Camera settings tutors on important settings and topics regarding your digital camera, and suggests their benefits and limitations.
This page, and Digital Photography basics pages both present important topics relevant to understanding your digital camera and digital photography concepts as fundamental components, settings, and operation, please visit them both, you can find a list of topics that are on the Digital Photography basics at the bottom of tis page.
Digital Camera Settings shares many similarities between DSLR cameras and the Digital Point & Shoot Cameras (P&S) and so on this page there is information shared on both.
Automation in cameras , both in professional and amateur cameras alike, have benefited the photographer greatly by the simplification of many camera functions, and much of this has opened the door to superior images, and speed.
Being the double edged sword that automation can be, it can make control over individual elements somewhat harder to achieve, this is one of the main challenges surrounding the P&S cameras verses the DSLR cameras, where DSLR cameras offer more personal control.
We'll take a look at some of these digital camera settings, and comment on some of the benefits and pit falls of them.
Digital Photography Basics Optical vs. Digital Zoom
Top Bottom
Ideally the optical image is the sharpest image you are going to be able to record and it is not a digital camera setting, in comparison to your Digital Zoom option is a digital camera setting and it is one you should avoid, should your camera offer that as an option. Bare with me, I will explain.
The optical zoom is designed with glass elements in optical lens groupings to accommodate focusing the image over the full area of the image sensor throughout all of the lenses zoom magnification range, from wide angle and through telephoto.
The digital zoom option is not an optical function at all. The digital zoom utilizes less pixels located near the center of the image sensor to initially capture the image with.
This digital camera setting creates the illusion of a stronger magnifying lens being used to capture your close up image, but the image is represented by fewer pixels from the center of the image sensor, lacking the details and resolution that a true optical zoom could provide had the optical zoom been designed to capture at this narrow angle of view.
How this works:
Digital Zoom - Digital Camera Setting
If your digital camera normally shot an 11 megapixel image utilizing the full image sensor during optical zoom use, then by continuing to press the zoom button after the optical zoom setting had reached it's maximum magnification zoom setting, then the Digital Zoom gets activated by the camera.
The digital camera setting " Digital Zoom " would start selecting a small rectangular area from the center region of the image sensor and only use those pixels are used for image capture.
The camera will then use an algorithm to stretch those pixels out and make up pixel colors to go in between those original pixels. These pixels do not represent real details that would have been seen had you use vary powerful optical telephoto lens, you can think of this new pixel data as filler.
In the end you are presented a image file that has 11 megapixels in file size, but is made up from a group of say, 7 megapixels. So 3 megapixels are added to the picture that represent no real details, so nothing is gained really.
Sorry to say, this function has vary little usefulness as a digital camera setting other than allow one to crop or frame the subject in real time rather than latter during editing.
You could even avoid the digital zoom altogether and compromise nothing. If you set the lens to the highest magnifying optical lens limit, then take the picture, then during editing you just crop your image down to the same close up framing that you would have used your digital zoom at, you would have the same the details and resolution for your print.
Plus, by framing of your image later during editing, you are opened to more cropping options, and there are likely better software and algorithms options to handle pixel details with then would be found inside of your camera, thus offering better image care and quality.
Here is a graphic of what light projected by the lens over the image sensor looks like. In this simulation the larger rectangle represents the dimensions and placement of the image sensor, while the optical lens is at highest magnification (note: text in white and ignore yellow text). The inner rectangle represents the pixels that will capture the digital zoom image. Your camera might have five or more of these smaller digital zoom settings.

Camera handling techniques for telephoto images.
Just like with using a vary powerful optical telephoto lenses, camera steadiness is vary important, it is equally important for digital zoom magnification. If the camera is not steady, the shots can record images that are blurred, and this is visually more prevalent as you increase magnification by telephoto use, or even when you crop the image during editing, they all produce the same risk to blurred images.
A useful Digital Camera Settings tip.
A tripod is clearly the best all around choice for steadying the camera. Sometimes people with PS cameras will get a small, light weight short one, it is a reasonable option, after all tripods can be expensive and one can easily reach almost the price of the camera.
If you have DSLR camera, you should consider some real investment into a tripod though.
Any tripod you purchase will likely out last any camera you buy, so if you buy a not so good one then you may learn to dislike it, then it will be in your closet a vary long time, or you need to sell it at a lost and then go tripod hunting again.
Digital Camera Settings - optical Zoom vs Digital Zoom
Digital Camera Settings Full Frame 35mm vs. APS Image Sensor
Top Bottom
I showed you a graphic above that displays the difference between digital Zoom and optical zoom on P&S cameras, that graphic also serves to show the difference between the normal 35mm full frame image sensor, and one of several different sizes of APS image sensor sizes that are used for DSLR cameras. This graphic approximates the APS-c shown here.
A lens projects light as a circular image, and the image sensor for the camera captures the image from inside the Circle of View. The outside edges of the sensor must avoid a light fall off, or vignetting, near the boundaries of the circle of view.

The Full Frame 135mm digital image sensor size, was designed to match the frame
size of the 135mm film dimensions, 24mm x 36mm. By doing this the many lenses
designed for film cameras that are used on these digital cameras now yields the
same perspective of view.
As you can see, the two different image sensor sizes ( Full Frame & APS-c ) shown in the color graphic above, capture a different crop from the same lens projection or perspective.
Because of the crop factor of the APS image senor, if you used a 14mm wide lens designed for the Full Frame 135mm image sensor, then the crop factor of the APS sensor will yield around 22.4mm or a little more in perspective, your not using all the image the lens is projecting, that can be a lot of financial Ouch for the price. Generally this is only annoying for the APS image sensor owner if they are looking for the real high quality glass in the wide angles lens ranges.
Camera manufactures do make lenses that are optically designed specifically for these smaller APS image sensor sizes, and you will want to look at what lenses are made for your camera body. You will then benefit from getting a 16mm projection for a 16mm lens design.
Most expensive telephoto lenses are made just for the full frame 135mm format camera in mind. The APS sensor being smaller gets an extra magnification kick from these expensive lenses, and this is not by any means a negative. If you use a 300mm telephoto, then your APS sensor may apply a 1.4 or 1.6 cropping factor on your magnification. This can turn a 300mm telephoto lens into a 420 - 480mm telephoto lens, a vary important advantage in bird photography.
NOTE OF CAUTION : If you are using a Full Frame (FF) DSLR camera body, you want to be sure not to put a lens designed for the APS image sensors on the FF camera body. If you fire off a shot you could damage the mirror in your camera and scratch the rear lens element, as these lenses are designed with the rear optics closer to the image plane, and there may not be enough room for the mirror to swing freely.
A useful Digital Camera Settings tip.
It should be said that if you are thinking about a dSLR camera body that utilizes an APS image sensor to capture image files at 11-16 megapixels, it does not necessarily mean that your images are not as sharp as image sensors capturing 21 megapixels. There are some vary fine dSLR cameras in this megapixel range. You can however print larger enlargement size prints from 21 megapixel image files before you start having to us a Bicubic Interpolation methods to reach vary large print sizes. We start some discussion on file and print sizes on the page Digital Photography Basics.
Digital Camera Settings - Full Frame 35mm vs APS Image Sensor
Digital Camera Settings Image Stabilization
Top Bottom
One improvement with assisting sharper detailed image during hand held shots to is the digital camera setting, Image Stabilization (Canon) or Vibration Reduction (Nikon). This digital camera setting was developed independent of digital the camera, and sa film cameras use and benefit also from Image Stabilization. There are different technologies presented for this with different names by different manufacturers. Basically this is a creatively designed electronic motion detection system in your camera lens that attempts to counter minuet body vibrations if you are attempting to hold the camera steady. Motion sensors detect pitch and yaw and then move a lens grouping centrally located in the lens to try to keep the image steady on the image sensor while you shoot.
This system does have it's operating limits but basically it will let you shoot on average, two shutter speeds slower then conditions where camera blur would start normally showing up.
For better understanding of how to use this image stabilizing option I talk about the Hand Held Rule, as a guidance for where this system will benefit you, and how to use it to your advantage on the link Fast Shutter Speed. The information on that page will cover a great deal on the topic of countering camera blur.
This digital camera setting does require more battery power, and so if you know you are shooting a fast enough shutter speed to counter camera blur issues then turn it off. You can see an image bellow that shows the Canon's Image Stabilization system attempting to work while the camera is on a tripod. The motion that was detected here was just that of the mirror flap as they call it, when the mirror moves out of the way so the exposure can be made. The diagram below is to discourage you from using Image Stabilization for tripod mounted shots, not to encourage it, but the image does show you the actual movements of this mechanism in action.
Turn off this Digital Camera Setting!
Note: when you use your camera on a tripod, turn Image
Stabilization OFF, certain camera functions cause vibrations. This
motion can blur your images because the Image stabilization might over
compensate attempting to adjust for this.
A useful Digital Camera Settings tip.
This example is a magnified velamen of Image Stabilization motors blurring the image while on the tripod. This was recorded during a camera test.

Digital Camera Settings - Image Stabilization ;
turn off setting while on tripod
What you are seeing here is light coming through vary small round holes from
the other side of this target. The light from holes in all three images are
showing linear blurred streaks of light that is running along an axis of about
2 and 8 O'clock. It is more apparent in the longer shots, plus we see some
flaring of the small bright holes do to over exposure during the timed shot.
This same image blur happens to all of the details of your image should you
leave Image Stabilization ON while you are shooting on a tripod.
Just in case you are interested, the holes were poked into tinfoil to get the smallest points of a light source to trace any movements during exposure. The camera was activated remotely by Infra Red sensors, and the camera was mounted on an 18 pound tripod that was on a solid concrete floor in a quiet neighborhood.
Digital Camera Settings - Image Stabilization or Vibration Reduction
Digital Camera Settings Exposure Mode
Top Bottom
Every camera now days is an automatic camera and that distinction is concerning the Exposure settings being made by the camera's light meter. So all digital cameras have these same digital camera settings.
Exposure Modes
Digital Camera Settings
- B = Bulb
- M = Manual
- P = Program
- AV = Aperture Value/Priority
- TV = Shutter Value/Priority
Your camera model may also have custom settings unique to it, and you will want to see your camera manual for those digital camera setting options. Also you find a slight naming difference in a few of these modes between manufacturers.
Brief Description of each digital camera setting:
- Bulb : Camera shutter is under your influence via a remote control device preferably, but if it is not, when you press the shutter button down fully and hold it there the following happens. The shutter opens on pressing the shutter button, it stays open until you release pressure on the shutter button. Now if you are using a remote release, the camera is programed as if your camera is sitting on tripod and the shutter will not close until you press the release button a second time. This is useful for capturing Star Trails or any type of light trail activity under vary dark conditions.
Manual : Here you will set Shutter Speed and Aperture according to your own preference independent of the light meters governing guidance, or control. Great whenever you know more about the lighting than the light meter does.
Program : The opposite of Manual, you currently have no control of shutter speed or aperture, or in some cases even your ISO setting, the light meter sets all of this for you. It is doing this with a preference towards faster shutter speeds to stop motion blur of images but the camera does not know what you are taking a picture of either. Great for when you don't know anything about operating a camera. Hopefully we change all that here on this web site.
AV or AP : Aperture Value (Canon) or Aperture Priority (Nikon). You set the Aperture according to some aperture criteria, the light meter will then set the shutter speed value to meet the needs of a good exposure based on your current aperture setting.
TV or TP : Time Value (Canon), or Shutter Speed/Time Priority (Nikon). You set the time, or shutter speed value, and the light meter will set the aperture to meet the needs of the exposures.
I have dedicated a whole page to these digital camera settings at Digital Camera Modes and it is just best to direct you there for that topic. Also, at the bottom of this page do link back to Digital Photography Basics for more digital camera setting topics, and a listing of pages for vary in-depth discussions on many digital photography topics that you will want to become vary familiar with.
Digital Camera Settings - Exposure Modes
Digital Camera Settings Auto Focus
Top Bottom
This digital camera setting is a big help for everyone, not just people with eyes that are over 35 years of age.
Your AF system may have a selection of different AF points indicated inside the viewfinder as little rectangle outlines. Generally the AF system uses one selected AF at a time or a group of several, for which you preselect before taking your picture. The one AF point you choose to use is likely a matter of compositional placement of your subject within the framed image where you want critical focus to be placed.
This does have some limitations to focus with equal precision under all circumstances. For example : fine detailed repeating patterns like lines or a grid, low contrast, and vary low light situations.
Much of the time I am amazed by the accuracy in DSLR cameras. Auto Focus systems on PS consumer cameras can be quite disheartening when shooting fast action, and manual focus may not be vary functional at all on these cameras may focus move in incremental steps that are hard to see in small view finders, and they often step beyond you desired focus point.
Pre-Focus Digital Camera Setting
The speed of capturing focus can be increased on all cameras, if a technique like pre-focus is used. You can pre-focus on the approximate distance you expect your subject to appear and then wait for the event to occur. The AF system can then acquire focus in a shorter time and amount of travel. This is technique is use by many bird photographers who are often challenged by needing quick responses to capture sharp images on vary active subject.
AF point options Digital Camera Setting
|
|
|
|
|
|
|
|
|
|
|
|
|
|


In picture "2", I elect to focus between the eyes and then frame the bear more centrally to take the picture. Always try to select focus around the eyes to allow this to be the sharpest part of the image.
Picture "3", is showing the choice of an AF point located in a more favorable location for your desired framing of the shot. Of course the more available AF points you have in the viewfinder the easier it is to suit the framing needs. This is often the best choice for speed.
On some cameras the central AF point, or a even a small selection around this central location, will have stronger attributes to achieve sharp focus under difficult lighting conditions. They have the ability to detect deviations from focus on both the vertical and horizontal axis. The other AF points often only detect horizontal deviations from focus.
If you are having trouble with one of the outer AF points, then you might switch back to the central AF point to see if you have any better luck. The center AF sensors are usually more sensitive.
The exception to using only one AF point for focus control is using the group collection of AF points. Most cameras will have at least one setting where a group or all of them are potentially active. In this mode, they each note their distance for what is to be the closest focus by average, and that distance will be used for the focus. This is what is shown by example in picture "3".
There might be a little bit of shutter lag time involved with this setting where the distances are needed to be averaged for focus in process. But for moving subjects like car races and air shows it is quite helpful if you are having some trouble following the subject precisely with your panning action. Problems can arise though when the camera starts to choose something else to focus on in the background you had not intended it to.
Typically exposure is locked in at the time when you press the shutter button down fully to take the picture, this means exposure is set last, for the final framing of your image, independent of the AF point. It is possible to change this in most cameras menus, should you desire to do so.
A little farther down the page we'll talk about selecting an exposure reading from a vary selective region of your framed image using a digital camera setting known as the AEL button.
Digital Camera Settings - Auto Focus
Digital Camera Settings Continuous Focus
Top Bottom
Most cameras offer a Continuous Focus (Nikon) or AI Servo (Canon) type feature, that may be able to adjust focus continuously as you follow the subjects movements relative to your camera position. This digital camera setting is a wonderful concept but it can be painfully slow sometimes on P&S cameras. Again, one of the many advantages if DSLR cameras is the processing speed at which they respond to changes, like subject movement. The more your subject's movement is perpendicular to you, the better chances you have of maintaining focus.
It is important to keep the selected AF point on the subject at all times. Slip off the subject into the distant background and the lens could get side tracked and waste time until Auto Focus can acquire your subject again. On dSLR's, this digital camera setting does a pretty good job. With some P&S cameras, you might find there are times when if you loose AF tracking, it could travel all the way to one end of the focus limit in order to turn around and come back trying to focus.
Good responce times with telephoto and macro lenses can be an issue do to length of travel, and also do to limited available light to operate the AF system. So the point here is that AF systems are not perfect, but with good technique they are a big help.
If your moving subject's motion is fairly consistent with speed and direction, the AI Servo can make calculated predictions as to where the next focus position is to be by the time the shutter will open up. Remember that on dSLR's the mirror has to get out of the way, before image acquisition and the AF feature would not be detecting distance during this brief time, yet your subject can be moving quite fast, even straight at the camera, so your focus would need to also be constantly moving to give you the best chance at sharp pictures. Pretty neat!
Good smooth tracking and panning technique is needed to get the best results.
Digital Camera Settings - Continuous Focus
Digital Camera Settings Face Detection
Top Bottom
Some PS cameras have a focusing digital camera setting called Face Detection, who's function is to automatically find the Human face anywhere it might be in the framing of your picture.
It's a find Waldo kind of feature
I have not used this personally and none of my cameras have it. I only know of this digital camera setting on P&S cameras, it is often used in place of, or an option to the cameras AF points, If you have AF points in the view finder then there is no real need for Face detection.
One point of caution on portraits, whether you are using Face Detection or not, the closer you get to a bust cropping or filling the frame with the face, the more critical your focus needs to be centered on the eyes, both of them if you can, but at least the first near one for sure. This is where every person is going to look at and identify with that picture.
A face detection feature is going to find the shape of the eyes, nose and chin and brow also, and not just the eyes. So experiment to your own satisfaction that face recognition is really getting the eyes sharp on those real important close up shots, you may find that an AF point selection is better for the real close up portraits, where you place the AF point on the close eye, then recompose for framing the portrait the way you want it.
For shots where the face is less than 1/4 of the frame Face Recognition might work fine because depth of field has increased some as the camera focuses on a subject farther away.
Digital Camera Settings - Face Detection
Digital Camera Settings Auto Exposure Lock (AE-L)
Top Bottom
AEL : Auto Exposure Lock button, This is vary useful digital camera setting function. If you are in one of your automatic exposure modes and are framing up a subject with the camera, as you move the camera around, the exposure settings are adjusting to the light accordingly. If you press the AEL button, then the exposure for the current framing is locked in. This frees you to re-compose the shot for the final compositional/framing while the exposure is not readjusting.
AE-L (Auto Exposure Lock) is activated by pressing the AE-L
button in, you must continue to pressing the button to keep that exposure
locked in. Releasing the button, releases the exposure lock.
A useful Digital Camera Settings tip.
The most common need for using this feature is for Backlight situations, where more light is comes from the background than is falling on your foreground subject.
|
Canon will likely label this button as : |
* Digital Camera Settings |
|
Nikon will often mark this button with : |
"AE-L" Digital Camera Settings |
Let's look at an example and see how we might use this feature. Backlighting is a common enough problem for light meters if it is your intension to have the best exposure on a subject in the foreground. The bight background light can easily overpower the exposure and turn the main subject dark.
Photographically speaking there are several ways to deal with this problem.
- Add light to the foreground, bringing it up to a complementary level with the background brightness.
- Change shooting angle or come in close so that you are illuminating the bright background.
- Move in close to your subject and set the exposure manually so that your exposure looks better for the main subject that is in the foreground.
Using of AEL
Digital Camera Setting
Exposure was set according to the present framing of the image.

Exposure reading here
was set by moving in close momentarily, and framing the dogs face, and then
pressing the AE-L button. 
Randy Smith Photography © 2011.
In this example we will actually employ a portion of solutions 1 & 2 to get a better picture, but we'll use the AEL button because it is fast and easy. I'll display the progression of the shots so you can see what I mean.
I pointed the AF at a location between the eyes where focus is more critically needed.
When I take the picture without the use of AEL button, where the exposure is based on the final framing of the shot, then the exposure considers that bright upper background light that is dominating the scene, and this encourages the exposure to be dark for my foreground subject. Even the highlights in the fir are looking a little dark in this image. Esthetically this not a good exposure.
For picture two, I used AEL.
I moved in so that just the face is framed for purposes of letting the camera set the exposure reading for this confined area specifically. I lock in that exposure by pressing the AE-L button. I am now free to step back and frame the image the way I want. I set the focus now on the area of the eyes by pressing the shutter button half way down, now I frame the shot and take the picture.
Critiquing this picture we see an improvement, focus is where it should be and the subject is exposed as the primary subject of concern. Yes the background is now brighter, but in this image it is not bad because we accept that there is backlight, and we have no problem with seeing the main subject.
This image can still be improve on of course.
Same exposure as
above using AE-L,
bright background cropped 
I have an entire section on this website dedicated to Exposure and Composition.
Here I compose a little better by removing some of the that bright background and just make the image about the Dog. I would also rather not have that eye distraction of window on the far right, which is also bright, and it pulls the eye away from the subject.
So a little tighter cropping for the frame and repeat the steps in shot two.
There, thats the picture. Sometimes better composition is just a matter of removing the elements that are distracting.
So, good subject, good focus, good exposure, good composition, ....pretty simple really.
Digital Camera Settings - Auto Exposure Lock
Digital Camera Settings Single / Continuous shooting mode
Top Bottom
This settings needs little description really, single shot mode shoots one picture for every press of the shutter button, and continuous shooting mode will fire off many shots sequentially.
Continuous shooting mode is an option used in hopes of capturing peak action out of a sequence of multiple shots taken in rapid succession.
Your camera may capture at the rate of nearly 4 frames/second, and though this may sound fast to some people, in the world of action it is rather slow.
Don't be afraid to let it rip. Shoot now, Edit later.
If you have a high pixel count for the images you shoot, sometimes the amount of data being loaded into the buffer of the camera memory builds up before all the pictures can be processed and saved as images. A full buffer will slow down, or even stop the continuous shooting rate. This back log of processing can be relative to your image file size that you have chosen to shoot in. If you feel you can live with a smaller file sizes, you can get a small boost in a fraction of more frame/second, and a definite boost in maximum number of frames captured in a sequence.
Continuous shooting mode is a wonderful feature and it cost you nothing to use it, unlike shooting film in cameras.
This digital camera setting can be helpful at taking pictures of people also, some people relax after they perceive the picture is taken, a few pictures in a row might capture better expressions, or give you an image where all people might have their eye's open, for which inevitably someone does not.
Digital Camera Settings - Single / Continuous Shooting Mode
Digital Camera Settings Timer Delay Button
Top Bottom
For sharpest possible images for long exposures, the delay timer can allow the camera to be mounted on a tripod, so that the photographer can isolate themselves from the camera during slow shutter speed exposures. This limits camera shake during the shot, offering sharpest possible details.
On the less technical side of function, it can be an opportunity and imaginative tool for creativity. Set the camera on the other side of the fish bowl and then look through the front side, CLICK. You now have Comic photo to spam your friends e-mail with.
To take pictures of yourself and friends, most cameras offer a 2 second, and a 10 second delay option, complete with a small light not the front of the camera to indicate that the shot is about to be taken, so don't blink.
A word of caution, generally it is stupid to walk away from your camera because you have given up control of circumstances, be sure there is solid support for your camera, this includes the ground or floor your tripod is standing on. Also be aware of other people in you immediate area.
I trashed a brand new camera in Peru on my second day of travel, because one of the legs of the tripod collapsed. I was sure glad I had just bought insurance. Stuff Happens!
Digital Camera Settings - Timer Delay Button
Digital Camera Settings Diopter
Top Bottom
If you find it hard to see when the picture is sharp when focusing, check the diopter power setting on the back of your viewfinder to see if rotating this dial which increases power can assist your eyes ability to see it clearly. Once set for your eyes, you should not have to adjust it again, unless someone else has moved it.
Digital Camera Settings Electronic Flash
Top Bottom
Most all cameras have on board flash for short distance illumination of subjects.
I remember when they started putting these on cameras, I was thinking this is a weak flash and is just a cheap sales gimmick. I was naive. My current camera does not have one, and I would have found it useful many times. It is a great digital camera setting option.
For distances of 3-11 feet, these work quite well as a flash fill when taking pictures of people in full Sunlight. No really! This may be one of the best uses of flash yet.
When standing out in the Full Sunlight there is as much as 8 times the difference in light between direct sun and shadow. For exposure, this works out to 3 full stops of light in difference and between the two, and as a result the shadows on people faces are going to be quite dark.
Imagine trying to photograph someone on a dock or boat with bright light reflecting off the water behind your subject, or the photographic opportunity of friends with a setting sun behind them. This is a time when we would love to pull out a camera for memory making shots around family and friends. This lighting is often referred to as Back Lighting, and Flash Fill is a natural solution for taming this strong contrasting lighting situation.
Even with the sun light high over head, the flash can help fill in the dark areas of the image, like eye sockets, under the nose and chin, and really liven up your people portraits. Flash is not just for night time or indoors.
There are real limitations of flash to subject distance.
|
|

Light spreads out from the source mimicking qualities of Issac Newton's Inverse Square Law. Which means the light from the source at one foot, will spread out over an area four times larger by the time light reaches a distance of two feet, so light intensity at two feet is 1/4 the power that it is at one foot. At four feet, it is 1/16th of it's initial intensity that it would be at one foot.
You use to have to manage your flash exposure with every shot, now days your flash will work more compatibly with your camera. Your camera will communicate with the flash, and the flash will adjust the output intensity by extending, or retarding the duration of the flash's spark while it is firing, to adjust for the light intensity. The light needed from the flash changes with every different aperture setting and different flash to subject distance, and the amount of light you want to be present from your flash. So manually using your flash takes some time to learn to how to manage this light that you never get the chance to see.
The maximum illumination and distance for many in camera flashes is to perhaps no more than 11 feet or so. So don't bother sitting in low budget seats in the sports stadium's taking pictures with the flash, unless you like the effect it makes for the viewers on the other side of the stadium.
Most cameras have a built in accessory shoe that will accept a more powerful electronic flash which can help with farther flash distances, or shooting flash with smaller apertures.
With the advent of TTL (Through the Lens) metering, Nikon SB TTL, or Canon E-TTL, and E-TTL-II, working with flash is getting easier.
Flashes are made specific to operate with a specific brands and sometimes models of cameras. This is because there are different technologies and algorithms between manufactures, used to help the flash adjust it's power output for flash to subject distance, and based on ambient light levels and even camera settings. So when you do buy a more powerful flash, make sure it is compatible with your camera's technology to take advantage of said technology.
On a basic level, the flash will share information with the camera and vice versa. The Flash exposure is being monitored whiled the flash is firing and the picture is being taken, or the camera, or flash metering system can measure the light from the flash prior to the picture being taken through the use of a pre-flash that is a small flash intensity that fires when you press the shutter button for the AF function. Sound confusing, that's because there are several different technology methods being used that are employed today which is why it is important to buy a flash for you specific model of camera.
Well talk about flash in more specifics in an entire section as there is much one can learn about and working with flash.

In this shot the sun was shining and coming in the window. There was maybe as
much as 9-1 light ratio or more. I chose to let the sun still be bright,
bleaching out some of the details in the highlights as it gave a feeling
warmth. The flash was used to fill in some light into the shadows.
I bounced the light of the flash off a small white card positioned above the lens to reduce shadows and to soften the flashes hard edge shadow lines.
This shot to the right is using Flash as secondary light source to place light into the shadows so they have detail. In board flash cameras and also flashes as accessories that attach to the hot shoe, have power ratios that allow you to reduce the amount of light from the flash, so you don't have to select a full power setting.
Your flash and or your camera menu may allow you to reduce the power ratio of the flash in 1/3 stops of light output. This helps to reduce the amount of light output when you want to, and it functions in the flash's automatic or manual modes.
Sometimes when you are shooting with flash you may feel the flash has over powered the aesthetic mood of the shot. Power Ratios allow you to drop the amount of power in even steps, and the camera can still work automatically. It is a beautiful partnership that has taken decades for the camera manufactures to get this to work well for you.
Having said that, taking flash pictures may take some a bit more effort at learning about the technology and to work with light that you can't be seen but for only a 1/20,000 of a second. Still, I am amazed at how much easier it is to get good quality lighting from flash these days compared to manual adjustment of light intensity and flash to subject distances.
Try also to use a bit of flash in vary flat lighting, like outdoors on a cloudy day, a setting around -1/2 to -3/4 of a stop of fill light can be a vary pleasant augment to the image when shooting close ups of people. Light meters will tend to under expose in outdoors under overcast lighting anyway. Typically the light coming from the flash is in addition to the existing ambient light falling on your subject, both light sources and are additive, the subject gets brighter.
Flash in your pictures can often appear quite obvious as flash if that light over powers the natural lighting too much. Experiment with the power ratios on the flash for finding a favorable flash fill amount for the situations if you prefer a more natural light setting. When your eyes look at people, your pupils adjust so that you can see the subject better, so flash fill, can still look quite natural to us even though we are augmenting the naturally lit scene.
If you are outside and using flash as a fill source, you might want to test whether the color balance is to your liking, see if the light from the flash looks a bit unnatural or not. There is a color balance setting on the camera that is made for working with flash, which may improve the colors more to your liking. I kind of like the color balance setting set for flash even under the full sun light, or with a light haze.
Digital Camera Settings - Electronic Flash
Digital Camera Settings Red Eye
Top Bottom
Often times when you are photographing people with flash you can get Red Eye, a reflection off of the back of the eye's Retina. Cameras with built in flash are more prone to this then with a flash that mounts on your camera's hotshot that is on top of most cameras.

This problem is related to the incident angle of the flash that is reflecting back to the camera from the photographed subjects eyes.
Red Eye Flash Button Digital Camera Settings
There is a work around though. The Red Eye digital camera setting is an option for use with your flash, where the flash can fire off a pre-flash before the picture is taken. This is in effort to cause peoples pupils to close slightly by the time the full force of the flash goes off for taking the actual picture. This reduces the chances of getting a strong presence of the Red Eye Effect.
Extend away from lens
For hot shoe mounting flash units, this problems is reduced some by the increased incident angle the light reflection will take. But it is still possible to capture Red Eye if the subjects are back far enough that the incident angle is again narrow and reflection is coming straight back at the lens.

A Flash sync connecting cords are available to keep the camera and flash connected electronically so you can move the flash farther away from the incident angle of the camera lens which eliminates the problem entirely. However, as you move the flash you also create shadows that become more prevalent in your image. For this reason, many people will use bounce flash lighting as an option for reducing hard edges that these shadows can have, in hopes of having this flash light appear more natural as reflected light from the surrounding area.
Bounce Lighting
Bounce lighting is where you use incident angles off the wall or ceiling to bounce a flat lighting effect onto your subject. Do note that the more off white your wall or ceiling is the more off white you color balance will be.
You can also use a flash mounted white card to bounce flash off of before illuminating your subject, this will soften hard edges some, but also allows illumination to be more direct from your camera position, therefore hard edges are less relative. There are many commercial options for this type of bounce flash lighting and they are also portable, as well as a pleasing enhancement.
Digital Camera Settings - Red Eye / Flash
This concludes the list of topics on this page of Digital Camera Settings. If you landed on this page as your first visit to this website, then do look at the list bellow for more topics that are presented on the Digital Photography Basics page. Digital Photography Basics page is this section's anchor page, and also has links to other specific in-depth topic driven pages regarding Digital Photography Basics.
Thank you for visiting.
Go to Digital Photography Basics from Digital Camera Settings
Visit "Digital Photography Basics" page for these topics :
|
LCD Monitor |
Image Sensor |
Prints from File Sizes |
|
Memory Card |
Image File Sizes |
Image File Formats |
|
Histogram |
Picture Styles |
White Balance Correction |
|
ISO |
Camera Firmware |
LCD Monitor |
|
Metadata |
Color Space sRGB |
Auto Exposure Bracketing |
The dSLR Image File Formats
All dSLR camera's, have at least two image file formats to choose from, the Jpeg and the RAW file. You can find the selection for them in the camera menu. Some cameras offer a third file format, the Tiff.
Image file name Extensions
|
Camera |
Jpeg |
Tiff |
RAW |
|
|
|||
|
Nikon |
.jgp |
.tif |
.nef, .nrw |
|
Canon |
.jpg |
.tif |
.crw, .cr2 |
|
Kodak |
.jpg |
.tif |
.kdc, |
|
Pentax |
.jpg |
.tif |
.raw, .rw2 |
|
RAW file extensions are unique to the manufacturer. |
|||
|
|
|||
|
Example of a file name: |
|||
|
ING_2873.CR2 |
|||
|
You can rename this part |
|||
Digital Photography Basics - Image File Formats
The RAW file format, specifically, affords the best flexibility for image processing correction of the three image file formats found in your camera.
The Jpeg and the Tiff image file formts differ from this by offering some options of doing some of the image processing (editing), from inside the camera as a matter of automatically applying adjustments to color, contrast, saturation, sharpening in accordance with your preference. These adjustments are referred to as Picture styles but will talk about them under the link Canon Picture Styles.
The choice of which one of these image file formats you want to use has a lot to do with your chosen path of work flow from shooting the image on through to printing the final image.
The file handling process for Jpeg images is generally quicker because the image file processing treatment is more oriented towards treating multiple pictures in bulk fashion under the idea that you consistently like to apply (at some base level) the vary same editing styling choices which can all be done by the camera, some additional and minor adjustments are still possible latter on your computer during the editing phase.
The jpeg image is a true image file format that is standardized with cross platform support industry wide with cameras, computers, web, printers and much more. You can shoot and save your images in the jpeg format and print straight from you camera or memory card to the printer. Your image styling choices must be made for the most part in the camera settings. You must also have correct white balance setting for your color and correct exposure in the camera before you shoot in order to get the best quality results. You can do a small measure of image processing adjustments in your image editor to fine tune your results uniquely to the image content.
|
Work Flow
Comparison
|
||
|
Description |
Jpeg |
RAW |
|
White Balance |
Before shooting |
not required |
|
Correct |
Correct |
more foregiving |
|
Exp. Latitude |
7 stop latitude |
10 stops |
|
Styling |
Apply before |
adjust in editing |
|
Sharpening |
Only slightly |
adjust in editing |
|
|
|
|
The RAW file is not a standard image format, it is specific for your make and model of camera. You need special editing software which acts like instructions to state how the image should look before it can even be viewed in most imaging applications. You can later save the image to a standardized image format like Jpeg or Tiff file formats whenever you want. You can't directly print your RAW file image from the camera or memory card.
With the RAW file, this method of image processing treatment offers you an amazing amount of latitude range for editing changes of color, brightness, contrast, and all other attributes that describe how the image is to look. After you have the individual file looking the way you want it in your chosen image editing software on your computer, then you make a copy of the file and convert it to a standardized image format, like the Tiff or Jpeg. It takes a bit more understanding to edit this image, but it should not be intimidating, and for individuals wanting more creative control, it is the most flexible and forgiving if you did not white balance before you shot, or even nail that perfect exposure that you wanted.
You can see the links Jpg Files, and RAW File Format to learn about the unique qualities of these image file formats, and their limitations.
Editing Image file Formats
If you are just starting out learning digital photography basics, you might find the Jpeg file format to work the best for you. It offers a few more options for different types of camera to print work flow options.
You can go straight from the camera's memory card to printing the picture at some photo finishers, and in some cases, even your own printer without the need for any edit processing.
If you want to start editing some of your pictures, you can ease into the practice without even owning any image editing software. There are several free online internet browser image editors available to choose from. Just go to their website and you can upload the image, make your edits, and then down load the image back to your computer. They are easy to use, and they offer the more common edit adjustments that you are likely to want.
Online browser editors work faster with small image file sizes. If you are shooting jpeg images that are 10 Mb or larger, expect the up load and down loads to take some time.
Having your own image editing application on your computer shortens the time it takes to edit the image. When you are ready to purchase your own, there is a plethora of inexpensive image editing software of under sixty dollars or so.
Image editing for the jpeg is done in bitmap editors, who's editing tools can be a bit distractive to image quality, if too many edits are performed on an image the image quality gets worse. This is why it is important to allways change the file name for the image file you are working on, so that your original image file is allways left untouched.
Adobe offer's two image editing applications that offer you the option to edit the image in a more safe manor of Lossless editing, where you can keep changing the appearance of the image without doing harm to the image quality. They are the more expensive applications called Lightroom, and Photoshop CS 5 (a new release of CS6 is expected in 2012). Price wise, these programs can cost you from $100 to $699 US dollars.
If you have your own computer, and you prefer to work in the RAW file format, this file offers the most flexibility for quality control and adjustment after you shoot. And once you get the hang of it, it can make a huge difference in the final image quality of all your shots. As you develop as a Photographer you will likely make this change to working with RAW files.
Editing the RAW file format requires a preparatory RAW file image editor for that specific file type provided by your camera. Applications like Adobe Lightroom, and Photoshop CS 5 are updated to handle the many types of RAW files presented from camera manufacturers. Editing with the RAW files affords greater latitude for better details captured in the highlights and shadow areas, so there is greater opportunity for improved image quality then what is available from the jpeg image file.
Jpg File
The Jpg file (pronounced jay-peg) is an image file format intentionally created for use on the Internet. Data transmission is at a premium and the jpg image is a compromise between image quality and file size. Most images you look at over the Internet are jpg files and carry the file extension "jpg". Even though more people these days that are connected to the Internet's have the luxury of broad band transmission, efficiency of data transmissions will always be important. The jpg format will likely be around for a long time and will evolve farther.
Jpeg Image File Format
The acronym JPEG stands for (Joint Photographic Experts Group) who developed this image format which uses algorithms of multiple compression ratios for reducing image file size.
As a bench mark to compare images against, Film is considered a continuous tonal image. It's multiple emulsion layers and various silver halide particle sizes and the spaces in-between them, help to create the illusion of smooth tones between extreme exposure changes, even though on close up magnification we can see that it is not continuous tones at all, it is what the human eye sees that matters in the end.
The digital image is reproduced in punctuated thresholds of luminance values of the photo sites located on the image sensor.
When the image sensor first captures your image as a RAW file it will do so with the subtle ability to capture the range of luminance levels in 16,384 possible steps from black to white. As far as the eye is concerned, this is a continuous tone image. When you save your image file into the jpg 8 bit image file format, you reduce the refinement of that continuous tone to 256 levels of luminance from black to white.
For the most part, you can stand back and look at a properly exposed, highest quality yielding jpg image, and not see a difference by comparison with the RAW file.
Pixels can present smooth continuous tones in an image as long as enough unique pixels exist that can represent all those subtle tones of shading of details on the forest floor, or even lack of details in the smooth gradation in the clean blue sky.
All of this information takes up a lot space to describe the details in a digital data file.
The Jpg file was designed with a compression algorithm in place to reduce as much visible information as possible yet still get the idea of the image across to the human eye.
Prior to the saving process of a Jpg file, you choose how much compression is to be used. With regards to saving these files in the camera, you have selected which quality setting to use in the camera menus.
Jpg File - Format
8x8 Pixel Blocks
Top Bottom
Compression that occurs in the jpg image is first a sectioning off of 8x8 pixels blocks of your image, and then the algorithm decides how to simplify the brightness, hue and color saturation, and variant across this 8 pixels block dimension.
A compression ration is the inverse of image quality of the final image. So the application of 30% compression, is a reduction to 70% image quality. This is just about the range or best compromise of selection in image quality is met for the visual quality vs the data file size.
This is called Lossy editing, as you edit changing some of the information that describes the image, then apply the compression routine when you save, that results in some of the original information being lost forever from the picture. This is why with jpg images you want to limit the number of times you repeat the process of opening up the image, perform edit changes, and then saving the image. Every time you do that, more of the original image is lost.
The processes this algorithm goes through is beyond the scope of this article. The process does try to take advantage of the sensitivities of the human eye. We see differences in luminance &$40;brightness&$41; easier than we see differences between color.
When you save your image, the jpg algorithm is able to reassign some of the brightness and color values the pixel data units within an 8x8 pixel block, often in an attempt to provide a more gradual stepped representation of data across this block.
The result of shared data of neighboring pixels is part of what is reducing the data file size by the encoder and decoder programs contained in the jpg file. The impression or presence of these 8x8 pixel blocks can be seen more easily the more you reduce image quality.
In this image below, a small portion of the image around the moon was used to show what happens to the 8x8 pixel blocks when you choose a lower quality image setting.

The small most left image of the moon shows a 400% magnified view of the
resolution as it is being used in the image above. No change in image quality
is being applied to it, you are seeing the pixels as they were presented in
this smaller version of my image file.If you examine the small image on the
left you can see shade details and relief shapes to the rocks. The middle image
shows what happens when you save your jpg file at 50% quality setting. In the
middle picture there are no pixels that show rock details and most shadow
details are missing. The last image on the right is the result of saving at 10%
quality. If there was any doubt of whether you were really seeing the 8x8
blocks at the 50% image quality setting, they have diminished when you looked
at the 10% image quality setting. In the last image on the right, you can
hardly make out what is mountain at the 90% compression save image on the
right. Your camera has multiple image quality settings that you can choose to
save your jpg image files in. Choosing to save in the largest Jpg file format
size will reduce the file size greatly to perhaps 25% from the original RAW
image capture. Obviously this means you can shoot and save more image files on
a memory card by selecting the jpg file image. There is a down side to this
choice however, you also limit your edit options for this image more than if
you had choose to saved in the RAW File Format, you
also may be restricting image enlargement size options.
Since your editing latitude is reduced so much from the original RAW file format by selecting to save in Jpeg, you really need to shoot as precisely as you can to capture the shot as you want it presented in the final printed or displayed presentation. This means having the correct exposure and color balance at the time of image capture.
Farther editing and saving of the image files, means a repeat of the compression process inherent in the jpg file, this process will continue to reduce image quality, deviating from the original image data with every save.
Jpg File - Image file Format
Jpeg 8 bit format
Top Bottom
The jpg file is capable of displaying over 16 million different colors. That is, each of the RGB components has 256 different luminance levels or 256^3 (ie: 256R x 256G x 256B ~ 16.7 million colors ). Some people refer to the jpg file as a 24bit image, implying 8 bits/color channel. Your software programs however will refer to the jpg as an 8 bit image. I think 16.7 million colors qualifies as a plethora.
With regard to your eyes. You likely will not notice any difference from an 8bit jpeg image and 14bit RAW file image if you shoot them at the same time and exposure. The difference becomes apparent when you start taking advantages of the RAW for all the extra latitude it has for processing more definition in the highlights and shadows for more details, it huge flexibility of gamut and color balance options.
By comparison the RAW file is 16,382^3 or 4.3 trillion colors, and that is rather mind boggling. But as mention above these different image files look the same to the eye when shot, the advantage is what you can do while you edit this file. Do see RAW File Format about this file format.
Jpg File - 8 Bit Image
Important Attributes of the Jpg File
Top Bottom
Jpg file performs best when reducing a vary large file size for display on the web. The first step would be to edit your image to the appearance you wish, then down size the image to dimension you wish. This is a good time, and the best time to apply any sharpening you wish to use. Then for use on the web, you can often use another file compression option that reduces the jpg file with stronger compression options to farther reduce file data size, (not dimension size of image). The quality setting can be set from high to low. Most editing applications allow you to see and adjust the image quality in real time showing you a comparison shot of the original image before reduction that sits along side the shot you are adjusting compression on, so you can see what you are doing to the file, prior to the saving the file.
To open up a Jpg File, view it and close it again will not alter or reduce image quality in anyway. However, because this file is designed to reduce space by the file size through applying compression encoding process every time you "save the image file", your image is being altered by loosing some of it's details every time you do this, whether you edited or not if you press "Save" or even "Save As". This process is often referred to as Lossy do to the effects of loosing image details, so limiting multiple saving sequences is a good idea.
Always duplicate your original jpg file and then give the new file a different name, before you performing any edits or saves.
You defiantly want to consider this issue if you are working with images of personal or historical value. The number of times you might open and edit an image over twenty or thirty years can be vary distractive within the jpg file format.
One good option for editing is to save your jpeg file into a Tiff file format if you plan to do a lot of editing with that image. The Tiff file is for the most part Lossless Editing. The Tiff file is a larger bit map space file as a 12 bit image. So your file size is will become a lot bigger, and it can slow down your edits some as the computer manages processing your edit changes. Converting your Jpeg file into a Tiff file will not put more shades of colors into your image just by upgrading the bitmap size, you will not gain any new colors that was not inherent in the Jpg image file. You will have more space in the Tiff file for making edits without causing more harm to the image with some types of image processing edits, and without color data being lost due to lossy editing ( the file compression performed during saving of the Jpeg). So you can come back and make more edits and save while doing far less damage to the image data.
If you shoot massive numbers of images in jpg files, then this converting to Tiff files format can take a lot more time, and eat up a lot of space in image storage. Particularly if you create lots of layers while editing and playing with your image creations. Tiff file structure with layers can result in vary large file storage sizes.
When I edit images, I do play with layers, and I sometimes make several edited versions of the images that I like. And rather than use Tiff to store multiple layered files I will use the more efficient Adobe Photoshop file format. later for printing I will merge layers, flatten the image and save the single image in Tiff for printing, or jpg file if used for the web.
RAW File Format
The RAW file format is not a single format like the Jpeg or Tiff image file formats which are internationally recognized and excepted as standardized file structures. There are perhaps hundreds of different RAW formats, and any single camera manufacturer may use several of their own design for their camera models.
RAW file Format - Overview
The RAW image file is not ready for the printing, or even editing inside of a standard bit mapped image editor.
Output devices have Color Space requirements, specific limitations of how color information is to be formatted, and interpreted in a color space and displayed for viewing. Meeting the needs of the output devices is the function of what is called "Processing the data", which comes from the image sensor and is formed into an image we understand.
Jpeg and Tiff image formats are common to most types of output devices so you can transfer these files directly from your camera or flash card to your printer. While having chosen to save your images in those formats, you were required to make choices about the Color Balance, Saturation, Sharpening, Contrast and even perhaps a choice of color space (RGB, sRGB).
Image file name Extensions
|
Camera |
RAW |
||
|
|
|||
|
Nikon |
.nef, .nrw |
|
|
|
Canon |
.crw, .cr2 |
|
|
|
Kodak |
.kdc, |
|
|
|
Pentax |
.raw, .rw2 |
|
|
|
RAW file extensions are unique to the manufacturer. |
|||
|
|
|||
|
Example of a file name: |
|||
|
ING_2873.CR2 |
|||
|
You can rename this part |
|||
RAW File Format
These options are found in the camera menu settings of both the point and shoot camera and the DSLR camera, and if you did not physically set these parameters in your menus, then you are likely selecting these bundled in a group when you choose to shoot in a Picture Styling image modes like "landscape", or "Portrait" and "Monochrome" on your camera.
Every time you shoot an image captured by the image sensor regardless of selected image format, the data from the photosites of the image senor has to be interpreted into pixel data, this is the RAW file, non-processed, wide gamut, RGB data. This data and it's arrangement is exclusive to the camera manufacture's interpretation and coding.
As you can see to the right from all the different file extensions provided by the most popular camera manufactures, there is not just one type of accepted formatting for this data, one that would be universally recognized.
The first stage in processing of an image from the image
sensor is the RAW file format. If you did elect to save your images in Jpeg or
Tiff file formats, those files are then processed from this RAW file in the
camera into your choice of saved file format.
An important RAW File Format point
Choosing to keep/save your images in the manufacturer's RAW file format means that you need to process the image later with the assistance of your camera's RAW file image processing application, presented by your camera manufacturer or from a third party editing software application of your choice. This is an extra step in file handling, but having access to this larger color space and gamut that comes with the RAW file data is of great benefit. If you would like more information on the jpeg image file see the link Jpg Files.
As stated before in the link Digital Photography Basics, you can defer adjusting the color balance of the lighting you are shooting under until later during editing, when you are processing the image in a RAW file image processing application that was designed to accept your RAW file format.
Other adjustments advantages of RAW fil format:
- Adjusting the brightness, saturation and hue of specific colors.
- Correcting for chromatic aberration generated by your lens.
- Correcting in some measure the light vignetting from your lens where the edges of the image grow darker.
- More latitude in adjustment for Noise or detail enhancement.
- Recovering as much as 2.5 stops more dynamic range of details over all, in the highlights or shadows that would other wise not be available to you with as much flexibility or latitude.
- Being able to make edit adjustments to your image file without loss or damage to any image file data, an option referred to as lossless editing, verses editing with a standard Jpeg file which does result in damage to the original data of the image file, referred to as lossy.
If you have not preformed editing on a RAW image file you might feel a little apprehensive, but that goes away quickly because just about every edit you can make is all done live as you adjust sliders for adjustment, if you don't like what you see, you don't use it, and as mentioned above with most editing applications you are editing in Lossless.
Lossless editing does not effect the RAW file directly like editing choices would in the Tiff or Jpeg file formats. Your edit choices are like instructions that are applied to the image as permanent changes when you choose to save the file into another file format. That is to say, while you are editing in RAW, your RAW file is unchanged, and you can change your mind about what edit choices you want to apply at any time, they are just a series of instructions. So open, edit in and save the RAW file an much as you want, you still have access to all of the gamut, and color space of RGB, save after save.

Color Bit Depth - Dynamic Range
Above is a diagram for Exposure Brightness range or what is commonly refered to Dynamic Range. On inspection you can see that for a Jpg image, the scale labeled "Normal Dynamic Range" is about 6.5 stops of light from pure black to pure white. The Jpeg image can only represent this dynamic range with 256 different levels of brightness per channel of RGB, because it is an 8 bit image.
The RAW file format offers access through a recovery process of luminance deferences that are normally locked up at the extreme ends of the luminance range, that can be spread out and moved closer to the mid tone values where you can see them in your picture, offering one full stop of recoverable details in the highlights and about 1.5 stops of light definition in the shadows.
As always it is recommended that you duplicate the original
file, change the name and then make your final edits, like sizing, sharpening
and selecting the final image file format you are going to use for your display
output device.
An important RAW File Format point
RAW File Format
RAW File Format - Compatibility - DNG file
Top Bottom
As mentioned before, Jpeg and Tiff file formats are Universally recognized file formats and so it stands to reason that these files formats will be around for some time for future years, even while new advancements are made to those file formats or even perhaps new ones are developed. This implies that those applications in their future versions will likely be backwards compatible to allow earlier saved versions of Jpeg and Tiff still be available as options for editing.
The idea of the RAW file being a non standard has caused some to be concerned that in the future, your image file format could become so obsolete that future third party applications will no longer open those files up and allow you to edit in them as RAW files.
There has been in development a RAW file format that is being lobbied as a universal RAW file format so that in the future, no matter what manufacturers do, you can always count on a standard where by editing applications will support this single RAW file option so that you have access to all your old RAW files.
This format is called the DNG or Digital Negative.
You can get a free download application from Adobe, it is a RAW File Converter, that enables you to convert your current RAW files to this DNG RAW File Format.
An important RAW File Format option
You will still have complete access to all of the RAW file editing options that are currently available. However, if you are using your manufacturer's RAW file editing software you likely will not be able to use the DNG format with that application. But most every third party editing software that I am aware of currently supports the DNG format
If your manufacture offers an editing option not found in the third party application for editing, that you really prefer to use, you could be out of luck, but there is an option with the DNG format where you can save the manufacture's RAW file format structure within the DNG, so that the DNG can rebuild the original RAW file format from it's own contents, giving you again access of your camera manufacturer's editing application. So now you are not out of luck you can have the DNG and still have the ability to reverse engineer the original RAW file format. This does require a much larger file size and it also requires you to tell DNG converter to convert your RAW file with this option in mind.
The usual DNG format will likely be slightly larger in storage file size as your current RAW file format.
There is also the possibility that the DNG file format in the future will become an industry standard where by all future image sensors begin to use this format as the universal RAW file format even from every camera manufacture, as of yet that has not taken place.
Naturally you can always duplicate your RAW file prior to Converting one copy to the DNG format, this would double the storage space size requirements for your images, but storage is not the expense issue that it use to be.
As it is right now, if your camera is new to you and you plan to purchase third party image editing software, it is a good idea you check the box or website and make sure that your manufacturer's RAW format is supported currently. Of course if you down load the free DNG converter, you can start editing that file right now, regardless of waiting for farther application updates for the editing software. Rest assured, if your editing software does not support your new camera RAW file, it soon will be supported with a software update.
DNG files have a few advantages, Raw files commonly need to be accompanied with an additional XMP file that saves your Metadata from your camera just like Jpeg and Tiff files do. DNG files can embed this data in the DNG file so that the two files are not separated. There may be are a few Metadata types that may be native to a specific camera that may not be stored, but all the fundamental metadata is there.
If you like, your DNG converter can even batch process your original RAW files as you upload your images to the computer.
So you can see that the DNG file is going to be larger than your original RAW file, but it may all be worth it if these shots are still to be accessed for twenty, thirty or more years down the road with files that are vary special to you. Who knows, maybe future RAW file editing has new tricks that are not available now, opening up new opportunities for great image processing.
Color Bit Depth
Color bit depth is composed of three luminance bit depth channels that accommodate the RGB color components of an image, so that you can see color images. To understand this, let's first look at the single bit depth image.
Bit Depth of an image
A little Bit of information :)
Bit depth denotes the amount of luminance tones that a image can capture by design. The bit is the smallest piece of data a computer has, it is a place holder for a small electrical charge. This place holder can only have one of two possibilities , it has a charge, or it does not have charge, it is like a simple light switch to your room, you have it on, or your have it off.
1 bit : no charge =0
charge =1
You can make a graphic image made from one bit data units, because it has two possibilities.
|
|

Black = 0 (no charge), and white=1(charge).
The 1 bit image two the right is not really a 1-bit image because I have a drop shadow, and gold colored lettering, but the concept here does represent the idea of an 1-bit image, only black or white pixel values.
For a 2 bit image, 2 single bits can be used together to define a small luminance range of values that has four potential different brightness possibilities as a unit. Adding more bits to define potential brightness values is know as Bit Depth
2 bit : no charge = (0,0 = black) no charge found in either bit.charge = (1,0 = dark gray) a charge found in bit #1, but not bit #2
(0,1 = light gray) a charge found in bit #2, but not bit #1(1,1 = white) a charge found in both bits.
We can mathematically find the number of possible tones that we can make buy dedicating many bits together to describe unique brightness values.
If a "single bit" = 2 possibilities, (on or off)
Then 2 bits used together = 2x2 or 2^2 or = 4 possibilities
4 bits used together = 2x2x2x2 or 2^4 or = 16 potential shades, which includes
a black and a white.
color Bit Depth - Bit Depth of an Image
The Color Bit Depth Image
The "Color Bit Depth" image is simply combining three regular luminance bit depth dimensions together to accommodate the Red, Green and Blue color channels of the image, which allows us to see the illusion of color when your monitor displays the color bit depth image buy projecting the RGB components of an image. As described on the link Photography Basics all color images are really three B&W images displayed with RGB filters for the digital image, when displayed together they represent the color image.
|
|

The jpeg image uses 8 bits to describe shades of brightness, offering 2 to the power of 8 brightness levels, or 256 different brightness levels for a single luminance option. A color image for a Jpeg will need to use Red, Green and Blue to make many colors. If each of the individual RGB colors can display 265 tones of brightness within their own color channels, then there is a potential for 256R x256G x 256B to make a total of 16,777,216 colors. So each pixel in a Jpeg has this color potential for 16 million different colors in the image.
When starting out in digital photography, this certainly sounds like more than enough colors.
Tiff and RAW files have greater potential for recording different brightness and colors because they have a much larger color bit depths to their file format designs. Your digital camera may have the potential for 2^12, or even 2^14 color per color channel for each single channel of RGB color.
So lets say your camera is using a 2^14 bit depth per channel, your RGB color bit depth would be this value times three. That is a color bit depth of 4,398,046,511,104 unique colors and tones. This certainly sounds like over kill, but really it is not, considering how you can use this in editing to recapture subtle differences in tones that are buried in the bright highlights or dark shadow areas, and making them more distinctive in your final image edit.
Because you have so many more different levels of brightness represented, you have processing options in your RAW file processing software, that allows you to use these levels of brightness for greater image quality, and more elbow room for making adjustments. Basically, by editing, you can spread the luminance range out some with adjustments, or compress them with more flexibility. This moves some of the luminance details from the vary bright end of the scale into a brightness range where you can see differences in brightness easily, where before they may have appeared just as bright light areas of your image, this is an editing function called Recovery. This is where we are able to reclaim details from these areas and seemingly stretch out our dynamic range from just 6 stops of light, to 9 stops of light, you really only get this options from the larger bit depth images.
Color Bit Depth - Dynamic Range
Above is a diagram for Exposure Brightness range or what is commonly refered to Dynamic Range. On inspection you can see that for a Jpg image, the scale labeled "Normal Dynamic Range" is about 6.5 stops of light from pure black to pure white. The Jpeg image can only represent this dynamic range with 256 different levels of brightness per channel of RGB, because it is an 8 bit image.
By design, our histogram on the camera will only display 255 levels of brightness also, even though a Tiff or RAW file is capable of recording more shades within this same dynamic range spread of 6.5 stops, resulting in sixteen thousand levels of brightness. This is not a problem though, because the 14 bit image will look the same as the 8 bit image when you capture it and it is displayed on the Histogram. It is only in processing that you can recover and make use of some this definition of luminance and details found in the larger color bit depth image file.
So to summarize just a bit, The larger the color bit depth of the image, the more room there is for storing more luminance values, and this can be a big help in editing.
Jpeg files are 8 bit images, and they have the space that is large enough to cover about a 6.5 stop dynamic range from the image sensor used by your camera. So for starting out and learning digital photography basics, it will do just fine. During editing, your pictures a little more warm, sharper, brighter just as you can with any other image files but you barely have any room for adjustment without compromising image quality some, particularly if you happen to save and close the file with intent to come back and work on it again later. I will explain about this on the link Jpg Files .
For now, I would recommend that if you want to edit your Jpeg files that you first copy your original image file and save the new file under a different name, and save as a Tiff file format, and then edit only those copied files, never edit the original.
Later as you progress and build confidence with editing then you might want to start saving your images in the camera as a RAW file. You will eventually begin to appreciate the many advantages that they can offer. It still does not hurt to carry over the same practice of duplicating the original, saving under a new name and then editing only the copied file.
RAW files will allow you recover more details in the highlights and the shadows. Don't expect huge differences though, just some more room in the bit depth size of the file to define some more details, it's good exposures that gives you the image you really want to work with. With RAW files, edit choices don't reduce the quality of the image after saving the file. We go into more information about the RAW File Format on it's own link.
Memory cards for digital cameras
Memory cards for digital cameras are small solid state image data storage devices that hold the data for all your pictures, and EXIF file information. These memory cards are not dependent on electrical power for storing data safely, and are used for all kinds of electronic equipment for data storage.
The 35 mm dSLR camera commonly uses one of two general styles of cards, and though these are not directly interchangeable into the same slot in the camera, some pro cameras might have more than one docking bay allowing for use of both of these card types. Check you camera manual for the type of card your camera can use.
For people who own Point and Shoot digital cameras, I don't display your type of cards on this page since this is a dSLR website, however much of this information is relative to you as well.
Two types of Memory
Cards for dSLR Digital Cameras

The two types of memory cards for dSLR cameras are the CF Memory Card (shown on the left) and the SD Memory Card (shown on the right).
There are three points you want to be aware of when purchasing a new card for your camera.
- The type of card your camera takes
- The fast speed requirements of your camera need to be met by the card. There are different speed ratings available with new technologies and in some cases new hardware requirements for some of the fastest cards. This can effect the price of the card. If you shoot large image file sizes like 18 Megapixels or higher, or you are shooting Video in your camera, you need a card that can manage higher read and write speeds. Before you pick up a fast read / write memory card, make sure your camera hand handle that fast rate of speed. Some cameras don't have the firmware or hardware to support the faster card speed rate technologies. So you are looking for Just the right fit.
- The size of card you would like to have for holding capacity. If your camera uses the SD cards, then there are ceiling limits that may work with your camera, as the higher capacity cards often are directly linked to newer technology, and your camera needs to be handle that class of card technology.
In short you camera manufacture or camera manual should state the compatible cards sizes and speed rates that are relative to your camera.
You may find that some cards write data faster then they read from. So you do want fast write speeds, but fast read speeds is important for people who don't like waiting while the card is downloading images to the computer.
Memory Size
Memory size is listed in bytes. We talked about a bit on the page Color Bit Depth. Well a Byte is equal to 8 Bits with regards to memory on cards, and a Byte is the base unit when we talk about memory.
Memory Sizes available today
- Mb (Megabyte) = 1000^2 or 1,000,000 bytes
- Gb (Gigabyte) = 1024^3 or 1,073,741,824 bytes
- Tb (Terabyte) = 1000^4 or 1,000,000,000,000 bytes
Memory Cards for Digital Cameras - CF Memory Card
CF Memory (compact flash) card was the more common card found on dSLR cameras prior to 2005, and is still used by many cameras to today, though the trend seems to be moving towards the SD memory cards (described below) as dSLR cameras get smaller.
The CF card measures around 36mm x 43mm rectangularly, and come in two different thicknesses.
- Type I = 3.3mm
- Type II = 5 mm
The type II cards are either the older high capacity solid state CF cards or they are the "Micro hard disk" hard drives, these have moving parts just like your computer hard drive. The largest capacity micro drive is the 8 Gbs.
More commonly preferred these days, and found in more recent dSLR cameras that use the Compact Flash card is the slimmer high capacity Type I card that is sold state and 3.3mm in width. CF cards are available from several manufacturers. You can get Type I cards from 128mb up through 128Gb for holding capacity. All Type I Cards, will fit into the larger Type II Card holder slots, and are fully compatible.
CF cards come in different speeds at which they can read or write, and this effects the cost of the card for it's given data size, so when shopping for cards, seeing different prices for the same size card might be a bit confusing unless you view the speed rating for the card. The rating is often stated as a multiplier from 12x - 133x where the base unit value is equal to 150 kb/s (Kilobytes per Second). You should see the Multiplier on the package, or at least the speed rate listed.
12x 150 kb/s =
1,800.0 kb or less than 2Mb/s
133x 150 kb/s = 19,950.0 kb/s or about 20Mb/s
The Canon 5D mark II can write at speeds over 30Mb/s and some pro cameras are likely faster, so shopping for a faster CF card can be relevant, and as you up date your firmware for your camera your read/write speeds could have increased a little, but probably not enough to jump up to the next faster card read/write rates.
With CF cards, you can use a faster card in a camera with a slower read and write speed and the card will not make the camera perform any faster, but it won't slow it down either. You can use a slower card in a faster camera and it will slow the camera down, limiting the number of shots you can take in a continuous firing sequence. So if you want to maximize your dollars when buying a card, find out what speed your camera can write at.
Oddly enough, between manufactures, it is sometimes hard tell what is faster between company brands, actual speeds can vary, and the cards that are labeled with buzz words proclaiming superior performance may not perform better then ones that do not hype up the sales display. You may have to do some research if you really want maximize you CF card speed efficiency with your cameras needs. There are some web sites that do run comparison speed test of cards on specific camera make and models so that you can see how a specific brand may perform against another.
Compact Flash Cards
Memory Cards for Digital Cameras - SD Memory Card
The SD Memory (secure digital) memory card that is present in most dSLR cameras is a bit smaller than the Compact Flash cards talked about above. The SD cards for dRLR cameras measure 24mm x 32mm and about 2.1 mm thick, and has a unique shape, rectangular with the upper right corner missing.
SD cards are used in many different kind products like video games and music players, and other smaller digital cameras rather than just dSLR cameras, and for those other products they make two smaller sized cards that are also known as SD memory cards as well. If you have a dSLR camera that uses the SD card, then you will most likely require the largest SD memory card just mentioned.
Now days, size is not so relative to speed or memory holding power in memory cards, don't let the small size fool you.
SD memory frequently comes in three different Speed categories that exist in all three sizes of SD cards for various products, and there is an even faster fourth category emerging today. All of these speed classes are relevant to dSLR products that use SD cards, and these classes are also relevant to different memory capacities ranges. So what I am saying here is, as the memory capacity capabilities increased over several years, so also did the technology for quicker data transfer rates.
So you will want to check with your camera manual because different speed categories are relevant to different firm ware and perhaps some hardware differences in your camera, that is you don't just pop in a faster speed class card without knowing which one your camera is designed to handle.
The Three speed categories:
- SD - sometimes referred now as SDSC ( stander class ) will most commonly have memory sizes 2Gb and smaller
- SDHC - (High Capacity), typically has a capacity from 4Gb through 32Gb.
- SDXC - (Extended Capacity) starts as 32Gb and will go unto 2Tb (Terabytes)
Speed Rates for SD cards are listed in classes. look for a C with a number inside the Letter.
- class 2 = guaranteed transfer rate of 2 MB/s
- class 4 = guaranteed transfer rate of 4 MB/s
- class 6 = guaranteed transfer rate of 6 MB/s
- class 10 = guaranteed transfer rate of 10 MB/s
SD Memory Cards A few more pointers on Memory Cards for Digital Cameras
The price range for memory cards is vast. If you are comparison shopping around be sure to look at all the important comparisons. Speed of the card, the amount of memory of the card, and the technology of the card if relative. All of these must be compatible with your camera and will effect the price greatly.
Which card is right for you is a self search. Many of the people that buy the largest capacity cards are those who are shooting video. If you are just shooting stills, you can go with smaller capacity cards that are cheaper in cost. Some of the lower capacity cards might be faster as well.
If you are on a long trip, shooting with lower capacity cards may be an advantage because you can carry more cards easily, they don't take up much room, and if you damage a card you have not lost all the pictures of your trip.
Some people carry card portable storage devices so that they can empty the contents of the card onto it, and some of these have built in LCD screens that even allow you to search through the many stored images. People sometimes travel with their laptops, and now days I suspect that new technology like the iPad is going to be ideally poplar for travel and storage and display device.
Color Spaces
Digital cameras offer one of two color spaces for taking pictures with aRGB and sRGB.
You have an option within the camera, of selecting a color space that will make up the colors used in your image.
The amount of different colors that can be recorded by the camera is related to the bit depth size of the image file being used, and bit depth is really not related to color space. We discuss the bit depth of color images on the link Color Bit Depth.
Color space is analogous to a painter that may use a selection of paints having a unique base to them, to create a different color palette for their paintings.
The term color space generally refers to a range of reproducible colors by an output device.
RGB refers to the color space of the additive color palette, or all the colors that can be represented by mixing Red, Green and Blue light that the human eye can see.
Realistically your camera's image sensor captures a bit smaller subset of the RGB color space gamut.
Your camera offers two common industry standards for color space. Adobe RGB is the larger of the two, and sRGB which was designed for internet use.
Adobe RGB (1998) or aRGB, is just one of many possible color palettes that exist today as a subset within RGB color space. There are many different color palettes because for every different type of technology, or even piece of equipment, there exist a unique and limited capacity to replicate color in the same way. Adobe RGB has become an excepted international standard for use with digital image sensors because this meets the needs of the professional publishing for a universally accepted broad color palette standard.
The sRGB color palette is smaller than Adobe RGB (1998) color palette and exist inside the boundaries of aRGB. sRGB was created in partnership between Hewlett Packard and Microsoft cooperation predating the aRGB color space. This color palette was designed to help standardize color for display by TV monitors of an earlier time, making color reproduction more predictable, and practical for transmitting over the internet. All the colors of the sRGB color space can be reproduced with a 24 bit image where each component of RGB is an 8-bit image with 256 different shades of brightness, which offered a potential of 16+ million colors. There were some professional TV and Flat panel monitors that were designed to display a broader color palette, but these were vary expensive and commonly used in a professional environment. Today, high quality RGB monitor displays are a bit more common.
The Adobe RGB color space being larger than sRGB, and has a greater capacity to replicate more accurate Blue, Cyan and green colors.
When you select Adobe RGB or sRGB in your camera to save your images in, you have selected industry standards for how colors should be interpreted by your target medium, so that those colors can be displayed with some degree of predicability.
When you are ready and happy with your image on your camera's LCD screen or computer monitor, and your are ready to print, your printer has the limitation of not being able to produce all those colors the way you see them on the monitor. Each printer, monitor and scanner has it's own limits of replicating color accurately within the large color space of RGB, so these limits of color range on the output device can be considered the color space of the device.
Color space designations is like instructions for what those colors are to be displayed as. The display or output device, might have a set of endemic instructions (ICC profile), that tells it how map those colors for it's own reproduction methods and technology.
Adobe RGB does not look radically different than sRGB. In fact if you switch back and forth between the two displays you may not see any change at all. Part of this reason is likely to be connected to the limits of your camera's LCD display device. The full RGB color space or even Adobe RGB color space can not be represented on that device, so switching the color space back and forth will present no visible change. So you first must have a monitor that can display some of these subtle differences.
If you intend to use the RGB colorspace to work within, you need to accept a more rigid color management work flow to care for those subtle differences. You will save your RAW file from the camera in the RGB color space. Your color monitor needs to one that can display all the colors of that color space, and it should be configured to display color correctly in your work environment. Generally people will use a third party color calibration system for assisting the color display of their monitor, that works to display colors while considering the limits of the target output device.
Your image processing software needs to be set to work in the RGB work space environment, one like Adobe RGB (1998), or ProPhoto RGB, and those images files need to be saved as RGB files. When it comes time to print to your professional printing device, you use the ICC profile for that target printer. All of this is done to help ensure the best possible care for the color with as few changes as possible being made to the image, as it is printed by a completely different technology based on inks and light reflectance rather than a technology who's base was using light and projection.
People who work in RGB color space must also remember to convert the image to sRGB if they display their images on the internet. The general idea behind this is that not all web browsers are capable of reading the image file's color space and then understand how to display the Adobe RGB image. And remember not all monitors display RGB anyway. So to convert your image to the sRGB color space is to give your image a chance to display correctly in everyones monitor or browser. An RGB image that is displayed as an sRGB image, will look muted and a bit dull compared to the sRGB image displayed as an sRGB image.
If your camera is set for the sRGB color space, your RAW file is still a wide gamut color space. You can still process your image taking advantage with all the features of your RAW file editor on your computer. And just like the pro photographers that are using RGB and practice careful handling of their image in a color controlled environment, you should apply good handling techniques of your color and work environment as well, even if you shoot sRGB.
You should be using the best color calibration for your monitor that you can manage, and handling your color in a proper workflow, in a controlled lighting environment that will assist you with making better color, contrast, and brightness adjustments to your images as you see them on your monitor.
Which color space you choose to use will be in part a choice of what your intended audience will be.
If you are sharing images over the internet, to be displayed on everyones TV or monitor, or for incorporating into different digital video formats, or sharing over the web (internet publishing), or for video presentations like power point, then your target color space is sRGB.
If you want your images printed for you at most consumer printing houses, then your color space is most likely sRGB as most of these printers are set up for running sRGB full time. sRGB is the file type that most of you here will be saving your final image in for display, whether your print it, or you are using it for digital display.
RGB is mostly a publishing industry color space, where the larger color space and gamut is needed to accommodate the inks used in the printing processes. Some professional photographers shoot RGB with the publishing industry standards in mind, for stock image sales. Many of the Stock agencies will not take your image at all unless it is still in the cameras RAW file structure. With this, agencies can work the file as they need to as a controlled output.
An image shot as sRGB and saved as a jpeg will not help you get back what was once recorded by the image sensor in the RAW file structure.
An image shot as RGB and saved to the cameras RAW file structure allows you to choose how you want to manage that image file in the color space of your choice, for all future uses.
sRGB images saved in jpeg format can print straight from the camera or flash card to a printing house like Costco or Walmart
Camera RAW files are not considered a recognize image file format and must be given a jpeg or tiff image format designation for printing at most printing houses. A camera RAW file can have a color space designation of RGB or sRGB.
A choice between using aRGB and sRGB gives you just as many colors for the image to work with, they are just different colors.
Keep in Mind!
I recommend that you, duplicate your original image file
first, then edit only the duplicated image file that you have saved under a
different name, this protects your original image file for whatever future use
needs you may have. Never edit the original file as a practice.
An important Color Spaces point
Color Spaces - RGB & sRGB
Color Spaces - settings of the monitor
Top Bottom
Your monitor's display settings makes a big difference in what choices you make when editing your pictures. If your monitor is not calibrated to a similar standard that other people's monitors are, then your pictures are going to look different on their monitors. And of course this is also true about printing, if you monitor is not close to correct display standards, then you will have a much harder time trying to print correct colors, exposure and gamma setting for your prints.
This is something you might care about if you share images over the internet, or are building webpages. sRGB color space with a gamma of 2.2 is a common setting for building webpages and sharing images over the internet. This is because at the time the internet was gaining it's popularity, more people were working with Windows based computer platforms, and Microsoft was building internet image standers for that purpose. This same sRGB standard has become a standard for poplar digital camera use, and thus has become a standard for consumer printing labs like that of Costco or Walmart, that can print direct from your camera or flash card if you shoot sRGB as a color space, and save your file in the Jpeg format. The point here is if you shoot in sRGB color space and save your images in the jpeg format, then you can print at these print labs, and the images will look much like the image does from your camera monitor, assuming you have not made adjustments to the camera LCD display.
The Gamma adjustment of your monitor display is a non-linear brightness adjustment algorithm that is needed to make the natural lighting of your scene appear natural when viewed on your electronic monitor. We mentioned before that monitors build for Microsoft Windows computers (with Gamma setting 2.2) were designed to show colors primarily to match that of the TV's of the day, and the needs of the internet.
Macintosh Monitors (with Gamma setting 1.8) were primarily set up to better assist the Publishing Industry, and so needed to be able show broader color gamuts of the RGB color space.
I have an old Apple Cinema Display that came set up at Gamma 1.8. As I am building this website I have adjusted adjusted my Gamma to 2.2 to match that of monitors of people that will most likely be viewing the internet through. This is so my pictures have a better chance of looking normal to your eyes of those view the internet.
The following displays the differences between the two most popular Gamma Settings. This image set was edited in sRGB color space, with my monitor set for 2.2 Gamma display. Now the colors are purposefully more saturated for this image to give the feeling of a warm sunset color, so the colors are not intended to represent color accuracy of the moment, the look was an aesthetic choice.
|
|
sRGB |
|
|
sRGB |
|
|
RGB |


Right or Wrong or whichever view you prefer in the above example, the point here is that how your monitor is set will effect your editing choices. In fact, I can't draw much conclusion for you in part because I don't know how your monitor is set up as you are viewing this.
But if you set your monitor and color space to a standard that is designed to work best for a specific output, you have a better chance of predicability of the outcome of the results.
What you do need to understand though is any color spaces can produce good saturated well exposed images, it's when you take your image out of the common workspace from which the image was edited in, is when you start to get variances. When you transfer the image from one technology to another, like printing the image, you need the assistance of ICC printer profiles that are correct for the output device and compatible with your color work space standard, like RGB with a Gamma of 1.8, or sRGB with a Gamma of 2.2.
The Gamma Adjustment
Gamma effects mostly the mid tones for adjustment, it will effect the shadows and the whites to a much lesser extent.
Gamma is a non linear algorithm adjustment for your monitor that helps to adjust your monitor's light output to resemble the natural linear light variation.
As you adjust Gamma, this also shifts color relationships as well, so Gamma adjustment tools also have you correct some for these color changes
An important Color Spaces recommendation
Gamma settings on your monitor that are lower than they should be will make the image look a little darker over all, while gamma settings that are higher will make the image look a bit over exposed, or lighter.
So even if you have a Mac monitor, your images will look darker on computer monitors designed for the Window based systems, and the inverse is also true for images created on monitors with gamma set to 2.5, like windows based machines, when viewed on Macs they will seem a little bright.
The images on this website
Images for this website were edited at a Gamma of 2.2. This means the images will be lighter than older Mac monitors still viewing at 1.8 Gamma, and in tune with Mac monitors set for 2.2 Gamma currently, and a bit dark for monitors displaying 2.5 Gamma settings for windows based machines.
So, my apologies for those seeing these images as too dark,
that always seems worse to me.
Color Spaces reference
Most people don't own third party color correction systems for their monitors, but in general this is one of the better ways to make adjustments and manage display differences between different out put devices. On some windows based machines, this maybe your only real option adjusting gamma, that is, through a third party color management program.
With Mac you most certainly can make fine adjustments in gamma, as these tools are available under System Preferences/Displays/color/Calibrate. It is pretty easy.
For people with older Mac systems that want to publish on the web, and share images over the internet, and use low budget printing houses for their prints, you can do what I did and re-calibrate your monitor to a Gamma 2.2 like the newer Mac monitors which are set at that current 2.2 default. A Mac can perform this procedure because their graphics cards allow for this adjustment. For making these adjustments in a MAC, see: The System preferences pane/Displays/color/calibrate.
Color Spaces - Settings of the Printer
Top Bottom
The most consistant color for the least trouble
Calibrate you monitor to Gamma 2.2. Set your camera Color
Profile to sRGB, Set your default image editing software to work in the sRGB
color space. When you share e-mail images, send image to most commercial
printers, design for the web, make power point presentation, use images in
video, or display on TV, your colors and light will be vary consistant and
quite lively, and you will have few problems if your monitor is adjusted
correctly.
An important Color Spaces recommendation
You do have the options of shooting in RGB in the camera, but for predictable results, you need the assistance of a third party color managements system to help you out, your image editing software needs to be set to a work space of RGB by default. You should have the ICC profile for your printer loading into your image editing software so that the color management system can adjust your monitor display those colors that will print out as you are editing your image.
Most commercial printing houses will print enlargements in sRGB and some will offer RGB as an option. Call ahead and find out how they are set up.
I prefer a printing house that offers an ICC printer profile as an option to download for my editing software. Not all labs offer this. The ICC profile describes the specific color space for the printer for it's inks, and specific paper, and surface that you are to print on. This information can be used by your image processing software, to display color and light on the monitor to help editing choices for the look of your final product.
What is White Balance
White Balance is the act of balancing the digital camera image sensor to the color of the light source, so that colors may be recorded as they would appear to our eyes under a neutral white light source.
The Sun emits a large spectrum of varying light frequencies, most of which are invisible to our eyes. The light we do see is referred to as the visible spectrum. The color of Daylight from the sun is fairly close to pure white light. We can simulate the light of the sun if we combine equal measures of Red, Green and Blue light together with the same intensity and saturation. These three colors are referred to as the Positive Primary colors because they can be blended to make white light, as well as any other color of the RGB color spectrum.

We could see the natural white light of the sun if there was an absence of atmosphere. The lower the sun is towards the horizon the warmer looking the light is due to all the atmospheric absorption and haze.
Man made light comes in many different colors that does not match the Daylight color setting on your digital camera. There are many times when the off color appearance present in our photographs away from a neutral color balance does not appeal to us. There are also plenty of times when off color balance makes our pictures feel exotic and interesting.
Image Sensor White Balance Adjustment
Your image sensor allows you to adjust the sensitivity to each of the colors Red, Green and blue that the image sensor records, thus allowing you to balance some of those odd light sources to a more neutral balance appearance.

A white object photographed under normal daylight balance should appear as white in your picture. White is not really the absence of color, it might be better to thought of as a balance of colors, reflecting red, green and blue light frequencies in equal measure. If your white object is shown in the picture as an off white color, then there is a color bias present in one or more light frequencies of red, green or blue that is not being reflected equally.
Color balance for the image can be achieved in two general ways. You can change the color of the light source to match the light sensitive medium, or you can change the light sensitive medium to match your light source. The digital image sensor of your camera uses the latter of these two options by allowing you to change the electrical sensitivity to one or more of the three primary colors. This means you can adjust your camera to vary wide range of colored light sources within the visible spectrum that may be natural, or man made.
The terms White Balance gets its name from the act of presenting a white card before the lens, and then letting the camera light sensor adjust to the ambient light that reflects off the card. The programing of the light sensors works to balance the sensitivity of the Red, Green and Blue frequencies so that they are represented equally for showing white or a neutral gray tone under this light (see above RGB graphic).
After performing a white balance for a scene, those settings could be saved and used for as long as you shoot under that light.
White Balancing works great as long as there is only one consistent color for the light that illuminates the scene. Two different light sources of different colors coming from different direction does not present a balancing option. Actually you could balance for this if it were in your power to filter one of those light sources to match the other and then perform a white balance. We'll talk a little about multiple illumination sources farther on down the page.
"Preset Light Balance Camera Settings"
Top Bottom
Your digital camera has a number of preset light balanced settings that you can select for shooting under a various light sources. You'll note I did not say White Balanced, but Light balanced. These are approximate light balanced settings, and the camera is not making a specific white balance adjustment for your unique lighting.
When you choose one of these light balance presets, you are choosing speed and convenience over accuracy. They are pretty good adjustments to light balance, and most people will be quite happy with these approximations, but these are not white balanced adjustments.
It is quite common for people to make small color adjustments during the image processing phase before printing, and so only but the most meticulous photographer performs actual the white balance procedure. This is not to say you should not make White Balance apart of your work flow for taking pictures, this could save you time from editing, and leave you more time for shooting.
Your camera will most likely have the following settings as preset light balance options. Your camera manufacturer might have used different preset color temperature settings in place of the color temperature values that I have listed here.
|
Light Balance Camera Presets |
||
|
Name |
Temperature K° |
Comments |
|
Daylight |
5200 |
Use when Sun light is illuminating your scene or falling on your primary subject. The color temperature of the sun is closer to 5500 k° This 5200 value is what Canon uses on my camera as a preset. |
|
Shade |
7000 |
Shade illumination is light from the blue sky, so this setting reduces the strong blue presence of that light. |
|
Cloudy |
6000 |
This setting will warm up color a little from what you would see if you were shooting under the daylight setting while it was cloudy out. |
|
Tungsten |
3200 |
The most common tungsten lighting is the common house light bulb. Tungsten light is a warmer yellow orange color than daylight is. Recently many homes are moving towards using daylight fluorescent bulbs as an energy saving compliment, so be aware of what is relative to your situation. |
|
Fluorescent |
4000 |
Fluorescent lights can be produced in many different colors, and even have spectral spikes of green color. As a result, selecting this setting may or may not give you a good color balance. A proper white balance could help shooting under these light quite dramatically. |
|
Flash |
6000 |
Balance for spark of the electronic flash. This is just a bit cooler in tone than Daylight balance. |
|
AWB |
3000-7000 |
The camera will attempt to balance light that it sees while you take the picture, this may be any color temperature setting from 3000 - 7000. The camera automatically takes a guess based on the reflected light in the scene. There is no guaranty this will give you accurate results, but it does better than you might think it possible. |
Color Temperature
Top Bottom
The numbers you see in the above table are the Color Temperature settings in degrees Kelvin. They come from studies of Black Body Radiation, where an iron ball is heated so hot it begins to give off some light and color. Each color is noted at a specific temperature and is referred to as Color Temperature in degrees Kelvin. A color temperature rating is vary helpful for stating what color a given source light is that you are acutaly working with. You can often find these color temperature ratings stated on the packages of common house light bulb lighting.

You can see by looking at this scale that the warm and white tones of this color chart can represent the color of the sun as it appears to us throughout different times of the day. The sun it self is a Black Body experiment in action emitting white light constantly. The blue of the chart does not represent cooler temperatures or color of the sky, it is just lucky that our atmosphere reflects a similar color of blue. Blue is actually the color of hotter objects, and some stars do emit these hot temperatures, and they tend to live shorter lives by burning out quicker than our solar sun.
File Formate Limitations on color correction
Top Bottom
If your preference is for saving your images in the camera as Jpeg or Tiff images, then you need to select a presets for the light balance you are shooting under, or perform a White Blance before you take the picture. This is because the camera is performing image processing functions describing how the image is to look presented in the jpeg image format. Though some additional editing may be done on jpeg images at a later time during processing to correct for off color balance, your latitude for adjustments to the image is much smaller after the image has been saved as a jpeg, and so it is best to have your color correct before it is saved as a jpeg file format in your camera. See Jpg File for more information.
If your preference is for saving your images as a RAW File Format, it is not even mandatory you set a light balance preference at all. Any adjustment to color temperature may be preformed during editing. This is because the RAW file is just the raw unprocessed data that comes from the image sensor. No limitations have been set for the data to perform to a specific file format or parameters. During editing of the image you can select any of the presets for color balance, or you can even balance the color manually to your preference.
For instance if you had a white picket fence in your scene, you could balance to make sure that the color of the fence shows equal amounts of red, green and blue for those pixels. This would make the fence appear white. If the fence was a true white in reality, all the colors of the scene would also be corrected for.
In this graphic below, I throw out the color balance pretty far by making a custom white balance off the cover of a red book. I did this so you might see some of the damage to colors by not performing good white balance before shooting a jpeg image. In this example I only attempt to correct for the bad color after the image has been shot.
Correct for color or white balance before you shoot with Jpeg.
Color Correction for
Jpeg after you shoot has limitaions. 
The first image on the left shows the color balance I shot under. The second image shows my attempt at correcting for this off color balance during editing the jpeg image. The last image on the right shows the RAW file that was shot under the same off color balance and was also corrected for during processing.
The RAW file on the right gets edited in Adobe Camera RAW CS4 as it needs a RAW file editor because RAW data is not a standard image format. With the gray card in the image, I can select a portion of the gray card using the White Balance Tool. It takes just a fraction of a second to preform the white balance. When I compare this image of the color chart with the real color cart, I find those colors are corrected quite accurately. The RAW file has all the RAW digital color data to work with, and so it has far more latitude to manage accurate color.
This jpeg image file is edited in Adobe Photoshop CS4, and the application allows you to edit independently the RGB colors via the Color Balance tool. Every image editing program has a similar adjustment option for these files. Using the independent sliders for RGB adjustment is great for minor color adjustment.
In this Jpeg example I attempt to match the colors and gray scale to their correct balance of equal RGB values. The correction for this shot is outside the range of possible correction, and an additional layer was made using this tool in effort to force adjustment farther. In other words the proceedure had to be done twice and you are seeing the combined effect of both layer adjustments to color balance.
The final jpeg result suggest that I got close to the gray card and gray scale tones, but that the colors in the color chart are nothing like those colors that you see in the RAW file shown on the right, or on the real color chart. This adjustment was far too extreme for the jpeg file.
The only point to this graphic is to show you the extreme latitude of color adjustment you can have in post processing by shooting in the RAW file format.
A proper color balance performed before you take your picture avoids all of the difficulty of trying to balance color in post, regardless of the image file format you are working in.
When not to perform a Custom White Balance
Top Bottom
If think about it, if you neutralize the color of light for every scene so that all color appears as if they were shot at high noon under white light, then your sunrise and sunsets are going to look less than appealing. Color bias is relative for shots that are meant to appeal to people in an emotional way.
There are emotional pictures however that do require accurate color balance. Wedding pictures had better show that wedding dress in at least some of those shots in perfect color corrected and appealing light.
For shooting sunsets, you can set your light balance preset to Daylight, so that the color you capture is of the warmth of the evening setting sun light as it passes through the atmosphere.
To show the true grace and beauty of natural things, like flowers and birds and other elements of nature, a proper color balance is best. For product photography, for publication, education and science, a good White Balance is pretty much mandatory.
Performing a Custom White Balance
Top Bottom
The procedure for performing a white balance was already hinted at near the top of this page, and can be done several ways.

Kodak Gray Card, Industry standard, color neutral White Balance Card. Mannequin
and stuffed furry animals not included.
Your camera will have an option for a custom white balance, for which we tune the camera to match the lighting of the environment. We use the available light that is illuminating the scene to illuminate a neutral white card, or gray card, that was manufactured to adhere to fairly strict standard of exhibiting no color bias.
Any color bias that is present in the lighting of the scene will now be reflected off of the gray card that is placed before the lens for a reading. No shadows should be falling on the card, and the card should fill the entire frame of view of the lens. The card should be placed directly in front of your subject if there is any chance that the light illuminating your subject or scene is any different from the position where you are shooting from.
These cards must be kept clean and dry for good performance.
If you have more than one light source illuminating the front of your scene, then angle the flat plane of the gray card about half way between you and the more prominent light sources. Angling the card this way can help pick up the mix of light that is influencing the front of your subject, like the presence of open sky.
When performing a White Balance procedure, some cameras might perform this a little different. For instance, when a Video cameras performs a white balance, it does so buy going though an automated procedure and then the result of that balance is applied automatically for all subsequent shots.
My dSLR camera wants you to first take a picture of the white card or gray card. You do this in the full presence of the light you are shooting under. I prefer to switch to the AWB mode for performing this step of photographing the gray card, this will just make it easier for the camera to get close to a neutral balance to start with.
After having shot a picture of the card, you will then go into your camera menu system and select the Custom White Balance function. It then analyses the light of that picture you just shot, and balances it for a neutral color balance. This becomes a saved custom preset for this specific lighting situation. You now select this Custom White Balance from your list of presets.
You can now shoot all your shots under this light balance using the preset for Custom White Balance. If you change the shooting angle around your subject, you might want to shoot another white balance. The sunny side of your subject might be balanced different then the open shade illumination.
You might notice that there are subtle differences in color when comparing this custom balance to other shots made under the closest approximate color balance presets. Colors from the custom white balance should seem a bit more rich, and nice looking. Whites should be neutral and white. Having slight biases of off color balance can often mute many colors of the scene.
The Gray Card has two uses. It helps the digital camera get a correct white balance for the lighting you are using and it also helps with exposure placement for the light meter.
Acrylic Filter
Top Bottom
I sometimes use an acrylic filter in place of White balancing off of a white card or gray card. I use an ultra clear, neutral, high quality piece of acrylic plastic that is large enough to be placed in front of the lens. It's important that your acrylic plastic be truly neutral and not inhibit any of the visible spectrum.
 Acrylic
Filter can be used to balance the image sensor so that the light source has a
neutral color balanced.
Acrylic
Filter can be used to balance the image sensor so that the light source has a
neutral color balanced.
The cut shape of the plastic needs to completely cover the front of the lens. I made mine square at first then rounded off only three corners. This forth corner gives my fingers a hand hold on the plastic.
One side of this acrylic plastic is then finely sanded with 600 grit or even finer grade sanding paper so that no details are being seen through the acrylic.
Place this filter over the front of the lens. Then take a picture in the direction of the light source/s.
The diffusion filter will show the diffused color/s of the light illuminating the filter.
Collecting the right results with this method is a bit trickier than using a gray card. The nature of the filter is we can see through it. So we can take our white balance looking directly at the light source if you want to collect just the source, or sometimes you can point this filter towards your scene so that you are getting a blend of the reflected light.
If you are using the filter in snow scenes or on water, pointing the filter at what you are shooting will work well. If you are photographing a brightly colored building, then pointing the filter at your scene in this case can throw off your balance. Consider the colors of the reflected light in your scene before you point the filter straight at the scene.
The magnification that the lens is set at when you are shoot through the filter can influence the results. For example if you were on telephoto and pointing lens at the sun could yield a result of the sun filling the whole view of the lens. If you used a wide angle setting were the sun would be smaller, then more blue sky would be included in the light balance for the filter. How you choose to collect a white balance for your scene has a lot to do with what light you believe is illuminating you scene. It can be a little tricky until you understand how best to collect light for your balance under your given set of circumstances.
After you have taken the shot of your filter, switch to your camera menu and select the Custom White Balance option for the picture you just shot of the filter. The camera will white balance the light of this shot. Then use this white balance setting for your scene by selecting the setting from the Custom White Balance preset.
One of the advantages of this method is that the acrylic filter is tough and easier to pack around with you into the field. The filter is also smaller than a full size gray card which is large so that you can move the card away from the camera to get light on it and still be able to fill the frame with the view of the gray card. I just wrap the filter in a cloth to keep big scratches off of it and to keep it clean. You can wash it, and even resurface the plastic when you need to, so it will out last the Gray Card.
For studio work the gray card might be a little more practical to work with, however I have used the acrylic filter in the studio with great results.
Making your Light Balance correction during the processing phase
Top Bottom
The normal White Balance procedure is about correcting for light before you take the picture. Another option if you prefer, is to instead get close to the correct balance perhaps using AWB or an appropriate preset selection, then do the final correction for light balance during processing the image. This can be done if you have a known color reference in the image.
This example shows two popular choices, the Kodak Gray Card and the Greta Macbeth Color Cart. The gray tone of the Gray Card is neutral, so the RGB values for this card should be equal if your color is correct. The Greta Macbeth Card is an option for more professional technical analyses sometimes used in motion picture and video work, which can be used with vector scopes for balancing color.
I show you this procedure in the following example.
Again keep in mind the RAW file does not require you to use a specific preset of light balance. Naturally it helps you to use a preset that gets you close to the correct white balance so that you see the image on your LCD screen in the best presentation.

In frame #1 I take a picture of my scene using a close light balance preset. In the second frame I shoot the same way from the same angle but this time I include a gray card or a reference source for correct color. It is during the editing that this reference source becomes helpful for getting to the correct color balance of the scene. I can use the Auto White Balance function of my image processing software and target the gray card. The image processing application will then neutralize the color shift to the correct color balance, as shown in frame #3. I now just transfer these color balance settings over to the original picture I shot to achieve correct color balance, as seen in frame #4.
It is the act of having a known color reference included in the scene that is shot under the same light that allows me to get to a neutral color balance. Those white flowers may not have been created by nature as a perfect pure white, and had you used those peddles to base your color balance on during editing, then you could still be off on your color a little. A true color reference allows you to eliminate any error in your interpretation.
The Kodak Gray Card is a good neutral industry standard. When you have your image processing software perform an auto white balance on the gray card, those color settings of different RGB values change to equal values for the gray card, and the image becomes neutrally light balanced.
What is LCD Display
LCD is an electronic display screen that has come into use on just about every electronic device made from wrist watches to cameras.
Your Digital camera likely has three LCD displays on it. One on top of the camera, one inside the viewfinder, and a full color display on the back. In contrast against the CRT tube, they are lighter in weight, use less electrical power, and allow for a nice flat profile for the entire operating system, making them easy for design engineers to place just about anywhere ergonomically.
Through these displays, you have access to information for all of you camera functions and computer menu settings. If fact, how you operate the camera has changed so much that there are no mechanical exposure controls on the outside of cameras anymore, leaving the Manual film camera which use to be the work horse for any profession photographer a thing of the past.

What is LCD.
View of Image size of the LCD screen on the Canon 5D Mark II
Advantages of the LCD screen
Because of technology developments of the image sensor, the computer and the LCD displays, your image captures forgo, film cost, film processing, time delays, processing cost, and printing cost associated with just getting your first look at your pictures. It's huge game changer.
Now days the video play back of your images on the LCD monitor and it's Histogram presentation, save Professional Photographers and you a whooping sum of money, making sure you can inspect the results of your image before you leave the location as insurance against missing the good shot.
Top Bottom
LCD : Buying a New Camera ?
If by some chance you have not purchased your camera yet, I would say the LCD monitor is a valuable enough assets that you should consider purchasing a camera that has these attributes :
- High resolution
- View that represents 99 % of the framing
- A large screen size presentation
These can be that helpful and important. LCD monitors in the past have been rather small and low on display resolution, and this almost defeats the need for what the LCD monitor is suppose to offer you.
Top Bottom
LCD Brightness Setting
LCD screens offer a screen brightness adjustment control for viewing it under various lighting brightnesses.
Many camera also have a light sensitive cell on the camera body that allows the LCD screen to adjust it's brightness automatically relative to the ambient light present.
Although I prefer to leave my LCD monitor set so that it displays at it's middle setting, and then just leave it. If you brighten your display up some so that you can see it in bright light, you might get fooled into thinking that you are over exposing a bit. The histogram is meant to help you determine the actual exposure brightness levels, but just the same, if the display is constant, then you have just one move visual reference of gaging exposure.
Leaving the LCD display at it's brightest setting will also
eat up more battery energy. This can also effect the presentation over time as
the screens can suffer damage from long or bright displays if use too much like
this.
A "What is LCD" important point on concern
While we are talking about LCD brightness, don't forget you have a backlight button on your SLR camera for the top LCD display. This is a big help when you are outside shooting night shots and you need to get at camera setting data.
The LCD display monitor shows the image you just shot in playback, or when you want to scroll through the registry of your shots that are still on the memory card. But a few cameras have another vary cool feature, "Live Video".
Top Bottom
Live Video Feature
Live Video is a great feature for when you need to get your camera into angles that your head was not meant to be in for long periods of time. I can move my camera through a crop of flower easily while looking at the live video display without tromping around and flattening them, to see if the light and patterns are looking good for a possible image, when you find one, then you can set the tripod up.
Live Video mode works by flipping the mirror up out of the way, and opening the shutter, so the image sensor can capture video live.
I use Live Video while the camera is on the tripod for composition and framing of shots. It's a lot like working with large format cameras only better, your view is bright and right side up.
There is room for improvement from manufactures here to build more functionality into Live Video, as on some cameras AF functions do not operate during Live Video mode. But to be fair, on the motion picture movie camera, you don't have Auto Focus, all shots are blocked with actors for the scene, that implies, people have marks on the floor they must hit in order for the camera man to hold focus on them, so focus is set and adjusted manually on those cameras also. The video image from the Canon full frame 135mm 5D Mark II is just beautiful, Now I just need a computer and video software to edit in it.
Top Bottom
LCD : Hot & Cold Care
LCD displays are a bit sensitive to heat and cold. Avoid placing your camera in the sunlight that comes through the window of a small enclosed area like a car. When I take pictures in sub-0 cold temperatures I wear the camera under my jacket until I am ready to shoot. When I bring the camera in out of the cold and inside a warm building, I wrap the camera up inside my jacket into a ball shape and lay it down somewhere allowing the camera to come up to room temperature at a gradual pace. This illuminates condensation from forming on the camera that can be bad for electronics.
Well that is pretty much it, it's not so much that you have an LCD display as much as what the display is offering to you in the way of information when you are shooting. It's LCD displays just makes working with video and photography so much easier, lighter, and less power hungry then the old CTR screens.
Histogram Graph
The Histogram Graph is a supreme exposure aid used by the analytical digital photographer for better exposure placement. Under some situations, the light meter is easily influenced into false exposure interpretation. Many people check their exposure accuracy by looking at their LCD screen, and this can give a false impression if the screen has not have been left at it's factory default settings. What's more, it can be hard to see under the harsh sun light.
The histogram graph is pretty easy to read and it represents the relative brightness values that the image sensor has recorded for a given scene.
Your histogram graph is representing the full range of light as 255 different levels of brightness displayed as vertical bars. The bars in the middle of the graph represent the middle tone values of your scene. The far right side of the graphs is the brightest highlights, and the far left is the darkest shadow details.
The height of the individual bars represent how much of your entire scene is recorded at this specific brightness value.
Do not associate the placement of the bars on the graph, with the left to right horizontal placement of light across your scene. A bright highlight on the left of your scene appears only on the right side of the graph.
What should a proper histogram graph look like?
There is no real right or wrong here, different scenes may show the distribution of light and the bar heights at different levels. There are many different lighting situations that people take pictures under, and the graph only represents what light the image senor can record.

If the bulk of your bars are on the left half of the histogram graph, then you have a low key lit scene, or it is also possible that you might be under exposing your scene. Interpretation of what you are tying to capture of the image is the only real relevance.
If you are shooting on snow in the sun you should see a shift of most of the light being more to the right half of the histogram graph if you have properly exposed for the snow. In the snow scene shown above, there a lot of trees in the sun and shadow on the snow, so the bulk of the brightnes tones of this scene are middle tones.
The histogram graph is not showing the Dynamic Range of the light that exist in the scene itself. The graph represents how your image sensor has recorded the light on the image sensor. So changing exposure is how you redistribute the placement of the light on the graph for the next shot.
At first using the histogram graph may seem quite abstract, after all it is hard to relate a region on the gram with a particular brightness value. It is true, in order to use the histogram effectively you may at least want to learn certain regions of the graph as certain bench marks that you can relate to. I will go over some of these here, but I will spend more time on this under the section of Photo Light Meter.
Histogram Graph - Proper appearance of the Histogram
Histogram - The ends of the Graph
Top Bottom
Perhaps the most important part of woking with the histogram graph is the light at the extreme ends of the graph. It is quite common that when you take a picture outdoors you run a risk of overexposing in the sky quite easily. Your Graph will show you this by the displaying a bar height that is fairly tall on the last bar to the right side of the graph.
It is okay if you get a some light in this bar, but smaller is better. This is because this last bar represents you brightest highlght, and if you want any shaping or tonality to occure in brightest highlights of your image, it must all occure below this bitghtness level, this bar is your peak brightness.

If the bar is high here, there is a strong chance that are scene highlights that are being lost do to your exposure setting. Photographers referred to this as "clipping".
Often a good exposure is one that records the full range of light of the scene without loss of details. You want all the shaping that the light can give you so that your image can reveal form. Clipped highlights can kill that, the appearance of clipping is like looking at a blank sheet of paper.

This is generally to be avoided on both sides of the histogram graph. All
though clipping of the shadows is considered to have smaller negative impact on
the viewers than having out of control clipping of the highlights.
Realistically what would be the point of lacking tonality in a photograph
anyway. Your eyes can see some tonality differences in shadows and highlights
even if you do not notice details in these areas, so the photogrph should also
show some varyation in these areas.
It is quite natural on sunny days that the dynamic range of the outdoor scenes often exceeds the range limits of what the light sensor can record, especially if you are shooting towards the sun. It then is quite common that you might have to choose what details are more important for recording your picture. Do you favor the highlights or the shadow areas knowing you may have some clipping. Or do you change your POV (point of view) altogether by reframing to avoid those areas that are forcing you to risk some clipping of this exposure.
The answer to where to place the most exposure may depend more on what you are shooting.
Nature scenes and landscapes look more natural if we limit the amount of clipping of the highlights, so don't let the bar on the graph get vary tall.
People that photograph other people are vary concerned on the placement of flesh tones, so they ensure that these details are present somewhere near the middle of the graph ± one stop. However if the person is wearing white, like the importance of a wedding dress is to the image, the subtle highlights of that dress are quite critical, and clipping in those highlights would not be acceptable. After all, someone paid a lot of money for that dress and the bride wears it once,... hopefully.
So how can you incorporate all of the light range into an image without clipping part of these important details?
People photographers often use reflectors or electronic flash fill as light aids to boost more light into the shadows or mid range of the image, so that they can readjust exposure to a darker settings to include the important highlights while bringing up the shadows and mid tones. They in effect reduce the scene's dynamic range to fit the image sensor's dynamic range.
In short, allowing the light to slope down to the vary far right of the histogram graph, or to the vary far left, is a good placement of exposure. It is when we are letting the light in the end bars climb up that the image is being hurt by loosing important highlights or shadow details.
There are a few acceptable highlights that it is okay to let completely blow out. A bright light source like the sun, or a specular reflection off of a shiny object or the water, that is mirroring the light of the sun. Most bright street lights and or car lights are lights that should carry some color and tonality to them. A vary small measure of haze or clouds immediately next to the bright sun may also be beyond the range of your exposure. What determines how much clipping is ultimately is acceptable is based on how does the final image looks to you.
If I am shooting a snow scene, I take extra caution to not let the last white of the image touch anything but the smallest portion of the last bar on the histogram graph, and I may not even let snow reflectance reach this bar at all. Some snow conditions can present mirror like reflections and sparkles, but usually snow is not thought of as a light source it self, and should contain tonality throughout.
I will also mention here that if you save your images in the camera as the 8-bit jpeg format, that your image only has these 255 level of brightness for each color channel to work with.
If you save your images in the camera as the 14-bit RAW file, each bar of the histogram represents about 63 levels of brightness. This type of image file gives you much more room for controlling the highlights later when you are editing. This means that even the brightness values of the last bar can be pulled down into lower brightness values that can then add to shape and definitions of details.
Slide film has about the same dynamic range as the digital image sensor, but when shooting slide film photographers never had the luxury of looking at a histogram graph to aid in exposure placement. There use to be a saying when shooting with slide film, "Expose for the highlights and let the shadows fall where they may".
Limiting clipping of shadows
If you're shooting a low key image, good lighting and exposure control will mean you don't have clipping in the shadows, even if the details that are present in the shadows are barely recognizable as usable details. What good is jet black space over large areas of the image to a photograph.
It generally is also a good idea to have at least some bright highlight somewhere in the image that will help serve as a reference point for our eyes, such as a bright reflection coming off a shinny object, like catch lights in the eyes, or a specular light source like a light bulb. This is also making good use of the dynamic range of the scene.
If your image has just medium gray values and dark shadows, it is not going to be a vary appealing look. Think back to the B&W movies of the spy in the dark shadows of the street scene, the street light at the end of the block is not a low brightness value.
Histogram Graph - Ends of the Histogram
Histogram Graph - Exposure Brightness Placement
Top Bottom
Making good use of exposure placement usually means you have more control of shaping of highlights or shadows when you are editing for the final image, which can help create a more appealing image. So getting close to your desired exposure placement will help you in the editing of the image.
If you shoot an exposure of snow and you accept that the exposure meter is going to under exposure here, then you can use Exposure Compensation to adjust for more exposure to get those highlights back up to where they should be.
Where you place the light level of the scene for any particular subject is a matter of personal preference. Your just trying to use exposure placement to expresses your subject favorably within the framed scene. Ansel Adams was great at taking middle toned scenes on B&W and expanding the highlights and shadow values of those mostly middle tone subjects, out towards the ends of the dynamic range of the final printed image.
When shooting scenes intended to have dark shadows, it does not hurt to shoot the scene with a bit more light into those dark shadows then you are intending to present in your final image. During editing you can easily adjust the brightness cure and pull those details down into darker regions of your image to your desired effect. It is much more difficult to get good image quality trying to pull shadow details up that were shot too dark, into a bright tonality so that you can see those details. This can result in bringing up stronger the pixelated signal to noise ration problems an image can have.
Regional brightness reference
The Histogram graph does not come with a stepped gray scale across the bottom of the graph, so I set up few examples that might help with understanding regional brightness in steps of ± one stop increments.
The middle tone.
To begin with, your light meter may use complicated algorithms and regional sensitivity differences within the viewfinder to read the light of the framed shot.
Histogram Graph -
Middle Tone 
ER = Exposure Reading in this example, it is the exposure meters interpretation of light, it allways strives to return a reading for a middle toned value between Black and White.
In this histograpm example, I photographed a plain White towel and let the light meter determine the exposure. I dropped out the normal background of the histogram graph and I am showing here the white towel.
The camera light meter has placed the resulting exposure of this towel as a mid tone image, not as a white. This is the basic job of the light meter, to average the light of the scene and set the exposure for the middle tone, so the white towel is placed between the brightest white and the blackest black.
You may also notice that this curve is not dead center in the graph, and this is rather common for most all digital camera manufactures. Camera light meters are not calibrated for a purfect 18% middle gray value, they are generally a bit less. We go over that in the section Photo Light Meter.
The narrow inverted bell shaped cure shown on this histogram graph is showing that the dynamic range from the brightest values in this image to the darkest values is rather narrow, and perhaps only a stop and a half wide. This image is rather flat looking as far as light range is concerned, and this is a histogram graph example of a low contrast image.
You can see the curve is made up of little vertical bars, and just to rehash what we talked about, there are 255 brightness values represented across the graph.
So if you take a picture of a plain white card you get a gray picture of a white card. If you take a picture of a plain black card, the camera will attempt to give you a gray picture of a black card. Luckily, if you take a picture of a gray card, you get a picture of a gray card.
To make this white towel look like a white towel, an exposure compensation correction is needed, or you can be satisfied with the gray towel and try to brighten it up later during editing the image. For best image quality sake, it is best to shoot the white towel as a white towel.
In this next graphic I superimpose a number of graphs on top of each other, to show you where the different graphs would be if I only adjust the light meter in ±one stop increments as I take an additional pictures of the same towel. The lighting was not change.
Histogram Graph - ±1
Stop Increments 
You can see where the peaks of the bell curve of these one stop changes in exposure are in relation to placement on the graph.
It would be nice if there were some small marks outside of the histogram graph that indicate these steps in exposure, but since we don't have that you can kind of get an idea of how much your exposure adjustment will shift across the graph based on the amount of exposure change you add for the next shot.
The histogram on your camera most likely has these line dividers that break up the graph into five parts like the ones that I show here. The only meaning of those is to divide the histogram up into equal sections. So 255 brightness levels are divided into five groups of 51 steps of light.
If you can remember the distances of least where the peaks of the ± 1 stop of light changes are then you can intuitively see how much correction may need to be added to, or subtracted from any additional exposures in order to place exposure values where you want them.
So back to my white towel example
If I wanted my towel to appear white to begin with in the first shot, I would take an exposure reading and then make an exposure compensation adjustment of about +1.5 to +2 stops of light, this would place the towels exposure more in the visual range of were we might see the towel with our interpretation of white.
I took this example to +2.5 stops increas over the normal exposure reading to show you that this towel is now white, and the graph shows that there is no clipping in the whites on the histogram.
Histogram Graph -
Placing white where white should be 
Just how bright this white should be is somewhat subjective, but your eyes and mind work together to make you feel that a white towel is still white when you are in any variety of ambient light brightness levels. I don't want to push the towel exposure to far to the right because I want to preserve the texture of the towel which comes from the shading around the Terry Cloth strands. This would mean watching that I don't let the last bar on the right of the graph get taller than maybe one small step upwards.
In this towel example, I have filled the frame with just one subject, and it completely covers the entire frame, this is not a vary common example for a real world scenario of most photographs you will shoot.
If you are shooting a picture in winter on the snow, you might have a wide range of features at different reflectance values. You need to be aware of which type of exposure metering style method you are using, so that you can interpret what the light meter is likely to see and be judging in that framed shot. Is the area of the shot composed of more trees than snow? Is the snow in the sun or is it in the shadow? All of these brightness values influence the light meter's exposure placement.
If you feel there are too many variables, it's okay, let the meter set the exposure, take a picture and examine the LCD screen, and the histogram. Watch for the ends of the histogram for potential clipping of details, and then adjust the exposure according to the way you want to see the image.
Rest assured though, you can eventual get vary familiar with how a light metering style is reading a scene, and you can become a good enough judge of what amount of area a brightness value dominates the scene, and then make an exposure compensation adjustment on the first shot. The section Photo Light Meter will help you develop that skill.
You may have noticed in the above diagram of the histogram graph that there is about 6 stops of dynamic range total from end to end for the image sensor if you are shooting in the jpeg format.
If you are saving your in camera images in the RAW file format, the appearance of the histogram graph will not change, the image appearance on the LCD screen will not change from that of the jpeg file, it is only during the editing phase that you can take advantage of the benefits of the RAW file format to gain an additional 2.5 stops of recoverable details shared between the shadows and the highlights.
You may have also noticed that you have about 2.5 stops of adjustment towards the highlights and 3 stops of light adjustment towards the shadows. So you need to watch your highlight just a bit more carefully than the shadows or they can get lost off the bright end of the dynamic range.
Histogram Graph - Exposure Placement
Histogram Graph -Examples
Top Bottom

In this image of a marine bird, the histogram shows two different areas of the
graph with their own peaks, instead of one single bell shaped curve. That's
okay, the graph is just showing what brightness values exist in this image as
well as the quantity of the pixels at these brightness levels. Notice at both
ends of the graph that the peaks are vary low, so it is likely that there is
vary little or no pixel brightest values in this scene that exist beyond the
dynamic range of this image capture.
Notice also the delicate white shading and shaping of the white feathers on the Puffin's face, none of that area in the picture appears to be blocked up as a solid block of single bright tone, this is what you want to see in your highlight, shaping and smooth textures. The same is true for the low light areas of this image. The only place where we might loose some shadow details is in the pupil of the eye, and that should be black, and likely the darkest black of the image. If it were a light black tone, then the bird would appear to have Cataract problems in the eye.
Marsh Scene

This fall scene is actually more than one picture, it is an HDR (High Dynamic Range). It was made from three images taken at different exposures, and is later blended together during editing. The reason for three different exposures is because the natural dynamic range of the scene exceeded that of what the image sensor could capture alone in one single shot.
Notice in this HDR image, that the ends of the bell shaped curve do slope down to the out side edges of the graph. However, the last bars on both ends of the graph do show that a lot of pixels are represented here as the height of the bars are climbing up taller than surrounding pixels. This suggest that there are pixels in the natural scene that are still outside the range of what the image sensor captured and that those brightness areas are not represented in this image. So this means we have clipping. These are areas of the image that exhibit no details, we have just pure black or pure white.
Clipping of brightnes and details are not normal to our eyes in nature, and generally you don't want to see it in our images either.
The tall spike on the right of the graph is the sun, and flare of light from from the sun. It is not too surprising that we have a spike in the histogram graph when you include the sun in your image, and you should expect that this light will be represented like this, it is far too bright to include into the scene as anything but the brightest part of the image. To tone the sun down by exposure on a nice clear bright day like this would mean making the rest of the natural scene would go much darker, and I wanted to see the grasses and other details throughout this scene easily.
If you do not have the sun, or a bright specular light source, or reflection in your scene, and you are getting this kind of spike on the right, you are way over exposed. Even if you are shooting a high key scene, you should see shaping details in your brightest whites, and the last bar on the right should not be climbing up the sides of the graph.
RGB Histogram Graph Display
You can also display on your camera the histogram graph showing a different graph for each of the independent Primary RGB color channels. There is no difference here with how you read this graph than the other histogram graph display.

RGB Histogram Graph for the Crocuses image above.

If any of the RGB color channels has a tall bar on the far right or left of the graph, then that color has reach is maximum saturation for that color and brightness, and it means the color is clipping. If you want details in those colors then you need to make an exposure change so that you can be sure to capture those details.
Just like with any exposure that has some clipping, you would reduce exposure to ensure capture of details in those brightness ranges.
The left side of the graph means that that color is less represented in the image, and so not vary prominent.
So ideally you don't want any of the color clipping, and each of these RGB graphs often times look quite different than the other.
A red ball would will show less presence of bars in the graph in the blue and green frequencies.

If you looked at the link Color Images under the Photography Basics section, then you are familiar with the three Primary colors of light being Red, Green and Blue, and that these three colors are all we need to blend together to make any color of light that we see with our eyes. The image sensor only records light brightness in these three wavelength or RGB. Where you see an over lap of the Positive Primary colors of RGB you get the other Subtractive Primary Colors of Yellow, Cyan and Magenta. This explains the yellow and cyan and magenta areas shown in the RGB Histogram as overlapping regions of RBG values.
If you took a picture of a truly gray or white ball, the three color histogram graphs of RGB should appear to have almost equal bell shaped curves. If the graphs are not similar then this could also be an indication that your color balance from your light source is not balanced for your picture color balance or picture style setting.
If I am looking at any other color in the scene other than a true gray or white, I certainly could not tell much about color balance, I would not know how much was suppose to be real color of the object as shown in these three color channels, and how much of that color was a light balance issue. However, if we are looking at the image on the LCD scree, even the less discriminating observer can usually tell if our color balance is way out of whack.
Exposure Compensation Setting
Exposure Compensation is an intentional exposure adjustment away from the light meter reading exposure that your camera has provided, for the purpose to arrive at your desired exposure.
Camera light meters have some draw backs reading the light of the scene. They do a great job of averaging the many different luminance areas of light and dark, but they don't have the capacity to understand the predominantly bright or dark reflective scenes. That is to say, they tend to over exposure dark scenes and under exposure light scenes. So to get the exposures nudged into the right luminance range requires an analytical interpretation and adjustment to the exposure of the scene from you.
There is also the subjective side of your interpretation of the scene, for which the light meter is going to have no clue on how you want this scene to look
The light meter sees objectively, attempting to provide a averaged reading of light and dark areas of your framed scene, what's more, the light meter is designed to read only the middle tone value correctly.
So incorrect exposures are more frequent than you might want to expect from your expensive camera purchase, don't worry, this is rather common and you can learn to read from the scene what you want, recognize the light meter's limitations and then apply the correct through the use of Exposure Compensation.
Exposure Compensation is a great feature to use for making exposure adjustments away from the light meter's interpretation of the scene. In fact I would say it's design is brilliantly simple and intuitive.
We generally learn over time how and when the light meter will fail in it's interpretation of of the scene, I help you speed up that process by showing you what is going on, and how to avoid it in the section Understanding Exposure.
Exposure Compensation Overview
Let's assume you already have your exposure reading for a scene. You are using an automated exposure mode of AV or TV of your choice. You take the picture but you find the exposure appears lighter or darker than you desire to be.
The Exposure compensation dial is likely the big wheel dial on the back of your camera. It will adjust the Aperture setting if you are currently set to using TV or Shutter Priority semi automatic mode on your camera. The Exposure Compensation dial will adjust Shutter Speed settings, if you are using a AV or Aperture Priority semi automatic feature.
The Exposure Compensation display will look similar to the graphic below.

Exposure Compensation
Exposure Compensation units have a maximum range limit of
adjustment of ±2 stops of light, and stepped in 1/3 stop increments.
An important Exposure Compensation Basic
The exposure compensation indicator (the long pointy thing I show in the middle of the diagram) is seen in your camera veiwfinder and shows you the deviation you are from the light meter reading
The light meter reading is what I often call the base exposure. As you adjust the exposure compensation dial, you can clearly read the deviation from the base exposure in 1/3 stop increments for a maximum of ±2 stops of over or under exposure deviation. My diagrams show there is no current deviation set at this time, the compensation setting equals the meter reading.
Displaying exposure compensation this way rather then showing shutter speed number and apertures is quicker for the mind to interpret exposure adjustments and relate them to the type of scene you are shooing. So that when you are in that situation again, you can always dial in the correction, rather than repeating the same exposure error.
Soon you will be able to set corrections before you even shoot the first shot, which is vary beneficial for not wasting time on the first shot that always gets away.
Naturally you will often double check your results on the Histogram Graph and LCD monitor, but odds are, you'll be much closer to the desired exposure on the first shot and not wasting time.
Some cameras might have offered you a menu setting option where you have set your camera's exposure increment units at 1/2 stop increment adjustments, and your exposure compensation will work with these units under those settings, and your exposure compensation display will also reflect those units in some manor.
How Exposure Compensation behaves
in different exposure modes
You are allowed to make Exposure Compensation adjustments with the Aperture and Shutter Speed controls, but there are differences based on what shooting mode you currently are using.
How Exposure Mode effects adjustment options
Manual Mode:
EC adjustments in shutter speed and aperture are allowed.
AV-Mode, Canon (AP-Nikon):
EC adjustments are only performed in Shutter Speeds.
TV-Mode, Canon (TP-Nikon):
EC adjustments are only perfumed in Aperture settings.
Program Mode,
EC adjustments are made in both Shutter Speed and Aperture but only based on your camera's criteria, you no longer make person choices about what settings your camera uses. Learn to avoid Program as a camera mode.
Pratice with Exposure
Top Bottom
You can go outside and play with exposure readings as a kind of game, you don't have to wait the for the perfect photo opportunity to arise. I think this is the fastest way to learn the quirks of exposure, and because you are shooting digital, you can learn at a much faster rate than you would if you had to shoot film, and without all the finical burden.
Again I would steer you to the Understanding Exposure link for some helpful guidance.
As mentioned above, scenes that reflect a great deal of the light that illuminates them, like snow, or water, and even lots of the framed image being made up of sky, will tend to cause the light meter to want to turn down exposure lower than it should be. So you might want to experiment a little. Take a picture using the light meter reading, examine it and see if that scene could not benefit by being a little brighter
The situation just described is often referred to as back lighting, and subjects in the foreground often suffer by being darker than they should be.
The inverse to this scenario is also true, where the scene is dark because it manages to absorb most of the light that is illuminating it. A volcanic black sands beach would be a good example here. You could counter this scene by closing down the exposure some.
If this seems backwards to your way of thinking, then it might help to understand that the light meter is designed to read the middle gray value perfectly. Those scene that do not reflect middle neutral tones, the light meter will still set the exposure as if it were a middle tone values. Hence, we under expose for dark toned subject and over expose for light toned subjects as a compensation for the light meters readings short comings.
Shooting in Manual
Top Bottom
Ironically the whole point of manufacturer's developing automatic shooting modes was to cut down on time consuming adjustments made for setting exposure.
But there are times when the light meter attempting to adjust for every little change in reflectivity of light is detrimental to shooting a series of pictures where your intent is to capture that action within the scene.
Shooting under a consistent light source from the same angle is one example. If you have determined the correct exposure for the scene, and this applies also when using Exposure Compensation, you don't need to keep changing exposure just because something of a little darker or lighter tones happens to be in your framed view. Light tones should be photographed light, and dark tones should photographed dark, that is of course unless you have some artistic reason to exposing otherwise. The light meter gets fooled because it is programmed to give an exposure that represents a middle value for that scene.
The Sun is a perfect consistent light source. Consider this when making exposure adjustments outdoors on a clear day when the sun is high in the sky. As the Sun gets lower, our atmosphere starts diminishing this light intensity by as much as three stops of light over an hour or so period of time.
This is a situation where shooting manual might be more practical. I use a parade shots shown below to help represent this idea.
Even though the subject matter may be constantly changing in colors and reflectivity, and brightness, there is not a lot of good reasons to keep playing with the exposure because you have already set for the light that illuminates the scene. Once you have it correct (if you have it correct), Just shoot. Subjects will reflect and be exposed relevant to their nature.
With all of these parade images below I used the same exposure on manual for controlling the highlights and background. For three of these image I also used a little electronic flash to fill in a little light to help with boosting the shadows. The basic principle here in this situation is you are shooting under a constant light source, so the light is not changing enough to worry about. Dark objects reflect low light and bright objects should be bright, so as long as you got the right base exposure, just use it.

Manual Mode
However if you start shooting at different angles, like into the sun light, or from the other side of the street, then exposure adjustments need to be made.
If people are in the pictures, keep an eye on the flesh tones to see how they are appearing, they can serve as close middle values for exposure.
In manual mode, if you forget to adjust for your shooting situation as you change it, then you may loose a few shots until you remember your in manual mode. Semi Automatic modes are great for keeping up with exposure of different camera angles, but you still need to apply a little thought as to weather you need to also use a little Exposure Compensation on a shot per shot basis.
Auto Exposure Bracketing
The Auto Exposure Bracketing feature on your camera is an option that allows you a better odds at getting the right exposure when you are shooting under difficult lighting scenarios. If you suspect the camera or your judgement of exposure is going to be off a bit, this feature offers an option of three pictures with different exposures. It is a little like shooting a shotgun if your aim with a rifle is not so good.
|
|
|
Auto Exposure Bracketing |

In the Example above, any one of these exposures is a reasonable one, depending on your needs for the image or the mood you wish to express.
AEB is an auto exposure bracketing tool that sets the camera to fire off three pictures in sequence that have different exposures. One of the three shots will be the exposure you set via the light meter reading, the next will be under exposed and the third is over exposed. Actually the firing order in not important as you can often express a different firing sequence in your camera menus.
How to set ABE on your camera
The general process is you will find AEB in your camera menus, select it as a function, then you are allowed to adjust the amount of deviation for the over and under exposures that will be use. The graphic below shows that I am setting my deviation as ±1 1/3 stops. Once you have done that you exit the AEB from the menus and then you now have to set your camera to continuous firing mode for a firing sequence so the three picture can be taken quickly while you hold the shutter button down. If you happen to forget this last part you will take one picture per press of the shutter button.
|
|
As far as exposure goes for the average photographer, it might be quicker to just shoot a test picture if you feel your exposure results will be less than satisfactory. It could take longer to go into the menu settings and set up AEB if you are not familiar with this operation. This feature has practical uses for photographic artists, and perhaps even for scientific applications.
The HDR application of Auto Exposure Bracketing
The most practical application of AEB for todays artistic photographer is to collect three or more exposures of a scene with the hopes of merging these images into one single HDR (High Dynamic Range) image, for a photo composite of a scene that shows a dynamic range far beyond that of what the image sensor can capture.
Below is an example of common scenario where you will find a broad dynamic range. Here we are framing a scene that faces towards the sun.
It is quite frequent that a single image can't capture the bright cloud details in the skies around the sun, and at the same time capture the needed shadow details of the trees all in a single shot. The image sensor only has about 6 stops of dynamic range, and many natural scenes can contain as many as 10 - 13 stops of dynamic range.
|
|
|
Auto Exposure Bracketing |

The three different images used in the HDR require a third party application like those offered by Adobe or even an optional application specializing in merging of images for HDR's. For this image I used Photomatix Pro.
First the three images have to be merged into one image buy the HDR program you are using.
When these images are first combined they are called a Tone Map, and at this stage you have a horrible looking image that is not complete just yet.

This image is the Tone mapped image for the above shot of the HDR Photo of
Stuckagain Lake. Tone mapped images have not been adjusted yet or processed
into the final result.
You will be provided with a number of adjustment sliders that let you fine tune the look of your image allowing you to control many aspects of image quality like :

Adjustment sliders
in HDR program
|
Adjustment Sliders in Photomatix Pro |
|
|
|
You will be able see all the adjustments in real time as you adjust the sliders.
At first you may not be familiar with the different names for the adjustments, but that does not matter much. Just grab a slider and push it to one extreme end of the adjustment so that you can see how the image is being effected. Then set it to your liking.
When you are happy with the end result you press the process button.
The process of creating HDR images using the Auto Exposure Bracketing feature is interesting, and fun, but more than that it opens the opportunity to capture photos under lighting that was not an option open to us before this process.
One of the biggest challenges of these shots is the movement of objects that might occur while the three pictures are being captured. If there is movement of items then there can be registration alignment problems with those elements when the images are merged together. It is best to use a tripod for this work and pick a calm moment from which to shoot your shot.
I"ll Explain more on a separate page write up for HDR images.
It just wanted to show you the cool opportunity that awaits you using the Auto Exposure Bracketing feature that exist on any digital camera.
Learn Panning in 5 Steps

Imagine this scenario: you are trying to take a photograph of a motorcycle as it is speeding by you at 60 mph. What would you do to get a nice, sharp photo? You may say you need to use a fast shutter speed to effectively freeze the bike’s motion.
That would be a good start, but how would you know exactly when to press the shutter button to ensure the motorcycle is perfectly framed in your photograph? If the scenario sounds like a daunting task to photograph -have no fear, panning to the rescue!
Step 1.
What is Panning?
Panning is a photographic technique used to freeze the motion of moving objects. The idea behind panning is to address the problem of capturing a photograph of a fast moving subject. You can tell when a shot is taken using the panning technique because of it’s tell tale sign: the moving object is in sharp focus while the rest of the background is blurred. This tutorial will teach you step-by-step how to use the technique of panning to help you get a nice photograph of a moving subject.
Step 2.
Camera Settings
Set manual exposure
 Bicycle Panning by
Adam Baker: This shot was taken at a rather slow
shutter speed of 1/45 sec to ensure a blurry background while maintaining an
acceptably sharp subject - the hallmark of a good panning shot. Photo courtesy
of Adam Baker.
Bicycle Panning by
Adam Baker: This shot was taken at a rather slow
shutter speed of 1/45 sec to ensure a blurry background while maintaining an
acceptably sharp subject - the hallmark of a good panning shot. Photo courtesy
of Adam Baker.
You want to set your exposure controls manually prior to taking the panning shots. If you set it to automatic, the exposure settings may change as a result of the movement of the camera. Setting the exposure manually will ensure consistent exposures across your photos.
Shutter speed. Out of the three settings you can change manually, shutter speed is the most important one when it comes to taking a good panning shot. I talked about how shutter speed gives you the ability to freeze motion or blur motion in my Understanding Shutter Speed in 3 Steps tutorial.
So what shutter speed should you use? There isn’t gonna be a set formula for this. You want to use a shutter speed that will let you freeze the motion of the subject while at the same time giving you a nice blur of the background. Generally speaking you would want to use a slower shutter speed than normal. The slower shutter speed will give you the nice blur of the background that is a feature of panning shots.
Set manual focus
As you pan your camera, it will be tough for it to get a good focus-lock because of the movement. It is easier to ensure focus by manually setting it before hand. The question then arises: how will you focus without the subject in position? There are a few possibilities for this.
- If possible, you use a "stand-in" for your subject.
- Otherwise, you "guess" the focus of where you believe the subject will be. If you have a few chances to take your photos, you can guess and readjust.
Use multiple exposure
If your camera has the multiple exposure feature, it is a good idea to utilize it. Multiple exposure will give you the flexibility for getting the "right" shot. Since everything is moving quickly, you don't have the luxury of properly framing your subject in the viewfinder. Your best bet is to take multiple exposures of the subject as you are panning and hope that one turns out great.
Step 3.
Camera Stabilization
When panning, you will be moving in a lateral (side-to-side) movement. Therefore, you want to minimize any vertical (up-and-down) movements. The best choices are a monopod or tripod.
Monopod. The monopod is a good choice for panning shots because it gives you the freedom to move the camera laterally, while preventing vertical movement - which is exactly what you want.
Tripod. The tripod is the gold-standard camera stabilizer. For panning shots, you want to make sure you get a head that gives you smooth, fluid panning.
Stance. If you don't have a tripod or monopod, you want to use your best camera stance. I like to get into a comfortable position, either standing or kneeling on one knee. I rest the elbow of my non-trigger hand (left) on the side of my hip. By keeping my elbow locked in this position as I pan the camera, it stabilizes it from vertical movement.
Step 4.
Panning
 Panning Diagram: Begin panning prior to taking the photo and follow-through pan
after taking the photo to ensure a smooth, consistent pan.
Panning Diagram: Begin panning prior to taking the photo and follow-through pan
after taking the photo to ensure a smooth, consistent pan.
You want to begin panning before you take the shots. This will ensure a smooth and even pan, which will give you a nice, sharp photograph. After you take the shots you want to continue the panning movement.
In sports, this is called a follow-through. And the same principle works here. By following through with your pan, you will ensure a smooth, consistent motion and prevent camera shake.
Step 5.
Review and Readjust
If you have the privelege of taking more shots of the subject, then review your photos and readjust the necessary steps above.
Panning is a technique that while simple to understand, requires a lot of work to master. Go out and practice. I would love to see your best panning shots. Place them in the comments below.
Understanding Shutter Speed in 3 Steps

In this tutorial, we will take a close look at one aspect of the exposure triangle - shutter speed. In my previous tutorial on Understanding Exposure in 7 Steps, I explained that the process of exposure requires three components, ISO, Shutter speed, and aperture. Each of these three components work together to record light.
The exposure process is the technical process of recording a “moment” of light. The total amount of light that is being recorded is dependent on the three aspects of the exposure triangle. Shutter speed dictates the total amount of time that light is allowed to expose the “recording device” (film, digital imaging sensor).
Each component of the exposure triangle, has both an effect on the exposure process and also an effect on the creative aspects of the photograph. ISO introduces noise in an image; aperture controls the depth of field; and shutter speed allows us to introduce blur.
Step 1:
Shutter Speed and Exposure
 Vertical Focal
Plane Shutter: Two shutter curtains (closed)
prevent light from "exposing" the "recording device" (film,
digital sensor) until the shutter release button is pressed.
Vertical Focal
Plane Shutter: Two shutter curtains (closed)
prevent light from "exposing" the "recording device" (film,
digital sensor) until the shutter release button is pressed.  Shutter Curtains in
Action: Shutter curtains open at 1/500th second.
Note how the rear curtain closes before the front curtain is fully open,
creating a "shutter gap."
Shutter Curtains in
Action: Shutter curtains open at 1/500th second.
Note how the rear curtain closes before the front curtain is fully open,
creating a "shutter gap."
Out of the three components of the exposure triangle, shutter speed is perhaps the easiest to understand. Shutter speed allows us to control the length of time that light is being recorded onto the film or digital imaging sensor (recording device).
On most digital SLR cameras, there are two "shutter curtains" which prevent light from hitting the film or digital imaging sensor. When you “take a photo” you are pressing the shutter release button. This opens the curtains for a specified period of time and allows light to “expose” the recording device. For a spectacular frame-by-frame photo sequence of the shutter curtains in action, head over .
- SLOW shutter speeds allow MORE light to be exposed on the recording device.
- FAST shutter speeds allow LESS light to be exposed on the recording device.
How is shutter speed represented?
Shutter speed is represented in units of time. On your camera, it is specifically represented in seconds. The numbers displayed indicate fractions of a second. So you will see 500 on your camera display, which will indicate a shutter speed of 1/500 of a second.
|
Standard full stop shutter speed scale |
|||||||||||
|
Time (sec) |
1 |
1/2 |
1/4 |
1/8 |
1/15 |
1/30 |
1/60 |
1/125 |
1/250 |
1/500 |
1/1000 |
Each doubling of time, corresponds to a doubling of the exposure. So a shutter speed of 1/125 gives double the exposure of 1/250. 1/125 is twice 1/250 because the slower shutter speed allows two times more light to be exposed.
Bulb mode. Most cameras have a “bulb” mode setting. Bulb mode allows you to keep the shutter open for as long as the shutter button is pressed down. This gives you more creative control over your shutter speed.
Time mode. Additionally, some cameras offer a “time” mode setting for shutter speed. Time mode will keep the shutter open until the shutter button is pressed again. You press once to open the shutter and press again to close it.
Step 2:
Shutter Speed Characteristics: Motion Freeze and Motion Blur
 Hummingbird in
Flight: A fast shutter speed is needed to "freeze"
the flight of a hummingbird whose wings flap upwards of 80 times a second.
Photo courtesy of nebarnix
Hummingbird in
Flight: A fast shutter speed is needed to "freeze"
the flight of a hummingbird whose wings flap upwards of 80 times a second.
Photo courtesy of nebarnix
 Camera-Induced
Motion Blur: Hand holding a camera in low-light
conditions with a slow shutter are ideal conditions for camera shake. Photo
courtesy of Dean Ayres
Camera-Induced
Motion Blur: Hand holding a camera in low-light
conditions with a slow shutter are ideal conditions for camera shake. Photo
courtesy of Dean Ayres
Remember, each component of the exposure triangle has two effects. The first effect is controlling how much light is being recorded. The second effect is introducing a creative aspect into the photograph. The creative effect that shutter speed has on a photograph is it’s effect on motion.
- Slow shutter speeds introduce motion blur.
- Faster shutter speeds freeze motion (motion freeze).
There are two types of motion that can be captured in a photograph. Motion as a result from movement of the camera (camera-induced motion), or motion as a result of the subject itself moving (subject-induced motion).
Camera-induced motion
Camera-induced motion is when the camera moves during an exposure. This is also referred to as “camera shake.” This creates blur in the entire scene of the photograph.
Focal length. Focal length amplifies camera-induced motion. The longer the focal length you use, the greater the degree of camera shake you will see.
1/60 guideline. If you are hand-holding your camera, the general guideline is not to shoot slower than 1/60. Your results may vary and depend entirely on your technique.
Subject-induced motion
Subject-induced motion is when the subject moves during an exposure. Any object that is moving during the exposure will come out blurred in the photograph. This can range from the entire subject moving, or just a part of the subject, e.g. arm or leg.
Step 3:
Shutter Speed Application
 Star Trails: Night shots require long shutter speeds. A series of 30 second
exposures were composite together to form this image. Photo courtesy of Andrew Stawarz
Star Trails: Night shots require long shutter speeds. A series of 30 second
exposures were composite together to form this image. Photo courtesy of Andrew Stawarz
 Bboy Airflares: A shutter speed of 1/60 was used to capture the motion blur from
the subject
Bboy Airflares: A shutter speed of 1/60 was used to capture the motion blur from
the subject
Now that you know what shutter speed is and it’s properties, let’s see how we can apply this knowledge.
How much available light do I have?
The first issue you want to address is exposure. Without proper exposure, you will not have a viewable photograph.
Ask yourself, “do I have enough light?” If you find yourself in a situation without sufficient light, then you can use a slow shutter speed to get a good exposure. Conversely, in well-lit scenes, choosing a fast shutter speed prevents your photograph from being over-exposed. The shutter speed you use will be dependent on the ISO and aperture settings as well.
Do I want motion blur in photo?
Motion blur can be used as an artistic technique. Whether or not you want blur in your image is a matter of taste and desired effect. Motion blur may be beneficial if you are trying to portray speed, movement, or confusion.
If you want to introduce motion blur, use a slow shutter speed that will allow you to capture the movement of the subject. The shutter speed you choose will be dependent on the degree of the motion effect you desire and the movement of the subject.
If you don’t want motion blur in your photo, then you will need to use a faster shutter speed that will help you to “freeze” the motion. Again, the shutter speed you set will be dependent on how fast the subject is moving and the degree of the motion freeze you desire.
Shutter Speed Practice
Shutter speed is an important element in photography. It is a fundamental skill that must be mastered and practiced daily. Go out and take photos with different shutter speeds to see how it has an effect on your exposure. Take some photos of moving objects at different shutter speeds to see how it can freeze motion and blur motion.
Understanding Exposure in 7 Steps

This tutorial is an introduction to the concept of exposure in photography. Exposure is the heart of photography. In order to excel in your photography career, you must have a firm understanding of what exposure is and how it works. In this article I will discuss what exposure is and the three main components of exposure, ISO, Shutter Speed and Aperture, also known as the exposure triangle.
Step 1:
What is Exposure?
 What Happens When
You Take A Photo: When you take a photo, you are
recording a moment of light.
What Happens When
You Take A Photo: When you take a photo, you are
recording a moment of light.
Exposure is the heart of photography - it is the technical process of recording light. To understand exposure, you must understand what photography is. What are you doing when you take a photo? What happens when you press the shutter button on your camera?
When you “take a photo” you are recording a moment of light. The technical process of recording light is called exposure. Exposure can also mean the actual single instance of the recording of light. So when you are taking a photo, you can also say that you are taking an exposure.
You record light by “exposing” the “recording device” of the camera (film, imaging sensor) to light. The total amount of light that is recorded is dependent on three key factors: how much light is recorded, how long is that light exposed and how sensitive is the recording device to that light.
In photography, these three key factors make up what is referred to as the exposure triangle and are the three main principles that constitute the exposure process:
- ISO
- Shutter Speed
- Aperture.
Let’s take a closer look at each of these three components.
Step 2:
ISO
In film photography, ISO is the sensitivity of the film to light. In digital photography, ISO is the sensitivity of the imaging sensor to light. So we can say that ISO is the sensitivity of the “recording device” (film, imaging sensor) to light.
ISO is represented in terms of numbers from below 100 to the thousands. The higher the number, the greater the light sensitivity. Conversely, a lower ISO number means a lower light sensitivity.
What does this mean to me?
What we mean by sensitivity to light is that, all other variables being equal, the total amount of light that is required to properly record an image.
- HIGHER ISOs require LESS light to record an image.
- LOWER ISOs require MORE light to record an image.
You can see how you can make use of this in your photography. For example, in lower light situations, you can increase your ISO to get a good exposure.
Step 3:
Shutter Speed
Shutter speed is perhaps the simplest of the three concepts to understand and refers to the duration that the light is recorded onto the recording device. In other words, how long is the light allowed to stay on the film or imaging sensor. This can range from thousands of a second to hours.
What does this mean to me?
As you can probably tell, the slower the shutter speed, the longer the recording device is exposed to light, and all variables being equal, the less light is needed to record an image.
- If you have LESS available light, then you will need a SLOWER shutter speed to get a good exposure.
- If you have MORE available light you have, the FASTER the shutter speed that you need to get a good exposure.
Step 4:
Aperture
In our analogy above, aperture is how much light is being recorded onto the recording device. The term “how much” can be a bit confusing. To give you a better understanding, think of aperture as representative of the “flow of light” that is being recorded.
We control this flow of light by controlling the diameter of the aperture, or the opening of the lens. A smaller opening means that less light will “flow” through the lens. A larger opening means that more light will “flow” through the lens and onto the recording device.
F-Stops
Now for the more confusing part about aperture. In photography, aperture is represented as an f-number, typically known as an f-stop. This ranges from f/1.0 and below to f/22 and above. What is confusing is the inverse relationship between the f-number and the aperture.
- The SMALLER the f-stop, the LARGER the aperture, or opening of the lens.
- The LARGER the f-stop, the SMALLER the aperture, or opening of the lens.
What does this mean to me?
What this means is that if you have a smaller f-stop, you have a larger aperture (diameter of opening of the lens), you will have more light flowing onto the recording device and therefore, need less time to expose the image.
- The SMALLER the f-stop, the LARGER the aperture (opening of the lens), the MORE light is allowed onto the film or digital sensor, the FASTER the shutter speed and/or LOWER ISO you need to get a proper exposure.
- The LARGER the f-stop, the SMALLER the aperture (opening of the lens), the LESS light is allowed onto the film or digital sensor, the SLOWER the shutter speed and/or HIGHER ISO you need to get a proper exposure.
If the above statements are confusing to you, please re-read them to make sure you understand what the interplay that is going on.
Step 5:
Putting it all together, the Exposure Triangle
 The Exposure
Triangle: Is the interplay between ISO, Shutter
Speed and Aperture.
The Exposure
Triangle: Is the interplay between ISO, Shutter
Speed and Aperture.
The exposure triangle is the relationship between the three components of exposure: ISO, shutter speed and aperture. As you can tell, changing one aspect of exposure induces a change in one or two of the other aspects. There is an interplay between ISO, shutter speed and aperture. The more comfortable you get with these three components, the more you will be able to control the quality of your photos.
An example might help to clarify the relationships of the exposure triangle. Imagine we want to get a good or “proper” exposure of a particular subject. Now imagine that this is a controlled shot, so that the only variables we can change are the ISO, shutter speed and aperture. All other variables remain constant.
- If we use a large aperture (small f/stop number), then we will need a faster shutter speed (shorter duration of exposure), and we can use a lower ISO (lower light sensitivity).
- If we use a slower shutter speed (longer duration of exposure), then we will need a smaller aperture (higher f/stop number), and we can use the same ISO.
- If we change the ISO and use a higher ISO (greater light sensitivity), then we can use a smaller aperture and/or faster shutter speed.
See if you can make out other relationships for yourself.
Step 6:
Further Variables
If you understand the principles explained so far, you may be thinking there are other ways to control the total amount of light that a recording device gets “exposed” to besides with just ISO, shutter speed and aperture. You are correct.
The other side of the equation is to control the incoming light itself!
Lighting is a whole other aspect of photography that we will explore in future tutorials.
Step 7:
Summary
The Exposure
Process: In photography, the recording of light is
the exposure process which is necessary to convert incoming light into a photo.
- We now know that exposure is the technical process of recording light. In other words, exposure controls the total amount of light that is recorded.
- The total amount of light that is recorded is controlled by three components of ISO, aperture and shutter speed.
- ISO controls the recording device’s sensitivity to the incoming light.
- Shutter Speed controls the duration that the light is exposed on the recording device.
- Aperture controls how much, or the flow of the incoming light onto the recording device.
- All three components control the total amount of light that is being recorded. This process of recording light is called exposure.
- The other way that you can control light is to control the light itself.
------------------------------------------------------------------------------------------------------------
Understanding ISO in 3 Steps

To supplement my tutorial, Understanding Exposure in 7 Steps, I’m going to take a closer look at ISO. ISO is one part of the Exposure Triangle, which also includes shutter speed and aperture. Remember, that the idea of exposure is a process of recording light. ISO is the “recording device’s” (film, digital imaging sensor) degree of sensitivity to light.
When we talk about the three components of the exposure triangle, we can talk about how each one relates to the technical side of the exposure process. Additionally, we can talk about the effects each one has on the artistic or creative side of the photograph itself. Each component introduces a creative or artistic effect on the photograph that is separate from it’s effect on exposure alone. The artistic effect ISO has on a photograph is the introduction of noise.
For now, let’s look at how ISO relates to the technical process of exposure.
Step 1:
ISO and Exposure
 ISO
100 Exposure: f/4.0, 1/60, ISO 100.
ISO
100 Exposure: f/4.0, 1/60, ISO 100.  ISO
200 Exposure: f/4.0, 1/60, ISO 200.
ISO
200 Exposure: f/4.0, 1/60, ISO 200.  ISO
400 Exposure: f/4.0, 1/60, ISO 400.
ISO
400 Exposure: f/4.0, 1/60, ISO 400.  ISO
800 Exposure: f/4.0, 1/60, ISO 800.
ISO
800 Exposure: f/4.0, 1/60, ISO 800.  ISO
1600 Exposure: f/4.0, 1/60, ISO 1600.
ISO
1600 Exposure: f/4.0, 1/60, ISO 1600.  ISO
3200 Exposure: f/4.0, 1/60, ISO 3200.
ISO
3200 Exposure: f/4.0, 1/60, ISO 3200.
In film photography, the recording device is the film itself. This means that light is exposed and recorded on the film medium. Film has certain characteristics, depending on the qualities of it’s raw materials. One property that film has is it’s sensitivity to light. In order to standardize the film’s sensitivity to light, ISO was created.
ISO is a standardized scale to represent a film’s speed, or sensitivity to light.
- Low speed film is less sensitive to light.
- High speed film is more sensitive to light.
In digital photography, the recording device is the digital imaging sensor and it carries over the same principles of ISO as for film.
What does sensitivity to light mean?
When we say that the recording device is less sensitive to light, we mean that it requires more light to get the same exposure as one that is more sensitive to light.
- The LOWER the ISO, the LESS sensitivity to light = MORE light is needed to get a proper exposure.
- The HIGHER the ISO, the GREATER sensitivity to light = LESS light is needed to get a proper exposure.
How is ISO represented?
ISO is represented in numbers - from 100 or below to the thousands.
|
Common ISO Ratings |
||||||||
|
ISO |
25 |
50 |
100 |
200 |
400 |
800 |
1600 |
3200 |
Each doubling of the ISO corresponds to a doubling of the sensitivity to light. So ISO 400 is twice as sensitive as ISO 200.
Examples
In the example photos to the right, notice how each increase in ISO causes the exposure of the image to increase. The aperture and shutter speed are fixed to show just how changes in the ISO alone affect the exposure of an image. Each picture represents a doubling of the exposure of the previous picture.
Step 2:
ISO Characteristic: Noise
 ISO
100 Noise: f/4.0, 1/60, ISO 100.
ISO
100 Noise: f/4.0, 1/60, ISO 100.  ISO
200 Noise: f/4.0, 1/60, ISO 200.
ISO
200 Noise: f/4.0, 1/60, ISO 200.  ISO
400 Noise: f/4.0, 1/60, ISO 400.
ISO
400 Noise: f/4.0, 1/60, ISO 400.  ISO
800 Noise: f/4.0, 1/60, ISO 800.
ISO
800 Noise: f/4.0, 1/60, ISO 800.  ISO
1600 Noise: f/4.0, 1/60, ISO 1600.
ISO
1600 Noise: f/4.0, 1/60, ISO 1600.  ISO
3200 Noise: f/4.0, 1/60, ISO 3200.
ISO
3200 Noise: f/4.0, 1/60, ISO 3200.
Besides it's effect on exposure, ISO also has another effect on a photograph. ISO has a creative side effect as a result of it's properties. That side effect is noise. Let's see how noise is introduced into a photo through ISO.
In film, the size of the grains of silver halide plays an important role in it's sensitivity to light.
- Film with larger size grains is more sensitive to light.
- Film with smaller size grains is less sensitive to light.
In other words, film that is less sensitive to light has finer grains. Film that is more sensitive to light has larger grains. These grains appear as “noise” in a photograph. Therefore, in regards to noise, we can say that:
- Low ISO introduces little noise in a photograph.
- High ISO introduces more noise in a photograph.
Examples
In the example photos to the right, notice how each increase in ISO causes a subsequent increase in noise. The aperture and shutter speed are fixed to show just how changes in ISO alone affect the noise in an image.
Step 3:
ISO Application
 Claws Out Bboy: I shot this at ISO 800 because I was indoors without flash.
However, I think the added noise in the photo works well with the subject
matter.
Claws Out Bboy: I shot this at ISO 800 because I was indoors without flash.
However, I think the added noise in the photo works well with the subject
matter.  Claws Out Bboy
Zoomed: As you know by now, increasing ISO,
increases noise. Do you like the noise?
Claws Out Bboy
Zoomed: As you know by now, increasing ISO,
increases noise. Do you like the noise?
Now you know what ISO is, how it works and it's characteristics. How can you apply this knowledge in your photography?
Do I Have Enough Light?
The first issue to address is whether you have adequate light to get a proper exposure. The idea is that exposure is the primary concern because if you don't have a good exposure, then you don't have an image.
Ask yourself, "Do I have enough light?" If you have sufficient light, then use the lowest ISO that you can. If you have inadequate light, then you will need to increase your ISO to the point that will give you sufficient exposure.
The reason we want to use the lowest ISO is because increasing ISO will increase the noise in an image. We don't want to intentionally introduce noise if it's not a desired effect we are trying to achieve. Which brings us to the second question:
Do I Want Noise in My Photo?
Noise can be used as an artistic technique. Whether or not you want noise in your image is a matter of taste and desired effect.
If you want this effect, you can intentionally dial up your ISO to get this look. The higher the ISO, the more noise will appear in your photos. Play around with your ISO setting to see how increases in ISO will affect noise.
ISO Practice
That concludes my tutorial on understanding ISO. Practice with different ISO settings to see how it changes both the exposure of an image and how it introduces the element of noise. Are there times when you would want noise in your photos? When do you think you will need to use a high ISO in your photography? ISO is an element in photography that is important for all photographers to understand.
Avoiding the evil of red-eye

You have checked your camera, have extra memory cards and back up batteries, and are ready to shoot. You start blasting away capturing awesome moments with family and friends, only to be shocked by your photos days later. You slowly begin to think that everyone you know are evil aliens! Okay, so that joke is getting old, but I’m referring to red-eye.
Red-eye, in photography terms, is when the pupils of the eyes in people and some animals, appear red in photos. Since ’tis almost the season for many great holidays, and amazing photo opportunities, I thought I’d give you a gift of my own, so here it is, how to avoid this tragedy.
What is red-eye?
For starters, we first need to look at the underlying issue that causes
red-eye. Without going into too much graphic detail, red-eye is caused by light
from your flash; it enters your subjects’ eyes, reflects off the back of the
their eyes (retinas), and then back out the eyes to your camera; all before
they can blink! Amazing right?
You might be asking yourself, why the eyes actually appear red, and not white.
Well that’s due to the blood that nourishes the insides of our eyes.

Red-eye occurs when light from the flash reflects straight back from the retina into the camera lens
Now that the biology of what causes red-eye is covered, let’s examine the technical side. Red-eye occurs more frequently in cameras the have flashes in close proximity of the lens, such as many compact flash digital cameras. Why? This is due to the fact that the flash and lens are almost on the same parallel plane with the eyes, enabling the light to bounce straight into the eyes and back into the lens.
There a number of editing programs with “red-eye fix” solutions, but don’t rely on that for solving your red eye issues.
What to do?
One of the easiest ways to avoid red-eye is to simply not use a flash, but let’s face it, that is not always an optimal choice. You could always make sure your subject is not looking directly into the camera. Although, this can create some amazing shots, this too may not always be practical or wanted option. If you have to use a flash, and want your subject looking at you, there are a number of ways to help eliminate the red-eye issue.
Red-eye reduction feature

Make the iris smaller and it'll help to reduce red-eye
If you are currently in the market, or recently purchased a camera, many cameras these days offer a feature generally referred to as, red-eye reduction. In most cases, the camera will emit two or more lower output flashes before taking the picture. The idea behind this is the lower output flashes will cause the eyes to constrict thus allowing less light in that could possibly be reflected.

By putting more distance between the flash and the lens, you can stop your victims looking like, ehm, victims.
Pop-up flashes
Another technological advancement are pop-up flashes. Here, the flash pops out of the top of the camera, creating more space between the lens and the flash. This can sometimes be used in conjunction with the red-eye reduction feature. Typically pop-up flashes will be found in higher end digital compact cameras, and lower-high end dSLRs.
Off-camera flashes
The best method, would be to get the flash completely off the camera, by using an off-camera flash. This is a more advanced option, but there are number of great ways to do this, from flash brackets, to stands, and everything in between. This not only allows you to eliminate red-eye issues, but also have better control over your lighting, creating more flattering photos.
Bring on the diffusers
Lastly, diffusing you flash lighting works for all cameras. Some methods may not work with your camera, but a few suggestion are bouncing your flash off walls, bounce cards, flash diffusers, filters, gel inserts, and tons of other professional products, and DIY ideas.
Quick red-eye-free summary
- Red-eye is caused by light from the flash entering the eye, bouncing off the retina and returning to the camera lens.
- It looks red because of the red blood cells in the eye.
- You can avoid red-eye by putting more distance between the camera lens and the flash.
- Diffusing the light from the flash will help, too!
Now go forth and take red-eye-less pictures over the party season!
Digital Photography tutorial
Digital Photography
Digital Photography has truly revolutionized photography in many ways but it’s more of a practical revolution than anything else. The basics of photography largely remains unchanged.
The biggest difference between film and digital photography is in how you handle your digital photographs after they are taken.
Storing and sharing your photos
Storing your digital photographs can be quite iffy and I have several friends that lost all their photographs after a fatal hard disk crash.
Even if you back up your files on a CD or DVD there is no guarantee you can open your files after a few years because the information on the discs can get lost or damaged over the years.
There are several ways you can store your digital photographs
- Your computers hard disk
- Burn CD or DVD’s
- USB hard disk
- USB memory stick
- Photo sharing sites
- Some iPods can store photographs
Always keep your photographs on at least two places, preferably two physically separated places in case of fire or theft.
You will definitely need a good system to catalogue and categorize your photos so you easily can find them. Otherwise you’ll end up with a major chaos of unstructured files on your computer.
iPhoto is a good software that takes care of structuring your photographs and it comes installed on all MAC computers. You can also do basic editing with iPhoto.
Windows PC users you can try Picasa which is a free software from Google.
Digital photography makes it very easy to share your photographs with friends and family when you travel the world.
New photo sharing sites are started daily so it should not be a problem for you to fine one. Here are the two photo sharing sites i personally use.
- Pbase.com
- Flikr.com
Photo sharing sites can also be used as an alternative storage for your digital photographs.
Social networking sites such as for instance myspace.com or facebook.com can also be used for sharing your photos.
Printing your photos
With digital photography there is obviously no cost for developing film and you can see the result immediately on your computer.
This is great but in some cases it just feels good to have a “real” photo to hold in your hand so in this case you have no choice but to make a print.
There are a two basic options to make prints from your digital photographs
- Buy a color printer or borrow from a friend
- Use a printing service
It doesn’t make sense to print at higher resolution than 300 DPI (dots per inch) because the human eye won’t appreciate the difference. Most printers today are capable of printing 300 DPI or higher so you don’t have to worry about the resolution.
The tricky part is to get the colors right in your prints. Imagine your printer gives a slightly greenish tone to your face, this is not making you happy.
Most printers comes with a default color profile that in theory corrects the colors and create prints in perfect colors. The color profile is however perfected for the “average” printer in the production line. The problem is that consumer printers can deviate quite a lot from the “average” so your prints might be slightly off-color and this can be really distracting.
You can buy printer profiling equipment but it’s not an easy process and cost quite a lot of money to buy.
The second option is to send your digital photographs to a printing service. You upload your photos, select print size and pay. Your photos will come directly to your home within a couple of days.
The printing service provider will make sure their color profile match their printer so you don’t have to worry about that.
There are lot’s of printing services out there so it should no be a problem to find one.
Some printing services like for instance CafeeExpress.com will even make T-shirts, mugs and large posters from your digital photographs.
Edit your photos
One of the biggest advantages with digital photography is that you easily can edit your photos without having to scan your film.
- Here’s some editing you can do quite easily:
- Crop out parts of the photo
- Change color tones and saturation
- Change the contrast
- Make the photograph darker or brighter
- Remove red eyes
- Convert between different file formats
- Change file size and resolution
Most cameras come equipped with editing software where you can do basic editing of your digital photographs but many of them is quite poor and difficult to use.
Professional photo editing software is unfortunately very expensive to buy but there are software you can download for free on the internet that are quite good:
- GIMP is free and have advanced professional functionality (gimp.org)
- IrfanView is free and easy to use (irfanvew.com)
- Picasa is free and easy to use (google.com)
- iPhoto comes delivered with all MAC computers
On the professional side is Adobe Photoshop CS he most popular editing software but it’s very pricey and can be overwhelming to use for beginners.
Exposure
The exposure is the amount of light that passes through the lens, into the camera and captured by the sensor/film.
Sounds simple right?
But how do you control how much light is captured by the sensor or film?
The amount of light that is captured by the sensor/film is controlled by four factors:
- Shutter speed
- Aperture
- ISO speed on film or sensor
- Focal length of the lens
Any change of these four factors will either directly or indirectly change the exposure.
Shutter speed is measured in time, sometimes in seconds but mostly fractions of a seconds. The longer time the shutter is open the more light flows through the lens and captured by the sensor or film.
Fast moving objects will be blurred with a slow shutter speed and frozen with a fast shutter speed.
Aperture is measured in f-stops (f/5.6 for instance) and controls how much light passes through the lens per time unit. A bigger aperture will allow for more light to pass through the lens and a smaller aperture will allow less light to pass through the lens and on to the sensor.
Shutter speed and aperture always goes hand-in-hand. You can shorten the shutter speed and get the same amount of light captured by the sensor or film if you a bigger aperture.
The aperture affects the depth of field which determines how much of what you see in the viewfinder will be in focus.
Shutter speed and aperture always goes hand-in-hand. You can shorten the shutter speed and get the same amount of light captured by the sensor or film if you open up the aperture.
ISO speed determines how fast a sensor or film reacts to light. A slower ISO means you either need a longer shutter speed or need a larger aperture and vice versa for a faster ISO speed
On a digital camera you can change the ISO speed with a push of a button. With a film camera it’s not so easy so you need to rewind the film, remove the film and replace it with a new film with faster or slower ISO.
The focal length of the lens affects the exposure but more indirectly than shutter speed and aperture. The focal length affects the depth of field in your photos which in turn affects the aperture and shutter speed you need to create the exposure and composition you desire.
A large aperture was used in the photograph below causing two of the flowers purpously go out of focus.
Example: Large aperture

Composition
Have you ever wondered why some photos are more appealing than others?
One of the main reasons you find some photos more appealing than others is because of their composition.
The main purpose with composition is to find a pleasing selection and arrangements of subjects within the picture frame.
By placing objects in certain positions of the picture frame or by choosing a different point of view with your camera you can make a dramatically composition.
Even thought some snapshots may turn out to be appealing and have good composition, most good photos are carefully crafted.
A snapshot can occasionally turn out great, but to consistently take well composed photos you need to carefully plan and wait for the right opportunity.
The good thing is that composition skills can be learned by following some simple guidelines. You'll soon find that these guidelines will become second nature to you if you use them consistently.
The basic components for composition are
- Simplification
- Rule of thirds
- Lines
- Balance
- Framing
- Patterns
- Avoiding mergers
In the photograph below you can see several components of good composition:
- It's extremely simple and one of the reasons is that the photo is framed so it doesn't include any distracting objects
- The tree is placed on the upper third intersection
- The snowtracks form a line that leats the eye all the way up to the tree.
- There are no mergers in the photograph
- The photo is very balanced
Example: Composition

What format to use?
It’ so much easier to “rescue” a badly exposed photograph if you use RAW format compared to using JPG format. You can correct the white balance and correct an badly exposed photograph in a snap. RAW format also gives your digital photographs a sharper and better quality.
Digital photographs in RAW format are stored exactly as your camera recorded the scene. RAW format is also called a “lossless” format because no information is lost.
JPG however is a “lossy” and compressed format so some information is lost on the way and can never be recovered.
So it sounds like RAW format is hand down best for digital photography?
It’s not as easy as that...
The RAW format has some serious disadvantages...
RAW files are huge so you need a large hard disk capacity. You also need special software to convert the files before they can be printed and shared.
Some cameras can store two photographs, one in JPG format that that can be viewed immediately and one in RAW format you can use to pull out the best possible quality from later.
So while RAW format gives you the best quality it can be time consuming and overwhelming to use for a beginner.
I personally always shoot my digital photographs in RAW format. The photographs I like I correct for best quality and convert to JPG or TIFF format. The photographs I don’t like as much I either delete or just leave them “as-is”.
Photographing Panoramas
 Valley of Views, Tasmania.
Epic is an understatement for this place.
Valley of Views, Tasmania.
Epic is an understatement for this place.
One of the defining properties of a great photo is that is captures the true essence of a scene and puts the viewer right in the shoes of the photographer. When you’re presented with a vast landscape, sometimes it can be difficult to portray the world around you using a single frame. In order to capture this essence you need your photo to be a depiction of everything you see, so we need to stretch beyond the bounds of a single photo and create a photograph that conveys the whole world around you.
Panoramic photography is a great way of capturing a vast scene. All it involves is taking multiple sequenced photos of a setting and then stitching them together to create a single, seamless and expansive photograph. In this guide you’ll learn a few tips on photographing panoramas, as well as how to stitch them together using photoshop.
Overlapping your photos.
When it comes to stitching your photos together, the program you’re using will look for matching features in your photos and use them to blend and align the photos together. Because of this, it’s important to have a distinct overlap in the original photos you take. Allow for a 10% to 20% overlap on the sides of your photo.
Don’t clip main features.
If there’s a distinctive object such as a tree in one of your frames, try to include all of it. If you clip half of it off then it’s likely that photoshop will have a hard time aligning and matching the intricate branches of the two photos, and you’ll see a distinct seem where photoshop has tried to put the two photos together. These can be hard to fix, so it’s best to avoid clipping significant features when taking your original photographs.
Photograph in Portrait.
This is probably the best tip I can offer. If you photograph in portrait mode then the extra sky and land in the shots will not only allow you to include more in the end photo, but it will also add another dimension to it. Take a look ‘Valley of Views’ panorama above. This has been created using 5 portrait photographs taken from a central, and if you look at the left and right edges, the photo seems to be wrapping around you. Whilst the effect is still visible when you look at a landscape-shot panorama, this third dimension is amplified by the extra sky and ground in the portrait-shot panorama.
Photographing in portrait will also give you a significantly higher resolution result. The above photo comes to almost 50 megapixels, as opposed to the 20 megapixels that would have been achieved had it been shot in portrait.
Maintain the same exposure and white balance.
Whilst the sun can still produce stunning results in a panoramic photo, its intensity can also corrupt your lighting and exposure between frames. You can quite easily combat this by using either manual mode to maintain the same exposure between shots, or alternatively use the ‘AE-Lock’ feature which will automatically lock the exposure between shots to ensure you end up with a balanced result.
Up, down, left and right.
Don’t constrain yourself to just left and right panoramic images. Experiment and try some up-down ones as well, or maybe combine both of these and produce a grid of photos with ups, downs, lefts and rights. Photographing in this way can be handy when you’re close to your subject, but if you’re distant enough to include the whole scene I’d avoid photographing in a grid and sticking to one direction.
Stitching them together.
There are a number of programs available which allow you to stitch your panoramic photographs together, many of which are free and produce great results. PTgui is probably the free one I’d recommend. Otherwise, Photoshop is perfect for stitching together your panoramic photo. Here’s how to do it:
Step 1: Open all your photos in Photoshop
This one’s pretty simple. Just open all the section photos of your panoramic
photo in photoshop.
Step 2: Photomerge
Click File > Automate > Photomerge.
This will bring up a new window displaying the options for merging your photos
Step 3: Add open files
Clicking Add open files will of course add all of the photos you have open in
photoshop to the photomerge list.
Step 4: Select your Photomerge layout
I tend to leave this on Auto, but there’s always room for experimentation! You
should also make sure that ‘Blend images together is selected’
Step 5: Click Ok
And wait for it to load. You should now see your basic panoramic image, similar
to the one below. (this image however doesn’t have blending applied)
 Step
6: Crop and refine
Step
6: Crop and refine
Just crop out the wobbly edges from your panoramic image and refine any rough
edges by blurring them or using the clone stamp tool.
That’s all there is to it. Panoramic photography is a great way to capture the true essence of a scene and can produce some breathtaking results. You don’t need an expensive camera, nor do you need an expensive program. All you need is an eye to capture the world around you, and these tips should help you do that.
Good Luck!
How I took a macro photo of a water droplet - useful tips and advice
The water droplet
One of the main advantages of using a digital SLR camera, is that you can focus on a subject directly through a sheet of glass. This is exactly what I did to capture the macro image of a water droplet as shown below.
Macro Water Drop
Digital SLR Camera: Canon EOS 400D / Rebel XTi
DSLR Lens: Canon EF
100/2.8 Macro USM lens
Exposure: 0.005 sec (1/200)
Aperture: f/0
Focal Length: 100 mm
ISO Speed: 100
Other information
The aperture for this photograph displays as f/0 due to the use of an extension tube. An extension tube allowed me to close in even further to fully fill the frame with the water droplet. Placing an extension tube between the camera's body and its lens, also meant I had to shoot completely in manual mode.
First lets start with the home studio set up
For starters, a water drop needs to fall into something that is clear enough for you to be able to focus directly through. As you can see by my setup below, a fish tank was perfect for this. Next, I knew to have the best chance of capturing the drop, it had to roughly fall into the same area with each splash. Hence, I placed a bag with a small pin hole over the top of the tank. If your following along with this home studio setup, it's also important that you have good lighting and a nice cardboard background placed behind the tank for color.
The image below shows you how to set up a macro studio for capturing water splashes and drops.
As you can see in the image above, I did try to use a tripod at first. However I found this too limiting and decided later on to hand hold the camera instead.
Where exactly do you need to focus the DSLR lens?
When photographing water, it's best to set your digital SLR camera to either shutter priority or manual mode (if using an extension tube). You also need to turn off your lens AF (automatic focus). Instead, prefocus through the glass and onto the tip of a pencil, held approximately 1cm above the water in the same area you anticipate the droplet to fall. When you look through the view finder, you should see a red focal point, flashing somewhere around the pencil tip. As this happens, take notice of the position you're standing from the subject. This is how you'll need to be when taking the photographs. Don't turn your camera off or change the lens focal length at this stage, or your settings will be lost. Now you're ready to pierce a small hole in that bag and start taking photographs.
Other useful tips
- Make sure you use a real macro lens for best results.
- You literally need to take hundreds of photographs to get a couple you will like.
- Practise makes perfect. Macro water photography takes a lot of patience.
- Try different colored backgrounds. For example, the image below was photographed with a red piece of cardboard placed behind the tank. No photoshop editing has been used other than to resize for display purposes. Hence, the red color is shown exactly how the photo was saved directly from the camera.
Colored Water Drops
Digital DSLR Camera: Canon EOS 400D /
Rebel XTi
DSLR Lens: Canon EF
100/2.8 Macro USM lens
Exposure: 0.005 sec (1/200)
Aperture: f/2.8
Focal Length: 100 mm
ISO Speed: 100
Exposure Program: Shutter priority
Other information
This time an extension tube was not used to take this photograph. Therefore eliminating the need for fully manual camera settings. Note, I still had to turn off AF (automatic focus) on the actual lens. Not all macro lens have this option so don't worry too much if you can't find AF on your lens.
The digital SLR camera was set to shutter priority with a speed of 0.005 sec (1/200). This enabled me to shoot fast enough to capture a moving droplet. To do this with such a small aperture, I used my cameras onboard flash. This ensured the photograph didnt turn out completely black.
Why you should never delete a photograph until you've seen it on the computer?
One of the very first photographs I took after purchasing a digital SLR camera was of a lonely tree on top of a sand dune. The time was around 5.30 in the afternoon and still quite sunny in my part of the world. The first photo in particular turned out quite dark, so I changed the camera settings and tried again (and again). Fortunate for me, I wasn't in a habit of deleting bad images straight from the camera either. When I returned home and transfered the images to my computer, I realised I had accidently taken a fantastic silhouette (sometimes mispelled silouette) of a lonely tree that you see in the photograph below.
Silhouette photograph example. The result of a good mistake.
Lonely Tree Silhouette
Digital SLR Camera: Canon EOS 400D / Rebel XTi digital SLR DSLR
DSLR Lens: Canon EF-S
17-85mm f/4-5.6 IS USM
Exposure: 0.001 sec (1/1000)
Aperture: f/22
Focal Length: 66 mm
ISO Speed: 100
Exposure Bias: -2 EV
Why this example of a silhouette works
Silhouette's always come across as being mysterious and moody. They hide the full story, making them interesting. The photograph is also uncluttered, so the lonely tree really stands out against the golden sky. The glow effect seen to the right of the tree was created by the sun being positioned on that side of the scenery.
Why this photo ended up a silhouette?
Looking back, I can now see why this photograph of a tree ended up a silhouette. The camera most likely set its exposure based on the background. Which in this case was a brightened sky, created by the sunset. Doing this resulted in the tree and foreground being very underexposed (black).
General tips for recreating the silhouette photograph
- Firstly set your digital camera to spot, partial or centre-weighted metering.
- Turn off your flash. Make sure your automatic flash does not go off. To do this you will need your camera on a setting other than fully automatic. If your camera is on automatic, it's likely the flash will go off. The P mode (program AE) is good to start with.
- Point camera metering towards a bright part of the sky (not the sun however) and take exposure reading by pressing your shutter button half way down.
- Lock this exposure using your digital SLR cameras AE-L button.
- Focus on the subject your photographing. For example, in this case it was the tree.
- Now your ready to photograph a beautiful silhouette.
HDR - high dynamic range imaging and photographs
The landscape photograph below was created with a technique known as high dynamic range, or HDR for short. HDR photo's are usually recognisable by their extreme exposure range. In other words, a greater range of shadows and highlights are visible to the eye when viewing the image, than would otherwise have been seen. This often results in an image that leaves other photographers wondering why their photo's aren't as sharp and detailed.
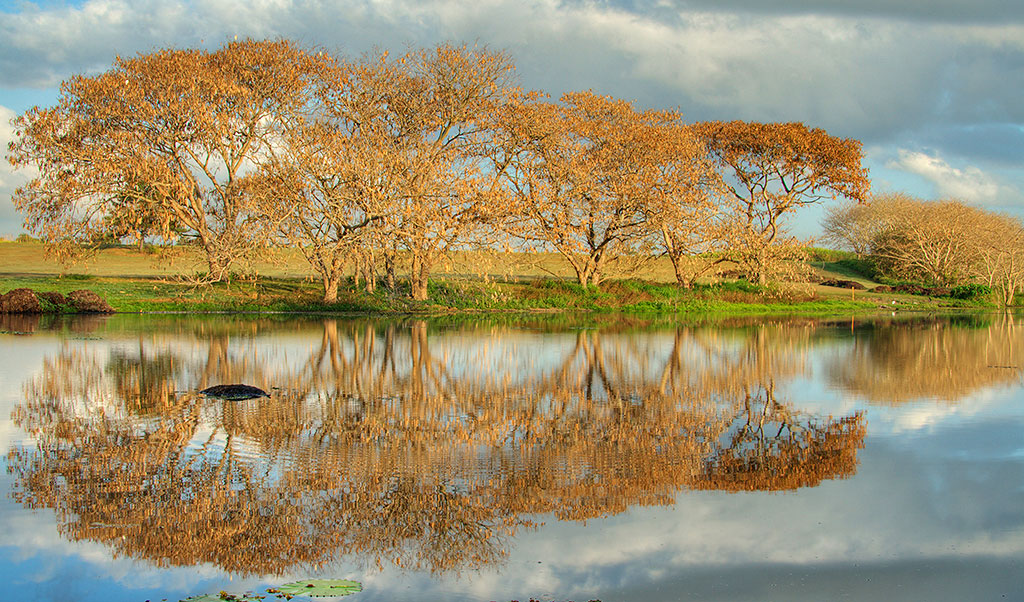
HDR Landscape
Click on the photo to view the larger HDR landscape
Digital SLR Camera: Canon EOS 400D / Rebel XTi
DSLR Lens: Canon EF-S
17-85mm f/4-5.6 IS USM
Exposure: 3 different exposures, due to the landscape photo being composed from
3 separate images. They were then combined into one HDR image using Photomatix
software. See explaination below.
Aperture: f/11
Focal Length: 30 mm
ISO Speed: 100
Why this image works
Nature landscapes including water reflections, tree's, grass and cloudy skies often set the perfect scene for a HDR photo. Furthermore, clearness of the water reflections are due to the images being taken early in the morning before the sun came up. Having an overcast day also added to the effectiveness of the reflections, showing both the tree's and the clouds hovering above, as though it was a mirror.
What exactly, is HDR?
A HDR photograph is an image that has been created from at least 3 separate shots, each with a different shutter speed (exposure). The 3 images are then blended together into one photograph, using a software program such as Photoshop or Photomatix.
How to create a HDR photo?
- Firstly you need 3
separate images of the exact same landscape or object. To do this it's
best to use a tripod to ensure you don't move the digital SLR camera
between shots. It will also make aligning the images easier later on.
The photo's need to be taken with different shutter speeds. You should aim for one under exposed image, one over exposed image and one somewhere between the two (too light, too dark, just right).

If your camera offers a setting called bracketed exposures (check manual), then it's best to use this technology to create the 3 different exposures. If not, then you will need to manually change the shutter speeds between shots. Of course if you need to do this, then it's best to photograph objects that don't move. - Once you have 3
unedited photographs, you also need to download a piece of software that
will compile the images into one HDR photo. Adobe Photoshop CS2 and above
can do this via the toolbar File | Automate | Merge to HDR. However, I
also recommend trying a program called Photomatix, that was specifically
created for making HDR images. Photomatix is not only cheaper than
Photoshop, but it also simplifies the process of HDR. You can download a trial version of Photomatix
that will be fully functional and never expires. However it does leave a
watermark on your final image.
To combine the 3 images into one HDR photo using Photomatix, click along the top toolbar on: HDR | Generate and follow program instructions from there. After generating a HDR photo, it is normal for it too look awful. The next step is to add some tone mapping to create a nicer image. Click on HDR | Tone Mapping, along the top toolbar and use the following settings to start with:
Luminosity 0
Strength 46
ColorSaturation 68
WhiteClip 0.25
BlackClip 0.00000
Smoothing High
Microcontrast High
360Image No
Then make adjustments from there, to your liking. Some photographers like a more cartoony or plastic look to their final images. Personally, I like a more natural look to them. Once done, click on File | Save As, and save it either as a tiff or jpg. - Creating the HDR photo is only the first step to editing the image. Many photographers find their image seems dull after creating the HDR picture. Next, you need to open it in your photo editing program, for example Photoshop, and apply some adjustments like curves, shadow / highlight and sharpening.
Do some sceneries or objects create better HDR images and photo's than others?
In my personal experience, yes. Sceneries that contain a lot of contrast and texture works best. For example, country landscapes, mountains, tree's, cloudy skies, grass, rocks and buildings made from stone. I've also found shiny objects like cars and motorcycles for example, create terrific HDR images. Sometimes it's a matter of try and see. Some objects definately work better than others.
Other hints and tips for making HDR photo's
- Shoot well focused photographs to begin with. The higher the quality of the original photographs, the nicer the HDR turns out.
- Use a camera aperture of f/8 or higher. Personally, I like an aperture of f/11 to ensure the whole landscape is in focus. I've found HDR doesn't look very nice on blurred images or any that contain Depth of Field.
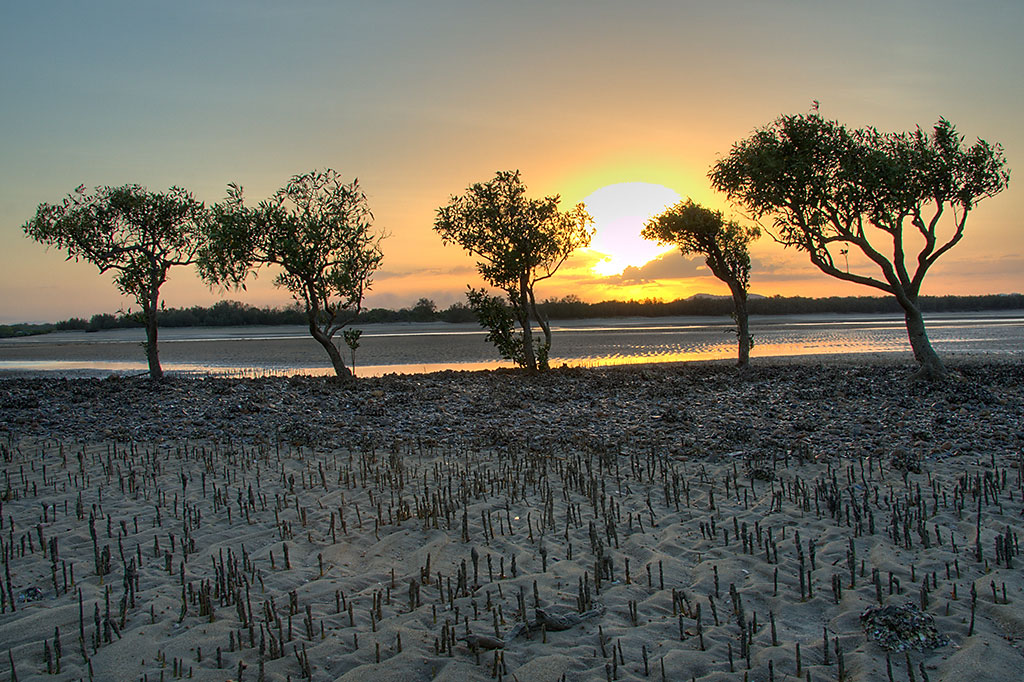
HDR Sunset Photograph
Click on the photo to view the larger HDR sunset
Digital SLR Camera: Canon EOS 400D / Rebel XTi
DSLR Lens: Canon EF-S
17-85mm f/4-5.6 IS USM
Exposure: 3 different exposures, due to the sunset HDR being composed from 3
separate images. They were then combined into one image using Photomatix
software.
Aperture: f/11
Focal Length: 22 mm
ISO Speed: 100
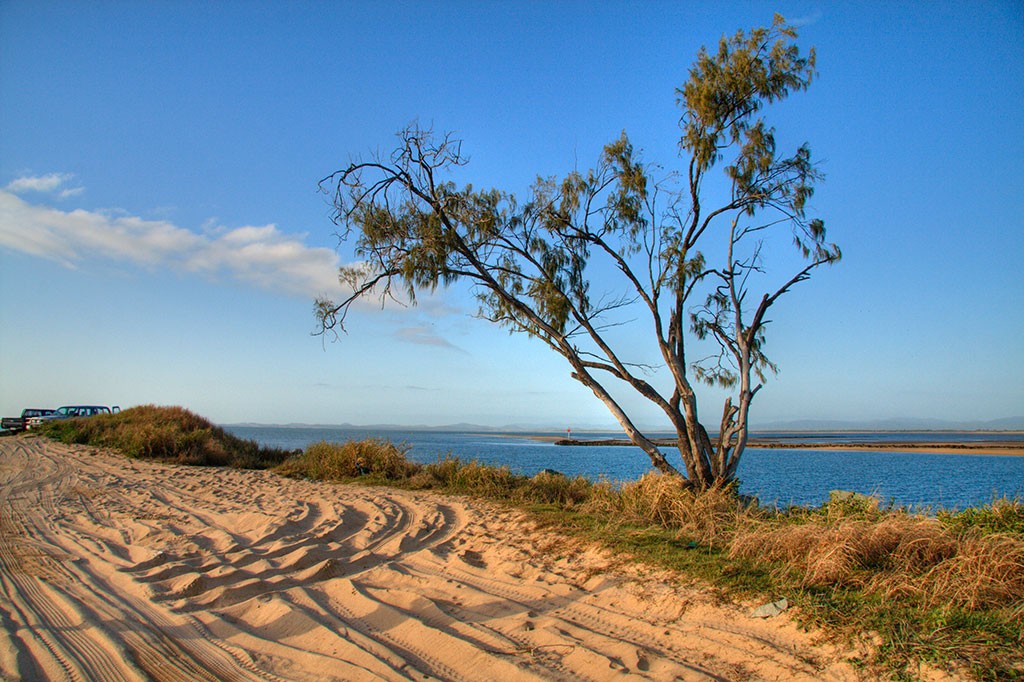
HDR Beach Photograph
Digital SLR Camera: Canon EOS 400D / Rebel XTi
DSLR Lens: Canon EF-S
17-85mm f/4-5.6 IS USM
Exposure: 3 different exposures, due to the beach HDR being composed from 3
separate images. They were then combined into one HDR image using Photomatix
software.
Aperture: f/11
Focal Length: 50 mm
ISO Speed: 100
Black and white photography
Funnily enough, in the age of digital SLRs and highly colored computer graphics, black and white photography seems to be re-emerging as a strong trend. Many new photographers presume that all they need to do is take the shot in black and white to start with, using the onboard monochrome camera setting. If only black and white photography was that easy. Like any style of photography, it takes practise. Otherwise, you could end up with a photo that seems flat and lifeless.
Black and white landscape photography
Black and white landscape photography starts before the shot is even taken. Listed below are some quick tips on what to look for to ensure the perfect black and white landscape.
- As with any landscape, foreground detail makes for a good composition. Compose the shot so there is something of interest in the foreground to help set the scene and lead the viewers eye all the way through the image.
- Light is one of the most important aspects of black and white landscapes. You need to ensure there are different area's of brightness. For example, look for well defined shadows, contrasted with bright highlights (yet not overexposed).
- Clouds are great, but make sure they aren't covering the sun. After all, sunlight is what makes the different area's of brightness mentioned above.
- Learn to see landscapes as a series of tones instead of colors. The more you practise black and white photography, the easier this will become. For example, it doesn't take long to learn that a cloudless blue sky will result in a boring one toned grey area. What is perfect for a colored photograph, can often have a negative impact on a black and white landscape.

Digital SLR Camera settings for black and white photography
- Many professional landscape photographers agree that it's best to shoot in RAW format. Then convert the image to monochrome with a RAW file editor, before tweaking in a graphics program like Photoshop. Very rarely, do you find a professional photographer who shoots the landscape with monochrome camera settings to start with.
- Underexposing your photographs by 1 or 2 stops will help avoid blowing out highlights.
What filters are good for black and white landscapes?
Using filters for black and white photography will help to separate colors that look similar once changed to monochrome. For example, the colors red and green look very similar in tone, once changed to black and white.
- Graduated filters are useful for keeping detail in the sky and clouds.
- Red filters will darken the sky, creating a moody atmosphere.
- Green colored filters are particularly useful for landscapes, as they create a contrast between different shades of green.
- Blue filters are effective for haze or misty conditions.
Urban black and white photography
Urban scenes are perfect for black and white photography. Try to choose area's that offer a good mix of texture, lighting and shadows.
Blurred water, slow motion photography effects
A popular flickr search is slow motion water images that look as though they are posters instead of digital photographs. A beginner photographer may also think the blurred water motion is a result of Photoshop effects. However as you'll soon discover, the slow motion blurring of the water is a result of digital SLR camera settings.
Digital SLR camera settings for slow motion water
The secret to blurring water in photographs, as though they are in a slow dreamy motion, is to firstly set your digital camera on shutter priority.
For a blurred water effect your camera needs a slow / long shutter speed. This means your camera will take a longer time than normal to shoot the actual photo.
If you find yourself near a running creek or waterfall with your camera hand held and no tripod available, then a shutter speed of 0.25 sec (1/4) is slow enough to blur the water, yet still fast enough to mininize possible camera shake. Remember, it's the water you want blurred and not the surrounding landscape.
Personally I find I can hand hold my camera for up to 2 seconds without seeing bad effects from camera shake. The photograph shown below of slow running water was taken with a shutter speed of 2 seconds. I was standing quite close to the water with a hand held camera.
If your standing further away from the running water, you can afford a faster
shutter speed resulting in the same blurred effects. Take this photo below for
example. Again the digital camera was hand held, however this time the shutter
speed was set at 0.25 sec (1/4).

Both photographs above were taken with a Canon 400D (Rebel XTi) Digital SLR Camera.
How to take sharp photographs images
Tips for getting really sharp photographs
When I first purchased my Canon SLR camera one thing that really annoyed me at first was that no photograph seemed to be as sharp as I knew they should be. The reasons for this of course was my digital camera skills and not the camera. Many factors including focus, camera shake, subject movement, aperture, ISO settings and lens quality help to determine how sharp your photo's will be.
Listed below are a few tips I've since learned for taking sharp photographs.
1. Focus correctly for sharp images. If you have your digital SLR camera set on
auto mode don't presume it will focus correctly. With Canon SLR camera's you
can press the shutter button half way in to focus. If you look through the eye
piece you can see what the camera is focusing on by the blinking red AF point
(red dot). I find if you release it and press it down half way again, it will
focus on a different part of the subject. I continue to do this until it's
focussing on what I want. Another idea is to set your camera to manual focus
mode (check manual).
2. Holding your camera steady helps take sharp photos. If you have a bad case of the shakes then I recommend buying a tripod to stop camera shake. Also keeping the camera close to your body or resting it on a fence or rock etc can help with blurred photographs due to camera shake.
3. Your cameras shutter speed will play a big part in how sharp your image is. The quicker your shutter speed the less likelihood of it being blurred due to camera shake or from the subject moving. Choosing a shutter speed faster than the focal length of the lens is effective if your holding the camera. For example, if your shooting with a focal length of 75 mm then make sure your shutter speed is 1/80th of a second or faster. If your focal length is 100mm then shoot with a shutter speed of 1/125 of a second or faster and so forth.
4. Aperture settings will determine how much of your photograph is sharp and how much is blurred. For example, setting your aperture to f/18 will ensure both near and far objects are in focus. Whereas setting it to f/4 will make the background objects out of focus and seem blurred.
5. Set your ISO as low as possible for sharp images. The higher your camera's ISO setting, the more noise in the photograph, the less sharp it is. Noise refers to parts of the photo that looks grainy. I recommend starting at ISO 200 and going down (or up) from there. If at 250 it looks fine then try 100. Or on the other hand if it's too dark, then go up to 400. On a perfectly sunny day outside you should be able to take photographs with an ISO of 100 with no problems at all.
6. Using a good lens with image stabalisation will increase the number of sharp photographs you take. A few months back I bought a Canon EF 90-300mm USM telephoto lens. At only $250 it was very cheap for a telephoto lens. However it doesn't come with an image stabilizer and I find it hard to take sharp images with it. Now looking back, I would have been better off paying the extra for a lens with image stabalizer.
7. This one might sound obvious but I'll include it anyway. Make sure your equipment is clean. By equipment I am referring to both the lens and the camera sensor. An earlier post talked about how to clean dust off your camera sensor. To keep a lens clean, it's just a matter of wiping it now and then with a digital camera cleaning cloth. I like using Spudz cleaning cloths myself that I picked up for only a few dollars


